SOTOX A™ MOBILE ANALY ZER | USER GUIDE
12 | EN
2. GET TING STARTED
2.9 On-screen keyboard
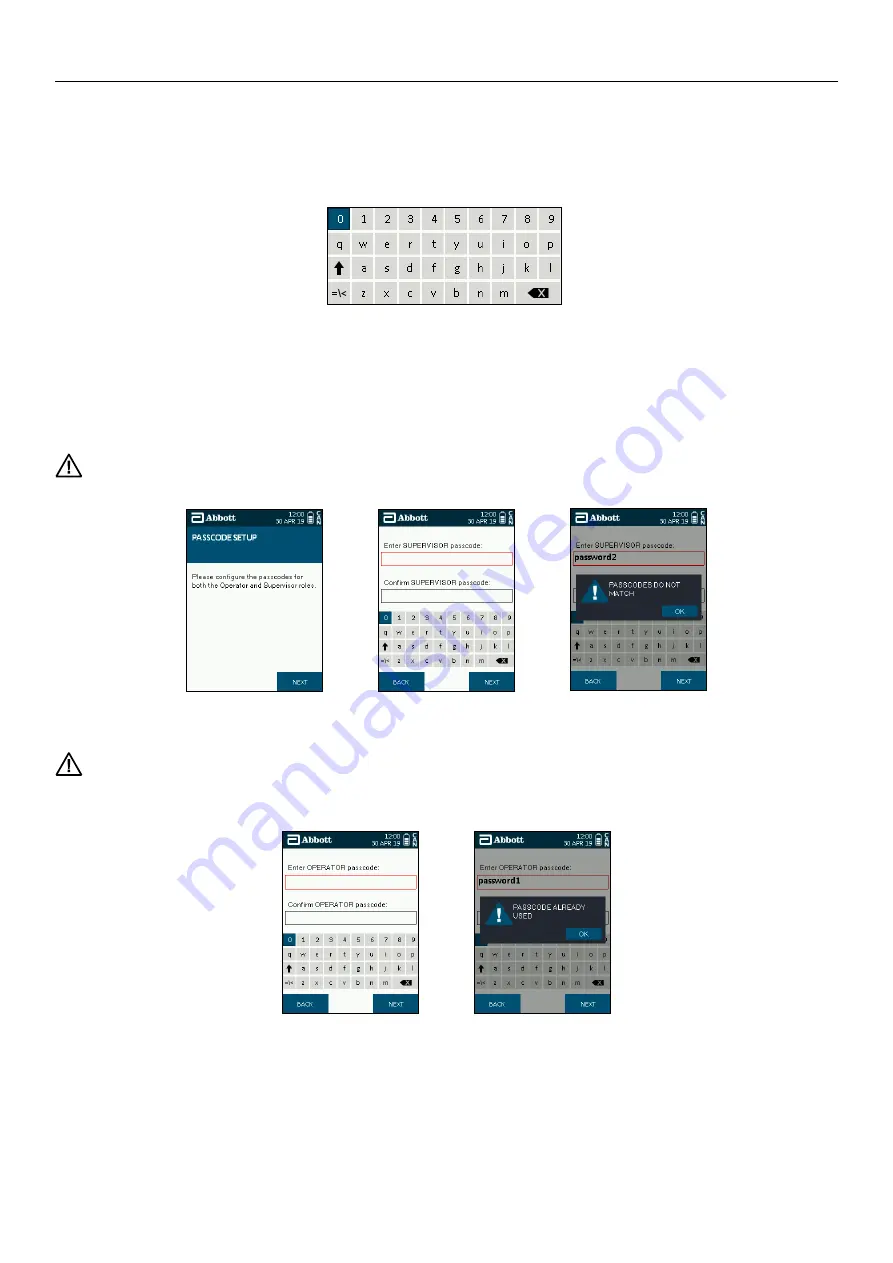
The on-screen keyboard allows the entry of a passcode and operator name/ID into the SoToxa™ Mobile Analyzer when prompted. The
keyboard is navigated by using the five way navigation keys. Press
to switch between upper and lower case. Press =\< to enable entry of
special characters.
2.10 Passcode setup
When the SoToxa™ Mobile Analyzer is turned on for the first time, it will request for passcodes to be setup for the Supervisor and Operator access
levels. The passcodes will need to be entered when prompted at Login and denote what functionality the user will have access to, see section 5 User
Access Levels
for more information. The passcodes should not include any personal information and is specific to the analyzer in use.
Step 1: Turn on the analyzer. The Abbott screen will be displayed followed by the Passcode Setup screen. Press the soft right button to proceed.
Step 2: Enter the passcode for the Supervisor using the five way navigation key and press Next. Confirm the passcode and press Next.
Please note the supervisor passcode must be a combination of numbers and letters, with a minimum length of six characters and
maximum of 20 characters. If the passcodes do not match or do not comply with these rules then the analyzer will prompt for the
passcode to be corrected accordingly, stating which rule has not been followed.
Step 3: Enter the passcode for the operator using the five way navigation key and press Next. Confirm the passcode and press Next.
Please note the operator passcode must be a combination of numbers and letters, with a minimum length of six characters and
maximum of 20 characters. If the passcodes do not match or do not comply with these rules or it is the same as the supervisor
passcode then the analyzer will prompt for the passcode to be corrected accordingly, stating what rule has not been followed.
Once both passcodes have been setup the analyzer will return to the main login screen.
Step 1
Step 2
Step 2
Step 3
Step 3


