background image

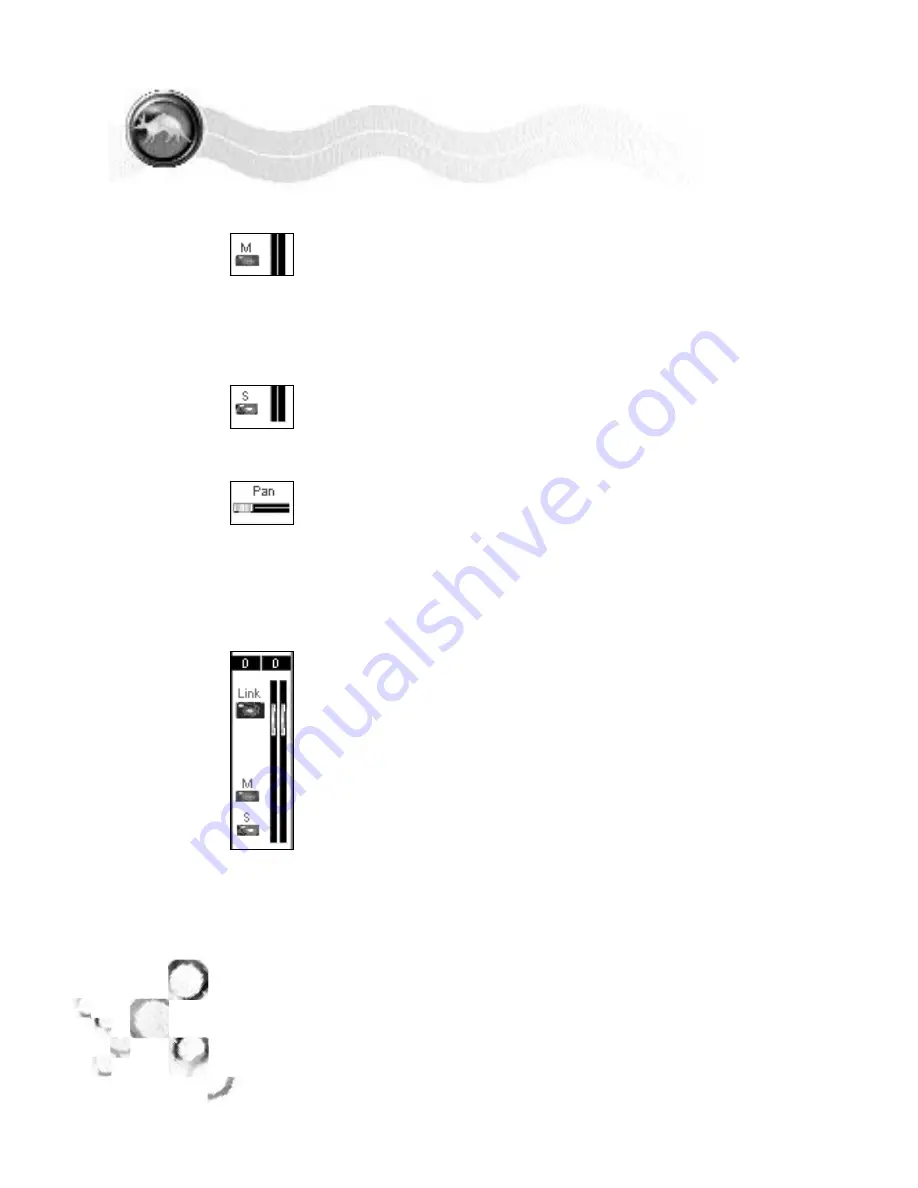
Mute

The Mute button allows you to remove an incoming signal
from the monitor mix. You should be aware that Mute does
not actually mute the input, and the signal can still be
recorded. Mute simply removes the incoming signals from
the monitor. This is helpful if you want to record Microphones
or other instruments that could potentially feed back. 

Solo

Solo will make the selected channel the only audible channel
in the monitor mix, all other inputs, and playback from audio
software, will be muted. 

Pan

At the bottom of each input is a Pan control. Pan does not
affect how an incoming signal is recorded, it only affects the
way it is heard in your monitor mix. An example of why Pan
is helpful: if you are monitoring with headphones, and
recording a guitar with channel 1, it is easiest to hear the
guitar in both sides of the headphones, even though you are
recording a mono track.

S/PDIF input controls

This channel strip allows you to adjust the signals entering
the S/PDIF input on the back of the Q10.

On the top of the strip is a LOCK light. This will light if our
S/PDIF input is receiving valid S/PDIF.

Directly beneath are the S/PDIF input meters, which measure
the dB level of the incoming S/PDIF signal.

You may notice that the “Link” light for S/PDIF is always lit.
This is because S/PDIF is a stereo format.

Q10

SOFTWARE

Q10 CONTROL PANEL

INPUT CONTROLS

PAGE

2 6

2 6

DIRECT PRO Q10

O W N E R S   M A N U A L

Summary of Contents for Direct Pro Q10

Page 1: ...Aardvark USA 202 East Washington Suite 306 Ann Arbor Michigan 48104 Web http www aardvark pro com E mail info aardvark pro com Voice 734 665 8899 Fax 734 665 0694 ...

Page 2: ...MANUAL REVISION 1 5 ...

Page 3: ......

Page 4: ...PECIFIC INPUTS 13 PHANTOM POWER BUTTON 14 E F R HI Z GUITAR BUTTONS 14 MONITOR VOLUME KNOB 15 HEADPHONE VOLUME KNOB 15 HEADPHONE JACK 15 REAR PANEL ANALOG OUTPUTS 16 MONITOR OUTPUTS 16 S PDIF DIGITAL INPUTS OUTPUTS 17 MIDI INPUTS OUTPUTS 18 HOST ATTACHMENT AND PCI HOST CARD 19 INSERTS 20 Q10 SOFTWARE CONTROL CONTROL PANEL 23 INPUT CONTROLS 24 PLAYBACK CONTROLS 27 ROUTING 29 PRESETS 30 ADVANCED 31 ...

Page 5: ......

Page 6: ...cle of the Direct Pro Series and brings a fresh new approach to computer recording Its unique 8 XLR mic inputs and mixer like monitoring features allow you to professionally record 10 channels direct to disk without needing a mixer Even if you don t need all 8 mic preamps at once the flexible XLR 1 4 connectors can be cleverly used as 1 4 line inputs This allows studios with analog mixers to easil...

Page 7: ...with the limits for a class A digital device pursuant to part 15 of the FCC rules These limits are designed to provide a reasonable protection against harmful interference when the equipment is operated in a commercial environment This equipment generates uses and can radiate radio frequency and if not installed and used in accordance with the instruction manual may cause harmful interference to r...

Page 8: ...from the small outer cover to lock the Direct Pro Q10 Host Card in place while providing maximum grounding 7 Replace the computer s cover 8 Connect one end of the 6 ft shielded cable to the 25 pin connector on the Direct Pro Q10 Host Card and the other end on the back of the Direct Pro Q10 interface box labelledTo Host Tighten the screws to assure a firm connection and maximum grounding for the Di...

Page 9: ...lder then double click SetupXP2K EXE this file may appear without EXE at the end but it s still the correct file If a Window appears asking what you would like to do with the contents of the CD choose Open Folder to View files Enter the XP 2K folder then double click SetupXP2K EXE this file may appear without EXE at the end but it s still the correct file If Windows does not respond when the CD is...

Page 10: ...the files will be installed Click NEXT to proceed 7 A warning message may appear regarding Windows logo testing Don t let Microsoft scare you Click CONTINUE ANYWAY to proceed If a second warning appears simply click CONTINUE ANYWAY again 8 Finally the installer will ask you to reboot the computer Click FINISH to reboot Once you have rebooted the Aardvark drivers and control panel will be installed...

Page 11: ...the CD then double click Q10_install pkg to start the installer 4 The installer will begin with the Welcome to the Aardvark CoreAudio Installer screen Click CONTINUE 5 Next a Read Me section will appear with information regarding the driver you re about to install Click CONTINUE 6 You will then be asked to select the destination of the software you re about to install Choose your main hard drive a...

Page 12: ...lation is done Click CONTINUE INSTALLATION to proceed 10 The computer will then restart When the restart is complete the Q10 drivers and control panel will be installed 11 To access the Q10 control panel browse the main hard drive choose the Applications folder then the Aardvark Control Panels Sub folder A file named Q10 is located in this folder Double click it to access the Q10 control panel 12 ...

Page 13: ...alog should appear 3 Click Next Windows may now ask for the location of the drivers If this is the case specify the CD ROM drive usually D Otherwise simply click Next again Windows will copy the files from the Direct Pro Q10 CD ROM 4 When the files have been copied Windows will ask to restart the computer This is because the files just installed will not take effect until the next time Windows is ...

Page 14: ...e files in another directory 8 Click the Next button to continue The Ready to Install Dialog should now appear Click Next again to begin installation 9 When the installation is complete a new folder for the Direct Pro Q10 Control Panel application will reside in the destination directory and a shortcut will automatically appear on the desktop for easy access 10 You must now turn your computer off ...

Page 15: ...lace a check mark beside CD ROM drive by clicking on it All other boxes must be cleared Click Next 4 Windows will now locate the Direct Pro Q10 driver software Click Next to begin installation Windows will copy the files from the Direct Pro Q10 driver CD ROM 5 When the installation is complete you must press Finish to exit the setup Windows will ask to restart the computer This is because the file...

Page 16: ...to put the files in another directory 9 Click the Next button to continue The Ready to Install Dialog should now appear Click Next again to begin installation 10 When the installation is complete a new folder for the Direct Pro Q10 Control Panel application will reside in the destination directory and a shortcut will automatically appear on the desktop for easy access 11 You must now turn your com...

Page 17: ...ontrol panel allows you to configure each input to accommodate balanced or unbalanced allowing use of balanced and unbalanced gear at the same time The XLR inputs are designed specifically for use with microphones Some line level devices such as mixers or synthesizers have XLR outputs The Q10 XLR inputs are not intended for use with these devices and potential damage can occur The XLR inputs will ...

Page 18: ... later in the manual Inputs 7 and 8 can be used for direct guitar recording By pressing in either one of the Hi Z guitar buttons you enable input 7 and or 8 as a direct guitar input This allows you to connect a guitar bass or other Hi Z sound source without the need for a DI direct box or preamp Armed with Aardvarks exclusive E F R technology these inputs yield a vibrant natural sound quality If y...

Page 19: ...s you to plug a guitar directly into these inputs Inputs 7 and 8 can be used for direct guitar recording by pressing the guitar buttons the two buttons on the right with the little guitar drawings next to them There are separate buttons for inputs 7 and 8 No preamps DI boxes or pedals needed Just plug the guitar right into the Q10 This is done using Aardvark s exclusive E F R Enhanced Frequency Re...

Page 20: ...e front of the Q10 Headphone Volume Knob This controls the volume of the headphone jack Headphone Jack This is where to plug in your headphones We recommend using headphones with an impedance of 160 Ohms or less The headphone jack also comes in handy if the only speakers you have are PC speakers with one 1 8 connection Simply connect a stereo 1 8 to 1 4 adapter and plug the speakers into the headp...

Page 21: ...o has a monitor output pair on the back of the interface box Although the monitor outputs can be used in many ways Monitor L and Monitor R are commonly used to listen to the full mix of your project In the control panel these should be set to Monitor L and Monitor R This way you can use these as the main outputs that allow you to monitor incoming signals as well as previously recorded tracks The v...

Page 22: ...ces To activate the S PDIF input for recording go to the Q10 control panel and select ADVANCED then select the General tab In the lower left you will have the option to select the Channels 9 10 recording source Select S PDIF Once this is selected you can record S PDIF by choosing Q10 input 9 10 in your audio recording software If you are recording with the S PDIF input you must have the Source Sel...

Page 23: ...of multiple digital devices so they all share the same sample rate Because word clock deals with synchronization a common misconception is that word clock is used to synchronize the transports of devices so when one plays or rewinds the other device s follow Word clock is not used to sync the transports of devices nor is it used to send or receive audio It is used to synchronize the sample rates o...

Page 24: ...e only the included cable to connect the host card to the Q10 unit or you may damage your Q10 interface host card or computer NOTE The extra shielding on the PCI card is to protect the card and keep out harmful computer interference Q10 REAR PANEL HOST ATTACHMENT PCI HOST CARD PAGE 1 1 9 9 DIRECT PRO Q10 O W N E R S M A N U A L ...

Page 25: ...10 inserts First you need to have an external effects device that you want to apply to an incoming signal Also you ll need to use a Y cable with a 1 4 TRS Tip Ring Sleeve connection on one end that splits into two 1 4 mono connections NOTE If you are having trouble telling the difference between a TRS jack and a mono jack a 1 4 TRS plug has two black lines and a 1 4 mono plug has only one black li...

Page 26: ...PAGE 2 1 2 1 Q10 CONNECTION DIAGRAM DIRECT PRO Q10 O W N E R S M A N U A L ...

Page 27: ...PAGE 2 2 2 2 Q10 CONNECTION NOTES DIRECT PRO Q10 O W N E R S M A N U A L ...

Page 28: ...st click it with the mouse then use the arrow keys on your keyboard to fine tune it You will find this control panel works just like any analog mixer used for mixing and monitoring but it also has many cool features that make it easier to use and more powerful Mac users will notice an additional SKINS menu when running the Q10 control panel This allows you to change the look of your Q10 panel by a...

Page 29: ...ery responsive M2 should rarely be necessary The M1 button provides the second highest level of gain 32 to 55 dB This is used for most microphone applications or for quieter line level devices that require a bit more gain The L button provides the lowest amount of gain and can reduce the volume of the incoming signal as well It provides up to 15 dB of gain to 8 dB volume reduction The Trim Knob lo...

Page 30: ...ter is a numeric display that measures the incoming signal in dB NOTE To get the best recording quality record your incoming signals as loud as you can with out letting them go into the upper red portion of the meters Link The Link button is used to link the controls of channel 1 to channel 2 channel 3 to channel 4 channel 5 to channel 6 and channel 7 to channel 8 This button is used for recording...

Page 31: ...it only affects the way it is heard in your monitor mix An example of why Pan is helpful if you are monitoring with headphones and recording a guitar with channel 1 it is easiest to hear the guitar in both sides of the headphones even though you are recording a mono track S PDIF input controls This channel strip allows you to adjust the signals entering the S PDIF input on the back of the Q10 On t...

Page 32: ...k of the Q10 These faders are used to boost and cut playback in the monitor mix You will hear the adjustments of these faders in your headphones the Monitor L R outputs as well as any other output that has been assigned the monitor bus in the Routing section Mute M Solo S Mute silences a channel in the monitor mix while solo will solo an output channel and will mute all other channels both input a...

Page 33: ...his knob allows you to control the brightness of the appealing Aardvark logo on the front of the Q10 Turn it up high to show off your Q10 or dim it down to make the Q10 less noticeable in darker studios Source Select This lets you select what sample rate you want to use the Q10 at You can select internal sample rates of 32kHz 44 1kHz 48kHz 88 2 kHz and 96 kHz Additional options allow you to slave ...

Page 34: ...selected the output will generate a 1khz test tone allowing you to verify your hardware is working IMPORTANT This tone is rather loud To avoid a nasty surprise Turn down your speaker volume before assigning tone to an output If Silence is selected nothing but digital silence will come out of the output This is useful for system calibration and other diagnostics NOTE Most users will have output L R...

Page 35: ...It s like taking a screenshot of all your settings so you can save and recall them at a later time When you open a Presets menu either for the entire control panel or for a specific effect you have the option to load a saved configuration or save your current settings To save a preset type a new name in the text box in the upper right click add then close the window To recall a preset double click...

Page 36: ...different sample rate than what is set in the SOURCE SELECT of the Q10 Control Panel or if you are trying to record S PDIF with out changing SOURCE SELECT to S PDIF Channels 9 10 Recording Source In your multitrack software inputs 9 10 are among the available Q10 recording devices Here you can choose what inputs 9 10 actually record If S PDIF is selected software inputs 9 10 will record the S PDIF...

Page 37: ...e by a software application Some low latency programs especially software synthesizers will report a device In use simply by having the program open even if it is not playing audio If a device says IDLE it simply means that a program is not using that device It does not mean that inputs or playback are having problems OUTPUT LEVELS TAB This lets you select between 10dBV unbalanced or 4dBu balanced...

Page 38: ...uter ASIOTurbo Mode works on almost all computers and software but occasionally it will not Simply give it a try if it works great If not don t use it NOTE If ASIO Turbo Mode is enabled the second to lowest ASIO buffer size is the fastest ASIO configuration Provides the option for selecting a master Aardvark Aark card This is for when multiple Aardvark cards are on the same computer It is also pos...

Page 39: ...io Studio 7 Deluxe The first time you open the program you will be prompted to create a new project Do this and choose your preferred sample rate and track count If the Q10 is properly installed Magix should automatically see it as an available device without the need for additional configuration Clicking the number for any given track will bring up a window labeled Track Info followed by the name...

Page 40: ...ropdown menu choose Aardvark as your ASIO driver Please note If Aardvark is not listed as an available driver you probably need to copy the Aardvark ASIO driver to Digital Performer s ASIO DRIVERS folder Sample rate can be set to any supported rate you plan to work with Keep Clock Source set to Internal and do not enable the Override internal buffer size option EMAGIC LOGIC AUDIO mac only Go to AU...

Page 41: ... Monitoring All other settings here are a matter of preference and in most cases you ll want to stick with the program defaults Click OK Go to DEVICES VST INPUTS and make sure all Aardvark inputs are enabled Mac Users Please note If Aardvark is not listed as an available driver you probably need to copy the Aardvark ASIO driver to Cubase Nuendo s ASIO DRIVERS folder STEINBERG WAVELAB Mac PC Go to ...

Page 42: ...d On the ADVANCED tab Data and Picture Directory can be set to whatever you prefer as long as they are not the same directory Checkmarks SHOULD be in the following boxes Copy and Manage imported files Simultaneous record playback Stop on Driver Underrun WavePipe Acceleration if this option is grayed out then it is already running Unpack 16 Bit audio Left Justify Unpacked Data Checkmarks SHOULD NOT...

Page 43: ...er to Channels 9 10 of the Q10 Sample Rate bit depth and other settings on this tab can be set to whatever you prefer On the ADVANCED tab Do not put checkmarks in ENABLE READ CACHING or ENABLE WRITE CACHING Set I O BUFFER SIZE to 128 Driver mode should still say ASIO All other settings can be set to what you prefer On the DRIVERS tab This allows you to select which Aardvark inputs outputs are seen...

Page 44: ...ut This is normal there is no need to change these settings On the ADVANCED tab Do not put checkmarks in ENABLE READ CACHING or ENABLE WRITE CACHING Set I O BUFFER SIZE to 128 Driver mode should still say ASIO All other settings can be set to what you prefer On the INPUT MONITORING tab If you would like to apply Direct X effects on incoming signals highlight the input channels listed here If you d...

Page 45: ...fer sizes to 48 On the GENERAL tab Playback and Record Timing Master should be depending on what product you own 9 10 Direct Pro Q10 9 10 Aark 24 5 6 Direct Pro LX6 or 5 6 Direct Pro 24 96 Aux Bus Virtual Mains Sampling rate Audio Driver and File bit Depth can be whatever you prefer Under Mixing latency Buffers in playback Queue can be 2 or 4 the best setting depends on your specific setup Lower t...

Page 46: ...ils after stopping can be whatever you prefer On the INPUT MONITORING tab No Aardvark device should be highlighted since we already have zero latency hardware monitoring of inputs On the DRIVERS tab Make sure all your Aardvark Devices are highlighted SONIC FOUNDRY VEGAS ACID PC Only Go to OPTIONS PREFERENCES and select the AUDIO tab Under AUDIO DEVICE select WINDOWS CLASSIC WAVE DRIVER Or ASIO AAR...

Page 47: ...layback Devices window highlight these devices and click USE to send them to the Multitrack Deivce Preference Order box on the right If there s a particular input output you want to use in CEPs edit view highlight this device and click Use in EV PROPELLERHEAD REASON Mac PC Go to EDIT PREFERENCES and on the PAGE menu select AUDIO Go to the AUDIO CARD Menu PC users should select the Aardvark ASIO dr...

Page 48: ...l not be able to use these outputs On the Sampler Tab the buffer is set to 1 meg The optimal buffer size depends a great deal on the computer you are using though NATIVE INSTRUMENTS REAKTOR B4 PRO52 ETC For best performance be sure that these programs are configured to use ASIO For ultra low latency performance you should also try the ASIO Turbo Mode found in the Advanced Tab of the Q10 Control Pa...

Page 49: ...lace the soundcard that came with my computer ANSWER The Q10 functions differently that a consumer soundcard such as SoundBlaster If your computer is used strictly for high resolution pro audio the Q10 will be the only soundcard necessary If you plan on using the computer for games and other applications with low resolution audio you ll want an additional consumer soundcard QUESTION How many track...

Page 50: ...NSWER Each card has its own control panel When multiple Q10s or other Aardvark cards are on the same system a card select menu will be available in your control panel software to select which control panel you want to configure QUESTION Can I potentially damage non powered microphones by using the phantom power ANSWER Your microphones will not be damaged Phantom power is designed to go to only mic...

Page 51: ...g it takes for audio software to respond to commands such as volume changes and transport controls In ASIO programs such as Cubase it can get as low as 4ms Non ASIO programs may experience anywhere from 50 to 300ms latency SoftSynth Latency This refers to the time it takes for a software synthesizer to respond to an incoming MIDI command such as pressing the key on a controller keyboard Most Softw...

Page 52: ...eed to test all eight inputs at the same time PROBLEM The Q10 is not coming through your Computer Speakers SOLUTION In order to hear the Q10 you need to have speakers or headphones plugged into output s on the Q10 breakout box If your speaker are plugged into something other than the Q10 you won t be able to hear it due to them being plugged into something other than the Q10 Note if the only avail...

Page 53: ...input to the Q10 S PDIF output to create a loop In the Q10 control panel SOURCE SELECT can be set to anything that begins with INT Go to ROUTING and assign TONE to output 7 S PDIF L and output 8 S PDIF R Click OK to exit ROUTING If S PDIF is working properly the input meters should register around 12 dB PROBLEM I can t hear audio CDs through the Q10 SOLUTION If you are a mac user you will be unabl...

Page 54: ... system bottleneck preventing the drive from running at the speed it is capable of There are several programs on the market capable of testing hard disk speed One of our favorites is called Fresh Diagnose and can be found at http www freshdevices com freshdiag html This program will benchmark your drive revealing what speed the drive is actually performing at A drive should read and write at a min...

Page 55: ...d you have MONITOR L R assigned to the output you are listening through PROBLEM The Q10 display does not look right SOLUTION You may need to increase the screen size your monitor accepts and the color scheme it uses Go to the Windows control panel and select DISPLAY Then select the SETTINGS tab Your SCREEN AREA should be set to 800 x 600 pixels or larger Colors should be set to High Color 16bit or...

Page 56: ...ave instructed your recording software to use inputs 9 10 In addition you must go to the ADVANCED menu of the Q10 control panel and verify that the Channels 9 10 recording source is set to S PDIF Finally you should make sure that the Q10 Source Select is set to S PDIF PROBLEM The Q10 sync selection keeps switching to 32kHz SOLUTION This is usually due to Windows attempting to play a 32 kHz system ...

Page 57: ...the left and one for the right A mono track can still be present in the left and right speakers however If you choose the proper SOURCE for your track you ll be able to pan it anywhere in the stereo image To record Input 1 to a track choose Left 1 2 Direct Pro Q10 as the SOURCE To record Input 2 to a track choose Right 1 2 Direct Pro Q10 as the SOURCE To record Input 3 to a track choose Left 3 4 D...

Page 58: ...ontrol panel and mute the input you re trying to record Once muted you will still be able to hear record the input but the echo will no longer be present PROBLEM A message appears in Sonar claiming the Q10 does not support 24 bit audio SOLUTION If you are on 2 2 or newer Go to the Q10 control panel select ADVANCED then the ASIO and DIRECT X tab Make sure the ASIO SAMPLE SIZE is set to 24 bit If yo...

Page 59: ... Input 3 to a track choose Left ASIO Aardvark Cards Driver 3 3 Direct Pro Q10 as the track input To record Input 4 to a track choose Right ASIO Aardvark Cards Driver 3 3 Direct Pro Q10 as the track input To record Input 5 to a track choose Left ASIO Aardvark Cards Driver 5 5 Direct Pro Q10 as the track input To record Input 6 to a track choose Right ASIO Aardvark Cards Driver 5 5 Direct Pro Q10 as...

Page 60: ...ismatch can make audio play at the incorrect speed and pitch PROBLEM The program does not see every Q10 input SOLUTION Go to DEVICES VST INPUTS and make sure all Q10 inputs are enabled WAVELAB PROBLEM Wavelab does not allow 24 bit recording SOLUTION Wavelab supports two 24 bit formats 24 bit and 24 bit alt To use 24 bit with the Q10 you need to choose 24 bit alt REASON REAKTOR AMD SIMILAR SOFT SYN...

Page 61: ... computer resources and may conflict with Pro Audio software To remove programs from startup go to START RUN In the OPEN dialog type MSCONFIG and click OK This will take you to the system configuration utility Go to the STARTUP tab and remove checkmarks from all entries However if you are on Windows 98 ME keep the checkmark in Scan Registry Removing checkmarks from these entries will not remove th...

Page 62: ...any device you don t use while working with audio Although the Q10 is quite good at coexisting with other devices disabling Network Adapters Modems Consumer Soundcards etc will help free up resources for audio and reduce the chances of unwanted interruptions In Windows XP reduce video priorities Windows XP is a graphics heavy OS but these graphics use resources that are better off allocated to Aud...

Page 63: ...urning the BRIGHTNESS knob take a look at the Aardvark light on each Q10 breakout box The light on Q10 1 will brighten dim in as you turn the knob Once you have confirmed which Q10 is 1 2 etc here s how to set them up for simultaneous use IF YOU HAVE 2 Q10s There are several ways to go about this but the following is the most common In this setup you should have your monitors headphones connected ...

Page 64: ... HAVE 4 Q10s Q10 1 BOX connect the S PDIF out to the S PDIF in of Q10 2 and connect the Word Clock In to the Word clock out of Q10 2 In the panel for Q10 1 set source select to WC Q10 2 BOX it should already have two cables connected to box one In addition connect the S PDIF out to the S PDIF in of BOX 3 In the panel for Q10 2 set source select to whatever sample rate you intend to record with Q10...

Reviews: