1
3
12
2
4
10
Inside
20
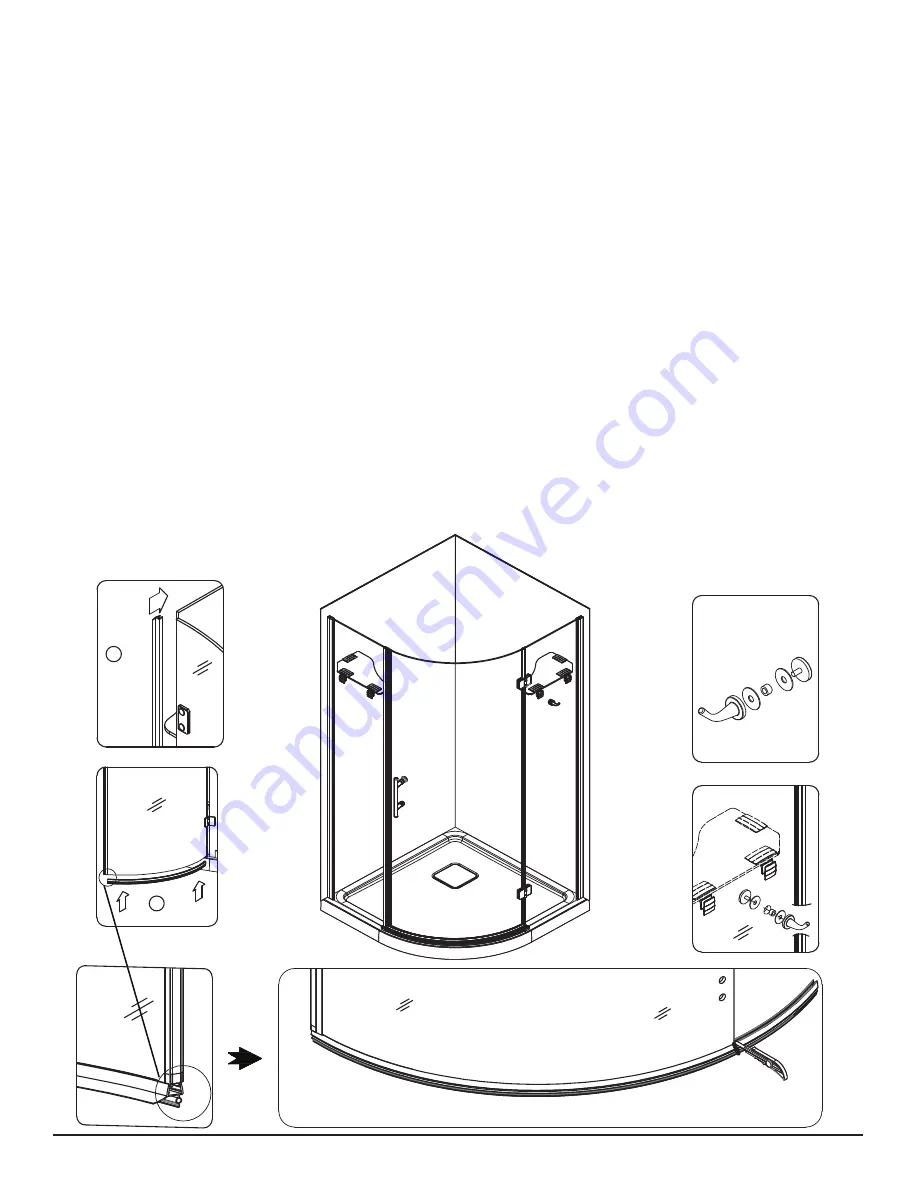
Install
the vertical seal strip (item 12)
and the horizontal bottom seal (item
10) on the door as illustrated in the
diagrams below. Make sure the
bottom seal (item 10) is installed with
the lip facing the inside of the shower
as can be seen below. Then, cut the
bottom seal as neeed to fit while
ensuring that the whole gap between
the door and base is tightly sealed.
Next, install the hook (item 20) as
illustrated on the right fixed panel
(item 18).
Instale la tira de sellado vertical
(artículo 12) y el sello inferior
horizontal (artículo 10) en la puerta
como se ilustra en los diagramas a
continuación. Asegúrese de que el
sello inferior (elemento 10) esté
instalado con el borde hacia el
interior de la ducha, como se puede
ver a continuación. Luego, corte el
sello inferior según sea necesario
para que encaje mientras se asegura
de que todo el espacio entre la
puerta y la base esté bien sellado.
A continuación, instale el gancho
(artículo 20) como se ilustra en el
panel fijo derecho (artículo 18).
Installez la bande d'étanchéité
verticale (élément 12) et le joint
inférieur horizontal (élément 10)
sur la porte comme illustré dans les
schémas ci-dessous. Assurez-vous
que le joint inférieur (item 10) est
installé avec la lèvre tournée vers
l'intérieur de la douche comme on
peut le voir ci-dessous. Ensuite,
coupez le joint inférieur au besoin
tout en vous assurant que tout
l'espace entre la porte et la base est
bien scellé.
Ensuite, installez le crochet
(élément 20) comme illustré sur le
panneau fixe droit (élément 18).
Summary of Contents for Risco-38 NEO SK-PNR-38-KIT-M
Page 4: ...04 25 26 ...


