6. Referring to the “Using Push-In Fittings” section, insert the blue
tubing into the faucet adapter fitting,
making sure the end of
tubing is firmly seated.
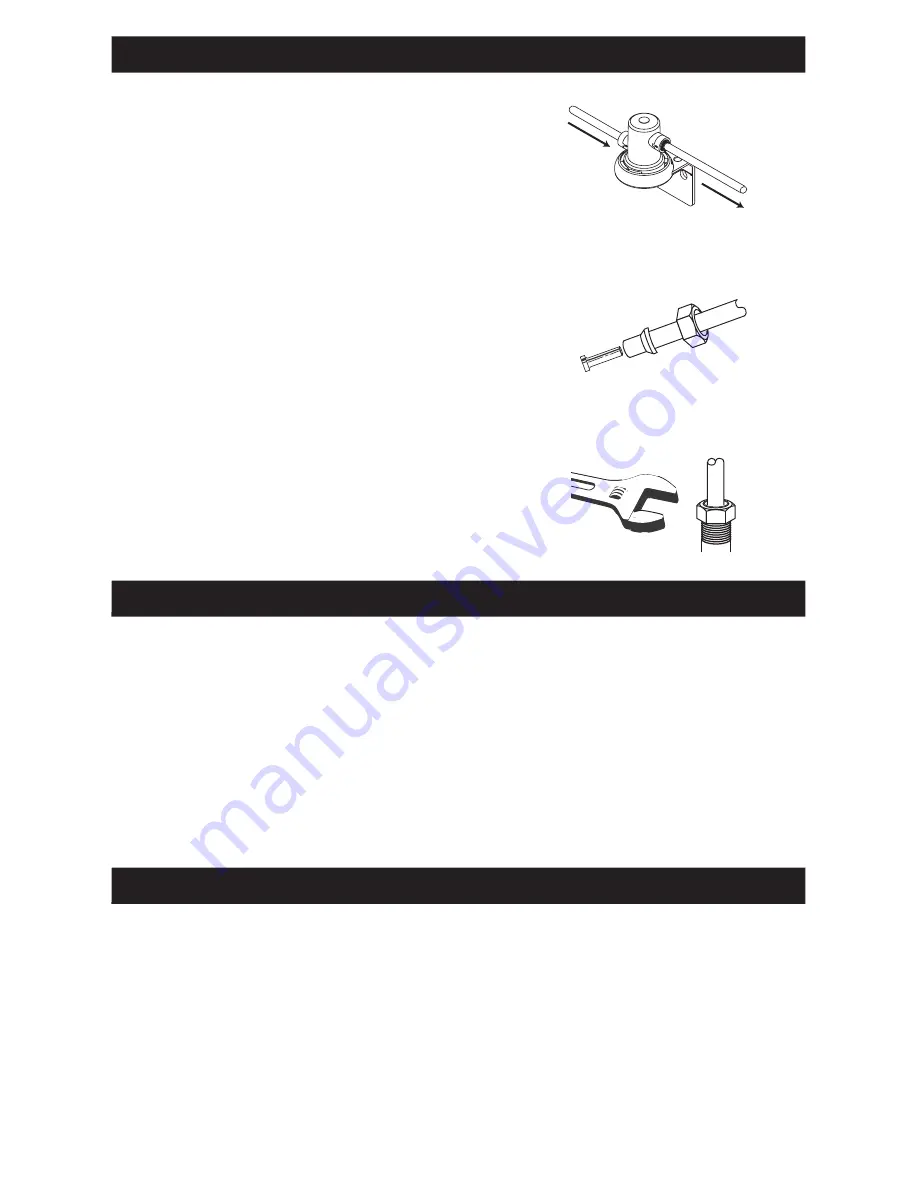
Hold the filter head assembly away from the wall, press other
end of tubing into outlet side as indicated by arrow on filter head
assembly. (see Figure 4A)
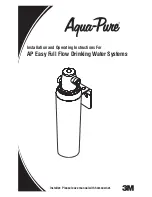
7. Take the remaining tubing, slip the compression hex nut and 3/8”
ferrule onto the tubing (position the tapered end of the ferrule
away from the hex nut) and put in the tube insert (See Figure 5).
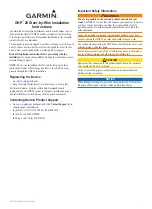
Fasten this assembly tightly onto 3/8” cold water supply outlet
(See Figure 6). Pull on tube to make sure a good connection has
been made. Connect other end to the inlet side of the filter head
assembly as indicated by arrow (see Figure 4B).
8. Place filter head assembly holes over mounting screws and press
down to lock into place. Tighten the screws for a secure fit.
9. Insert filter in filter head assembly. Turn filter one quarter turn to
the right until it stops. When fully engaged, the top surface of the
filter will be flush with the bottom of the filter head assembly. The
color label will face forward.
10. Turn on water and open faucet to flush air from the system.
Flush 10 gallons through system before use (approximately
5 to 7.5 minutes).
Close sink faucet. The system is now ready for use.
Note: White tube from head is pressure relief outlet.
Inlet
Outlet to
Equipment
B
A
Figure 4
INSTALLATION INSTRUCTIONS (CONTINUED)
FILTER CARTRIDGE REPLACEMENT INSTRUCTIONS
1
. Place pan under filter to collect any residual water during cartridge change-out.
2. Grasp cartridge and turn to the left (counterclockwise) until cartridge comes to a complete stop (water automatically
turns off). Gently pull cartridge downward to remove.
3. Remove RED sanitary protective cap from new cartridge.
4.
Ensure that o-rings are present on the cartridge and are seated into grooves; moisten o-rings with water. DO NOT
use any petroleum products to lubricate the o-rings.
5. Align tabs of new filter cartridge with existing filter head and insert new filter cartridge into head. Turn cartridge to the
right (clockwise) until cartridge stops.
6.
Flush 10 gallons through system before use (approximately 5 to 7.5 minutes).
TROUBLESHOOTING GUIDE
Figure 5
Figure 6
Water Leaks at Push-In Connections:
Push tubing in as far as it will go. If leaking continues, shut off water at the original valve and remove water line by
pushing in on the connector collar while pulling the tubing away. Inspect tubing for cracks and scratches. If tubing is
cracked or scratched, simply cut that portion away and reinsert tubing into push-in fitting.
Make sure tubing is cut straight. If not, recut.
If water leaks, please verify that the o-ring is properly seated in its groove.
Water Does Not Flow From The Drinking Water System Faucet:
Check to see if the main water line valve is open, allowing water to flow to the filter.
Water Appears Cloudy or Air Comes Out of the Drinking Water System Faucet:
Flush 10 gallons through system before use (approximately 5 to 7.5 minutes) to remove any carbon fines or trapped air
in the filter and water lines.


