


29
3D Systems, Inc.
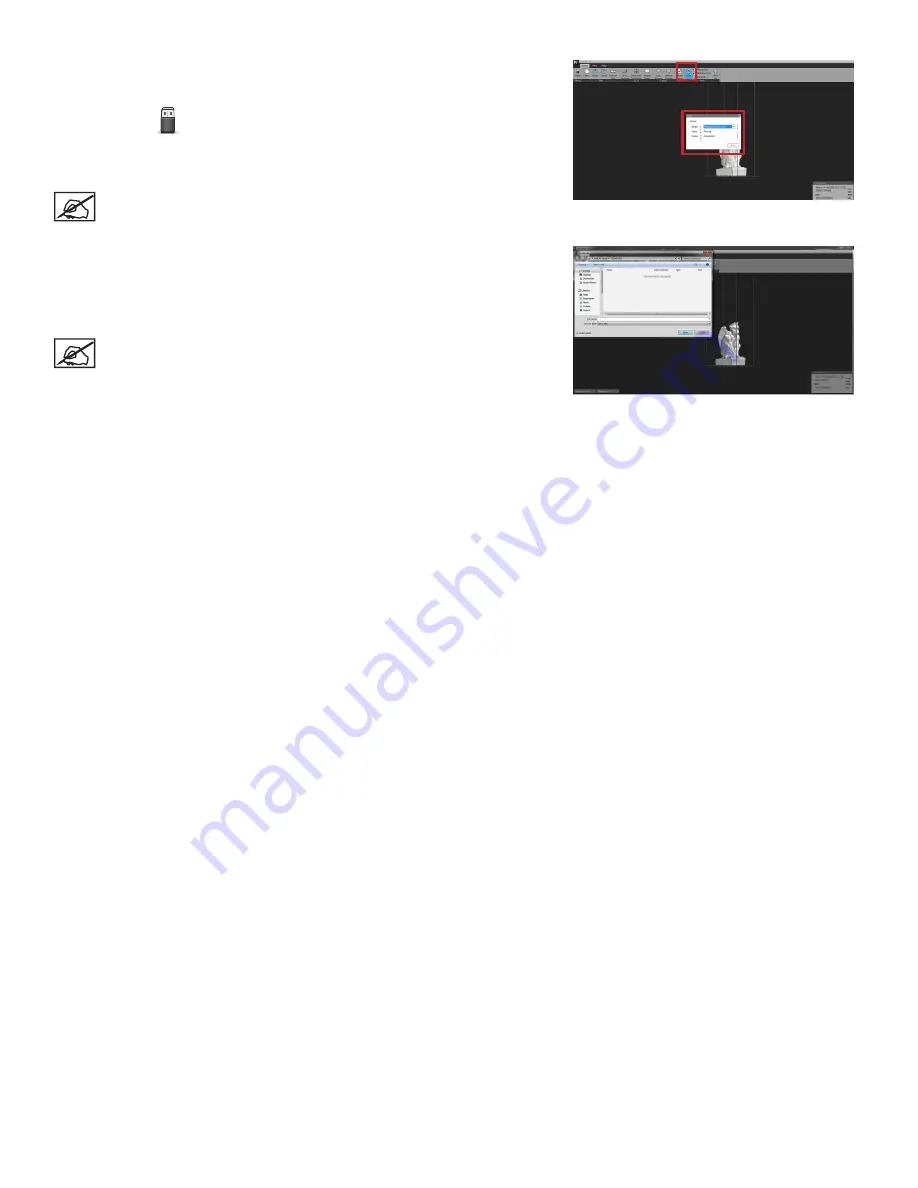
Sending the Job to Print
If all steps are taken and the file is set up as desired, it is ready to send to the
printer .
1 . Click
on the
Home
tab .
2 . Select
Printer
from the drop-down menu .
3 . Select
.
NOTE: If you want to rebuild a print that was sent directly to the
printer you can find the build file under \My Documents\3D Systems\
Geomagic Print .
Print to File
The print can also be saved as a file.
1 . Click
Print to File
on the
Home
tab .
2 .
Select location and file name and click
Save
.
NOTE: Before you print a part ensure the proper material type has
been selected from the preferences section . If you try to submit a print
job and the material does not match, an error will be shown . You will
be asked to change the material type in the preferences section, or you
will be asked to change the material in the machine .


