Local Boot ROM and Software Loading
473
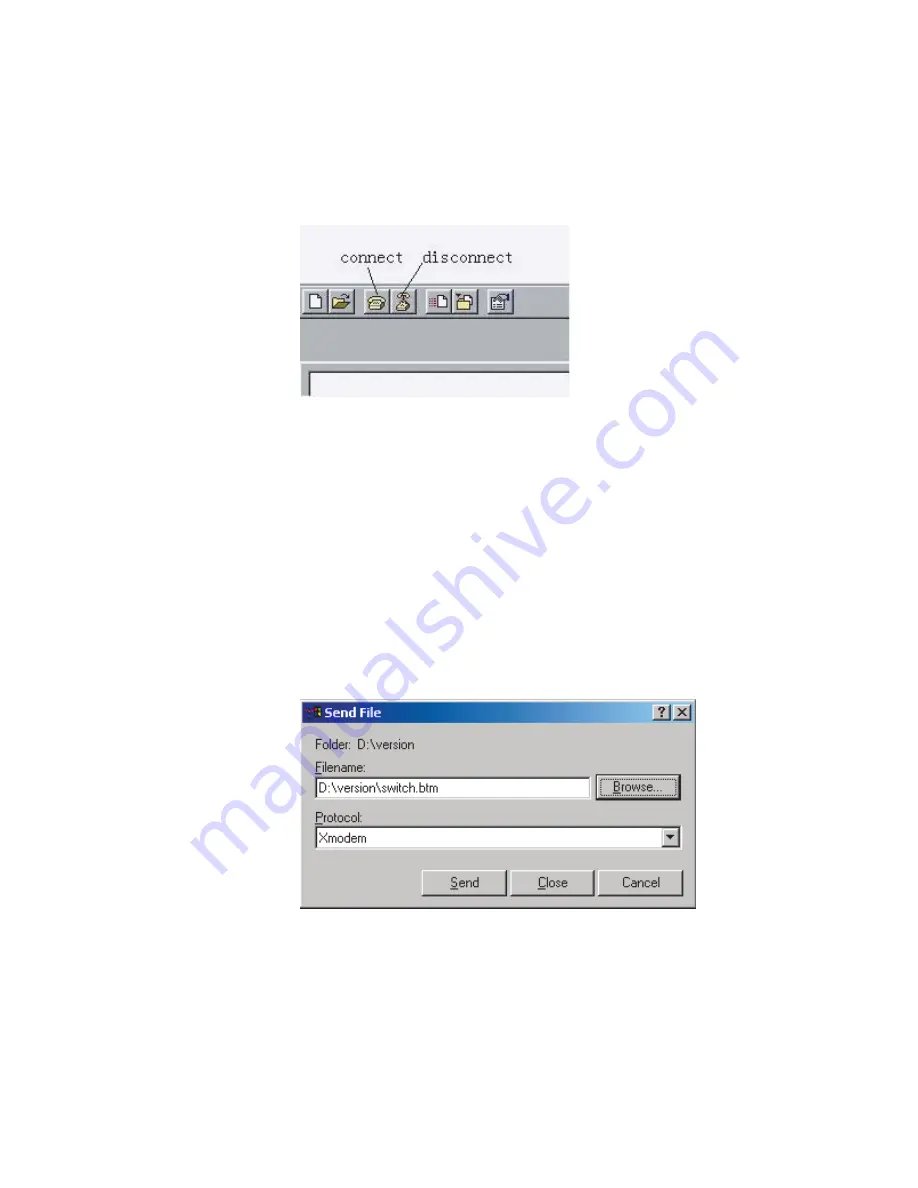
Step 5: Click the <Disconnect> button to disconnect the HyperTerminal from the
switch and then click the <Connect> button to reconnect the HyperTerminal to
the switch, as shown in Figure 159.
Figure 159
Connect and disconnect buttons
n
The new baudrate takes effect after you disconnect and reconnect the
HyperTerminal program.
Step 6: Press <Enter> to start downloading the program. The system displays the
following information:
Now please start transfer file with XMODEM protocol.
If you want to exit, Press <Ctrl+X>.
Loading ...CCCCCCCCCC
Step 7: Choose [Transfer/Send File] in HyperTerminal, and click <Browse> in
pop-up dialog box, as shown in Figure 160. Select the software file that you need
to load to the switch, and set the protocol to XModem.
Figure 160
Send file dialog box
Step 8: Click <Send>. The system displays the page, as shown in Figure 161.
Summary of Contents for Switch 4210 9-Port
Page 22: ...20 CHAPTER 1 CLI CONFIGURATION ...
Page 74: ...72 CHAPTER 3 CONFIGURATION FILE MANAGEMENT ...
Page 84: ...82 CHAPTER 5 VLAN CONFIGURATION ...
Page 96: ...94 CHAPTER 8 IP PERFORMANCE CONFIGURATION ...
Page 108: ...106 CHAPTER 9 PORT BASIC CONFIGURATION ...
Page 122: ...120 CHAPTER 11 PORT ISOLATION CONFIGURATION ...
Page 140: ...138 CHAPTER 13 MAC ADDRESS TABLE MANAGEMENT ...
Page 234: ...232 CHAPTER 17 802 1X CONFIGURATION ...
Page 246: ...244 CHAPTER 20 AAA OVERVIEW ...
Page 270: ...268 CHAPTER 21 AAA CONFIGURATION ...
Page 292: ...290 CHAPTER 26 DHCP BOOTP CLIENT CONFIGURATION ...
Page 318: ...316 CHAPTER 29 MIRRORING CONFIGURATION ...
Page 340: ...338 CHAPTER 30 CLUSTER ...
Page 362: ...360 CHAPTER 33 SNMP CONFIGURATION ...
Page 368: ...366 CHAPTER 34 RMON CONFIGURATION ...
Page 450: ...448 CHAPTER 39 TFTP CONFIGURATION ...
Page 451: ......
Page 452: ...450 CHAPTER 39 TFTP CONFIGURATION ...
Page 470: ...468 CHAPTER 40 INFORMATION CENTER ...
Page 496: ...494 CHAPTER 44 DEVICE MANAGEMENT ...


