18
C
HAPTER
2: LAN I
NSTALLATION
■
Find the
Default Server Name
for your Print Server. The
Default Server
Name
is shown on a sticker on the base of the device. It consists of 8
letters and/or digits. Record this name; it may be needed during
configuration.
1
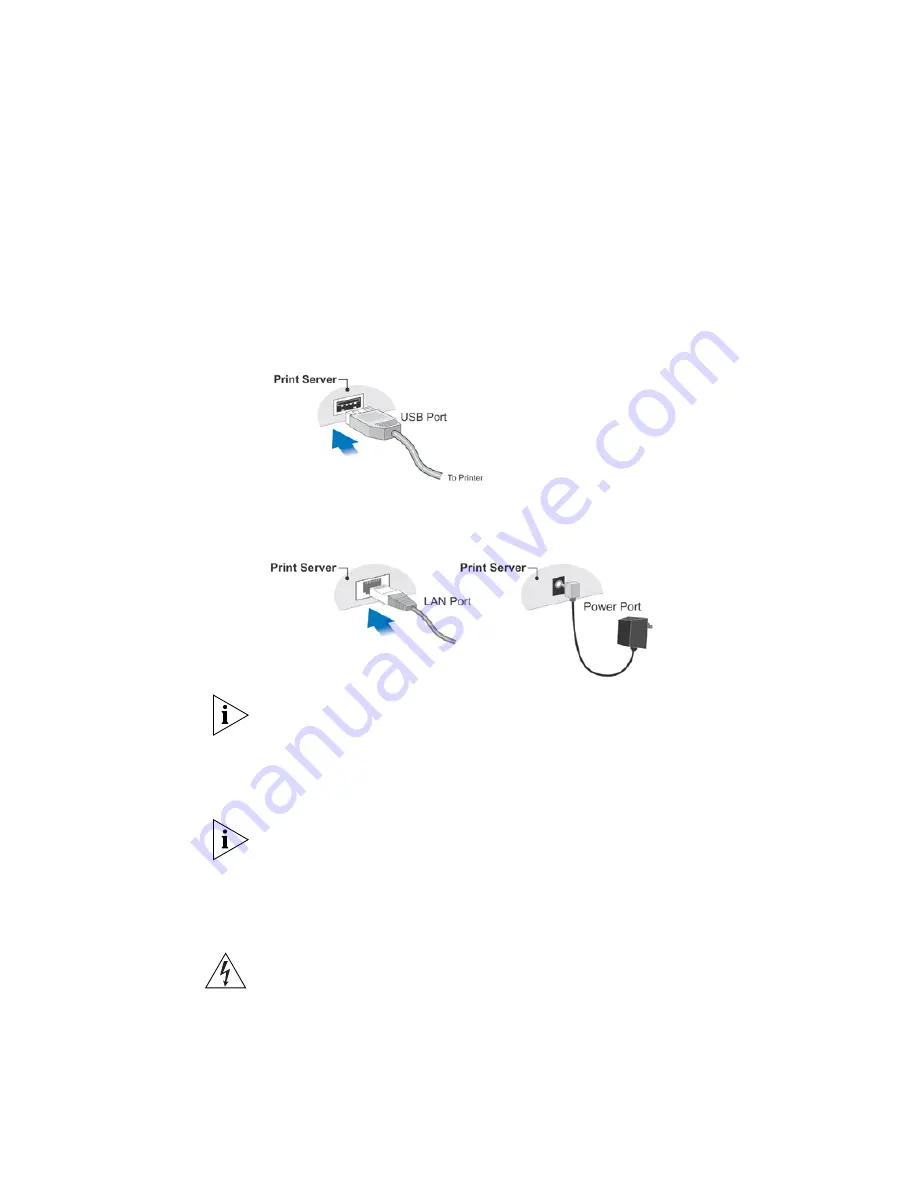
Make sure the Print Server and printer are powered OFF.
2
Connect the printer to the Print Server's printer port, as shown in the
following diagram.
3
Connect an Ethernet cable to the LAN port on the Print Server and your
laptop or desktop computer.
Initial configuration cannot be performed via the Wireless interface; the
Wired (LAN) interface should be used for initial configuration. To use the
LAN interface, the Ethernet cable needs to be inserted BEFORE powering
ON. After configuration, you can power off and disconnect the Ethernet
cable if desired.
To use BOTH the LAN and Wireless interfaces, the Wireless mode must be
changed to "Ad-hoc".
Power Up
Plug in the power adapter cable and power up. Start-up will take only a
few seconds.
WARNING:
Use only the Power Supply unit provided with the device.
Power Supply units for different models are not interchangeable.
To PC
Summary of Contents for 3CRWPS10075-US - OfficeConnect Wireless 54Mbps 11g Print...
Page 8: ......
Page 12: ...12 ABOUT THIS GUIDE...
Page 20: ...20 CHAPTER 2 LAN INSTALLATION...
Page 40: ...40 CHAPTER 4 CLIENT PC CONFIGURATION 6 Click Add Configuration is now complete...
Page 68: ...68 CHAPTER 7 TROUBLESHOOTING...
Page 72: ...72 APPENDIX A SPECIFICATIONS...
Page 76: ...76 APPENDIX B WINDOWS SERVER CONFIGURATION...
Page 84: ...84 APPENDIX C UNIX SYSTEMS...
Page 93: ......


