6
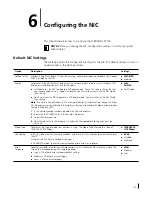
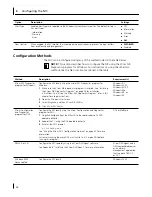
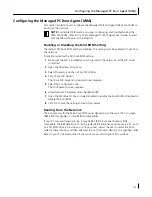
Configuring the NIC
50
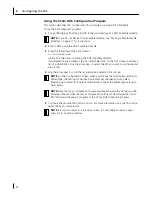
Using the 3Com DOS Configuration Program
This section describes NIC configuration for computers running DOS or NetWare.
To run the DOS diagnostic program:
1
Copy 3c99xcfg.exe from the
EtherCD
to the root directory of a DOS-bootable diskette.
2
Boot to DOS using the DOS-bootable diskette.
3
Enter the following at the DOS prompt:
a:\3c99xcfg.exe
where a:\ is the drive containing the DOS-bootable diskette.
If multiple NICs are installed in the PC, select Select NIC on the first screen to display a
list of installed NICs. Use the arrow keys to select the NIC you want to configure and
press Enter.
4
Use the arrow keys to scroll the list and make a selection. Press Enter.
5
Continue this procedure for other options. For more information on a specific option,
select the option and press F1.
NOTE:
If you do not have a DOS-bootable diskette, see “Making a DOS-Bootable
Diskette” on page 11 for instructions.
NOTE:
On the Configuration screen, when you choose the Auto Select setting for
Media Type, the setting for Duplex is automatically changed to Auto Select.
Selecting Auto Select for Duplex automatically changes the Media Type setting to
Auto Select.
NOTE:
Note that any configuration change you make through the Windows 2000
Advanced tab overrides the same configuration setting made through the 3Com
NIC (Windows) Diagnostic program or the 3Com DOS Diagnostic program.
NOTE:
Press Esc to return to a previous screen. If a secondary window is open,
press Esc to close the window.

