Chapter 7 Tutorials
WAP5705 User’s Guide
63
4
After you’ve set your computer’s IP address, open a web browser such as Internet Explorer and
type “http://192.168.1.10” as the web address in your web browser.
5
Enter “1234” (default) as the password and click
Login
.
6
Type a new password and retype it to confirm, then click
Apply
. Otherwise, click
Ignore
.
7
The Easy mode appears. Click
Expert Mode
in the navigation panel.
8
To connect to a specific wireless network, you can manually create a wireless profile or use the site
survey tool to associate with it.
7.6.1 Connecting to a Wireless Network Using Site Survey
1
Go to
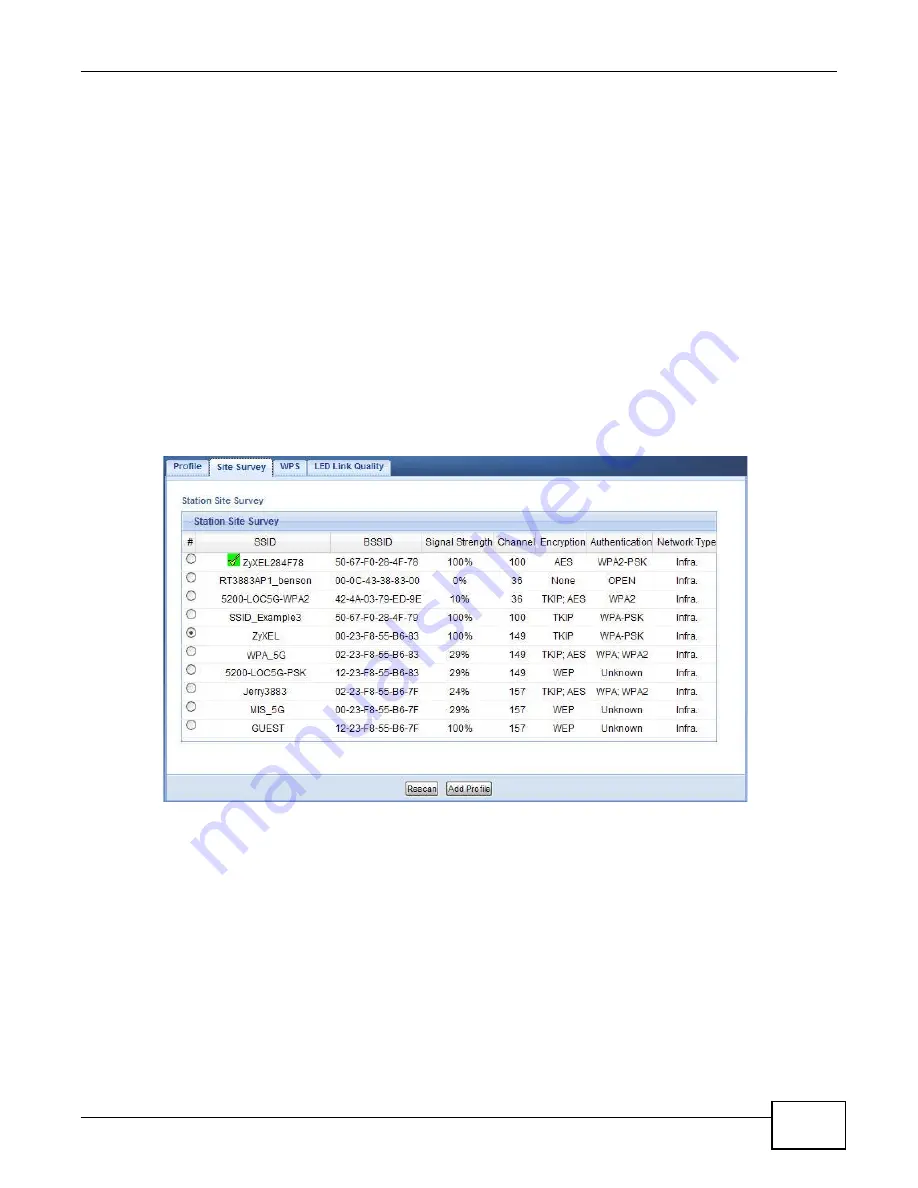
Configuration > Network > Wireless LAN > Site Survey
. The WAP5705 automatically
scans for and connects to an available wireless network. The green check icon indicates the wireless
device to which the WAP5705 is connecting. Select an SSID’s radio button and click
Add Profile
to
add this wireless device to a profile.
Содержание WAP5705
Страница 4: ...Contents Overview WAP5705 User s Guide 4...
Страница 9: ...9 PART I User s Guide...
Страница 10: ...10...
Страница 14: ...Chapter 1 Getting to Know Your WAP5705 WAP5705 User s Guide 14 1 7 LEDs Figure 2 Front Panel...
Страница 46: ...Chapter 5 Client Mode WAP5705 User s Guide 46...
Страница 52: ...Chapter 6 The Web Configurator WAP5705 User s Guide 52...
Страница 66: ...Chapter 7 Tutorials WAP5705 User s Guide 66...
Страница 67: ...67 PART II Technical Reference...
Страница 68: ...68...
Страница 98: ...Chapter 11 Maintenance WAP5705 User s Guide 98...
Страница 104: ...Chapter 12 Troubleshooting WAP5705 User s Guide 104...
Страница 146: ...Appendix B Wireless LANs WAP5705 User s Guide 146...
Страница 152: ...Appendix C Legal Information WAP5705 User s Guide 152...
Страница 156: ...Index WAP5705 User s Guide 156...


