Chapter 5 Client Mode
WAP5705 User’s Guide
36
5.4 Setting your WAP5705 to Client Mode
1
To set your WAP5705 to
client mode, see
2
Connect your computer to the LAN port of the WAP5705.
3
The default IP address of the WAP5705 in client mode is “192.168.1.10”. In this case, your
computer must have an IP address in the range between “192.168.1.11” and “192.168.1.254”.
4
Click
Start > Run
on your computer in Windows. Type “cmd” in the dialog box. Enter “ipconfig” to
show your computer’s IP address. If your computer’s IP address is not in the correct range then see
for information on changing your computer’s IP address.
5
After you’ve set your computer’s IP address, open a web browser such as Internet Explorer and
type “http://192.168.1.10” as the web address in your web browser.
6
Enter “1234” (default) as the password and click
Login
.
7
Type a new password and retype it to confirm, then click
Apply
. Otherwise, click
Ignore
.
8
The Easy mode appears. Click
Expert Mode
in the navigation panel.
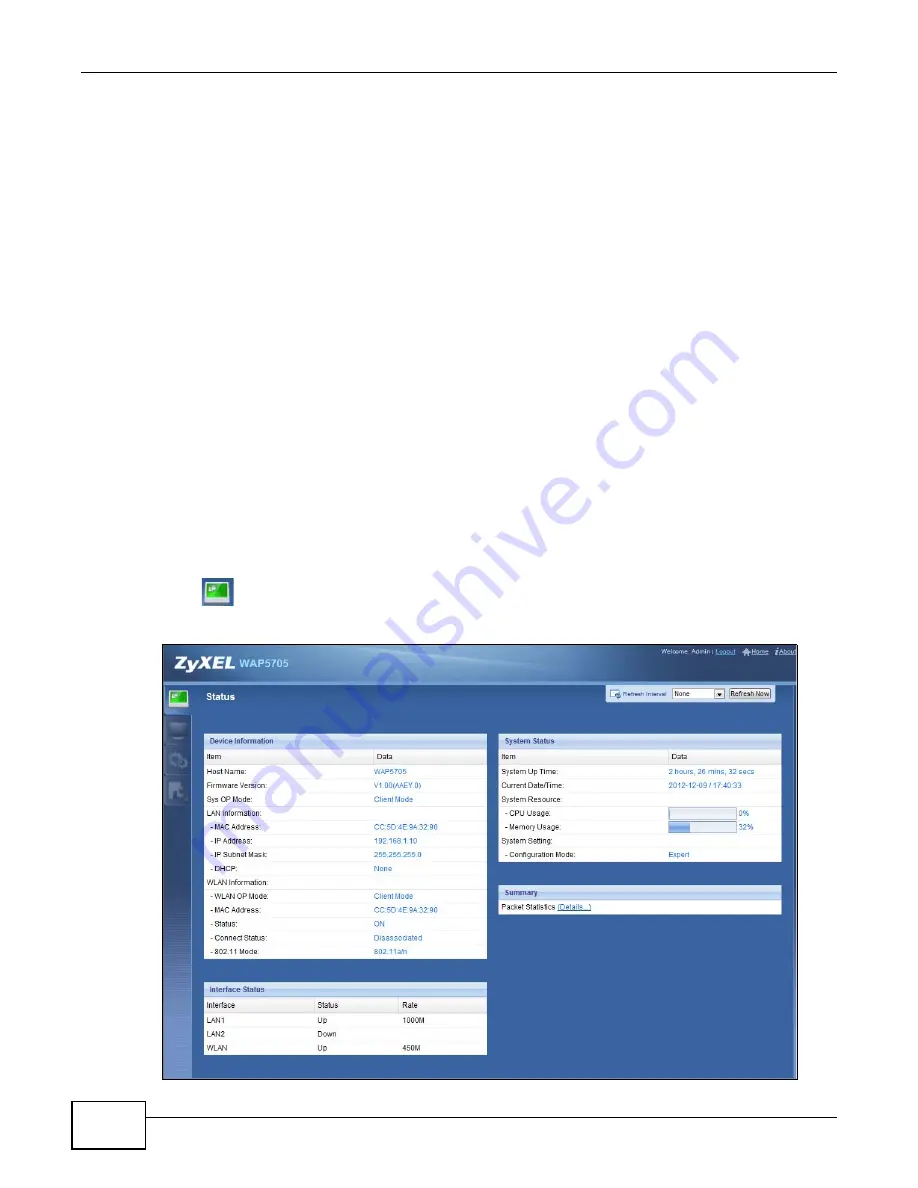
5.5 Client Mode Status Screen
Click
to open the status screen.
Figure 22
Status: Client Mode
Содержание WAP5705
Страница 4: ...Contents Overview WAP5705 User s Guide 4...
Страница 9: ...9 PART I User s Guide...
Страница 10: ...10...
Страница 14: ...Chapter 1 Getting to Know Your WAP5705 WAP5705 User s Guide 14 1 7 LEDs Figure 2 Front Panel...
Страница 46: ...Chapter 5 Client Mode WAP5705 User s Guide 46...
Страница 52: ...Chapter 6 The Web Configurator WAP5705 User s Guide 52...
Страница 66: ...Chapter 7 Tutorials WAP5705 User s Guide 66...
Страница 67: ...67 PART II Technical Reference...
Страница 68: ...68...
Страница 98: ...Chapter 11 Maintenance WAP5705 User s Guide 98...
Страница 104: ...Chapter 12 Troubleshooting WAP5705 User s Guide 104...
Страница 146: ...Appendix B Wireless LANs WAP5705 User s Guide 146...
Страница 152: ...Appendix C Legal Information WAP5705 User s Guide 152...
Страница 156: ...Index WAP5705 User s Guide 156...


