


MultiBio700- User Manual
eSSL Pvt. Ltd.
Page 73
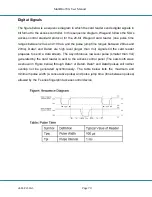
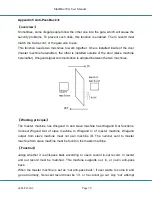
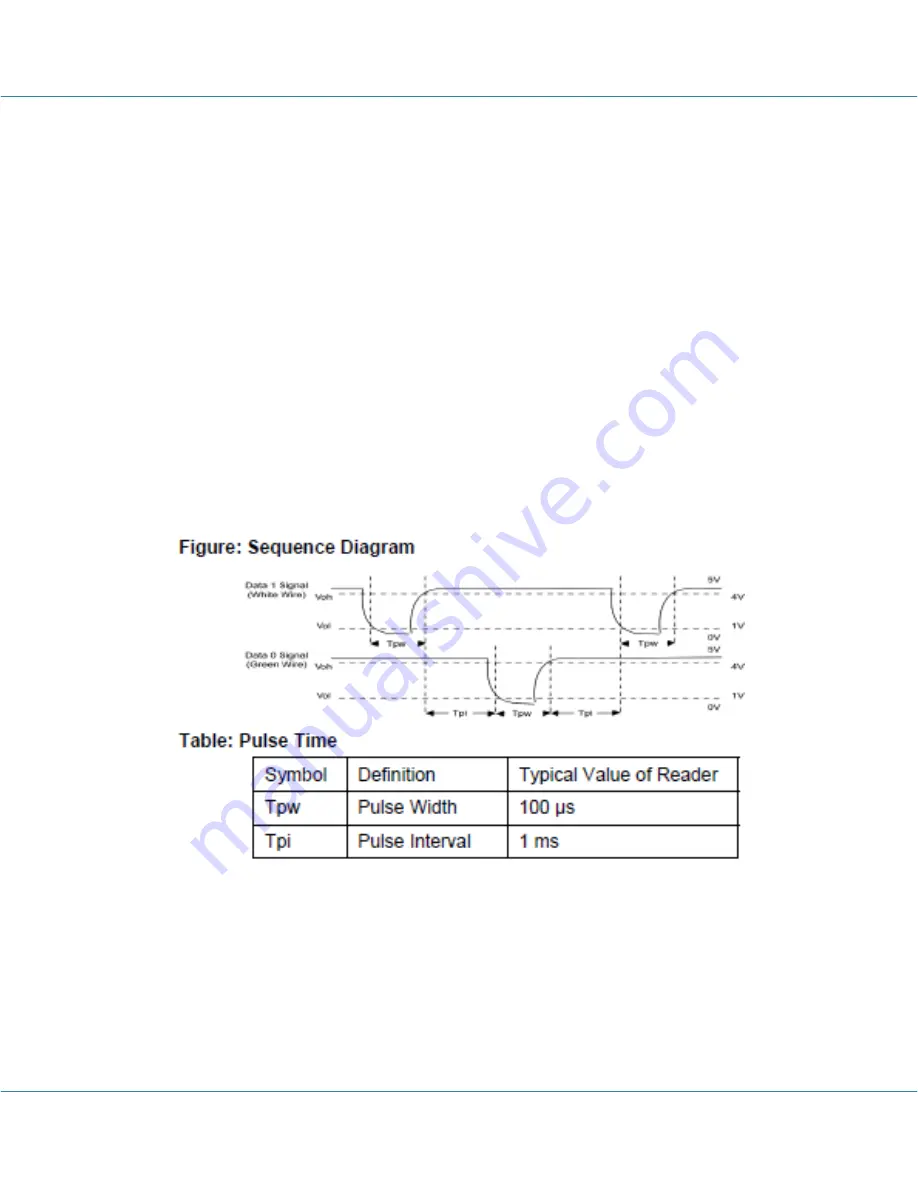
Digital Signals
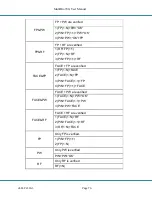
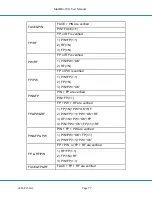
The figure below is a sequence diagram in which the card reader sends digital signals in
bit format to the access controller. In this sequence diagram, Wiegand follows the SIA’s
access control standard protocol for the 26-bit Wiegand card reader (one pulse time
ranges between 20 us and 100 us, and the pulse jump time ranges between 200us and
20ms). Data1 and Data0 are high level (larger than Vol) signals till the card reader
prepares to send a data stream. The asynchronous low-level pulse (smaller than Vol)
generated by the card reader is sent to the access control panel (The saw-tooth wave
as shown in Figure below) through Data1 or Data0. Data1 and Data0 pulses will neither
overlap nor be generated synchronously. The table below lists the maximum and
minimum pulse width (a consecutive pulse) and pulse jump time (time between pulses)
allowed by the F series fingerprint access control device.


