32
Get more from your Zip NVR with our Free CCTV tips at
ZipNVR.com
How To - Confi gure Port Forwarding
1
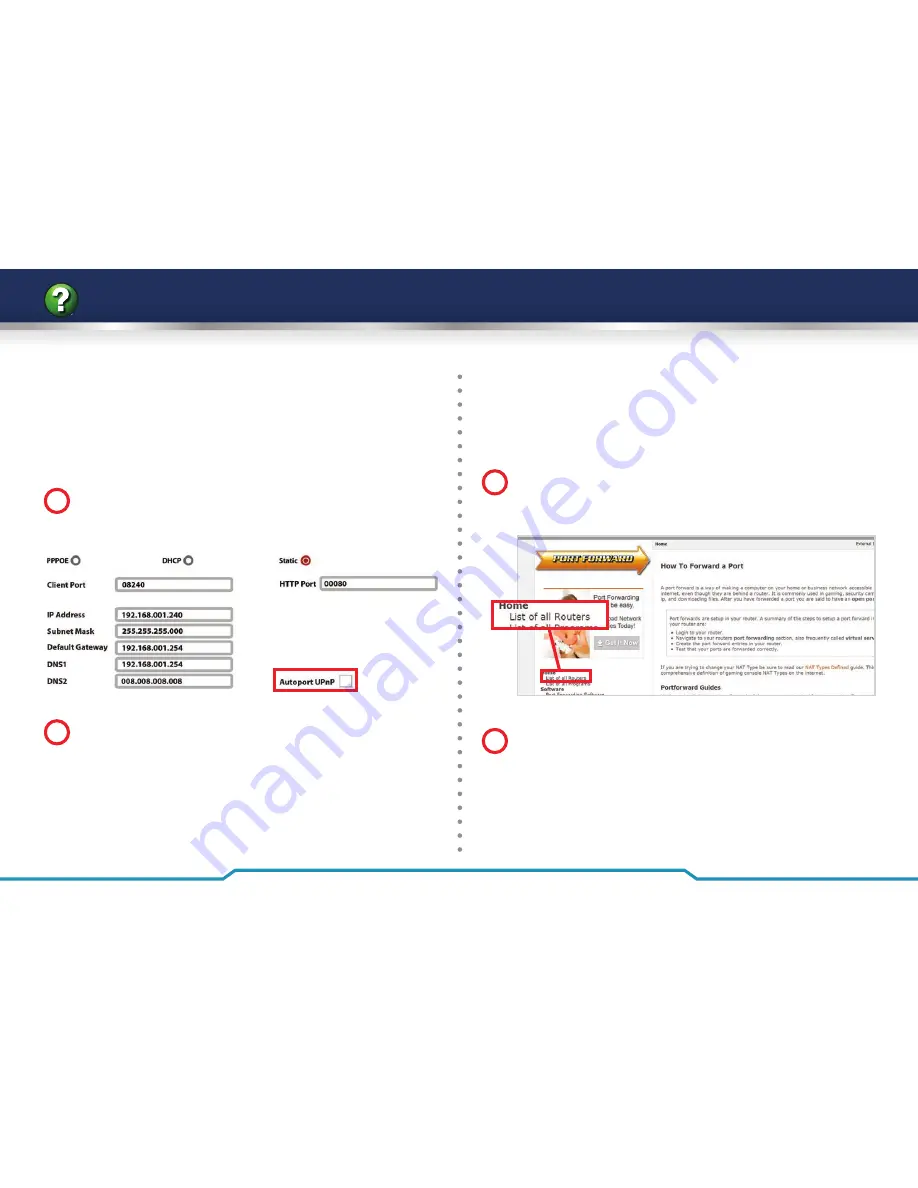
Enter the Main Menu of the NVR. Select ‘
Setup
‘ and
then click the ‘
Network
’ tab on the left hand side. Check
‘
Autoport UPnP
’ and click ‘
Save
’.
2
On a PC open up a web browser and go to
www.zipnvr.com/connect
. In the Zip NVR port checker
click ‘
Use This IP
’ to enter your IP address. Check the
ports are correct and then click ‘
Test Now
’. If the ports
show open then we are fi nished, if not you will need to
uncheck ‘
Autoport UPnP
’ and click ‘
Save
’.
UPnP - Automatic Port Forwarding
The easiest way to confi gure port forwarding is to use
UPnP automatic port forwarding. If this works then you do
not need to access the router setup.
Manual Port Forwarding
If UPnP did not work then we will have to manually enter
the port forwarding in the router.
1
Go to
www.portforward.com
. On the side menu
choose ‘
List of all Routers
’. Select the manufacturer and
model of the your router.
2
Scroll down to ‘
step 4
‘ and choose ‘
D-Link DCS-930L
‘ from
the list of programs. Follow the guide changing the three
port numbers it suggests to the port numbers you are
using (
80, 1240 and 8240 by default
). The IP address you
are forwarding to is the NVR’s IP address (
192.168.001.240
by default). Once completed test the port forwarding as
explained in step 2 for ‘
UPnP - Automatic Port Forwarding
’.


