background image

X11 Wireless Broadband Router                                                                        User manual 

Page 30 of 69 

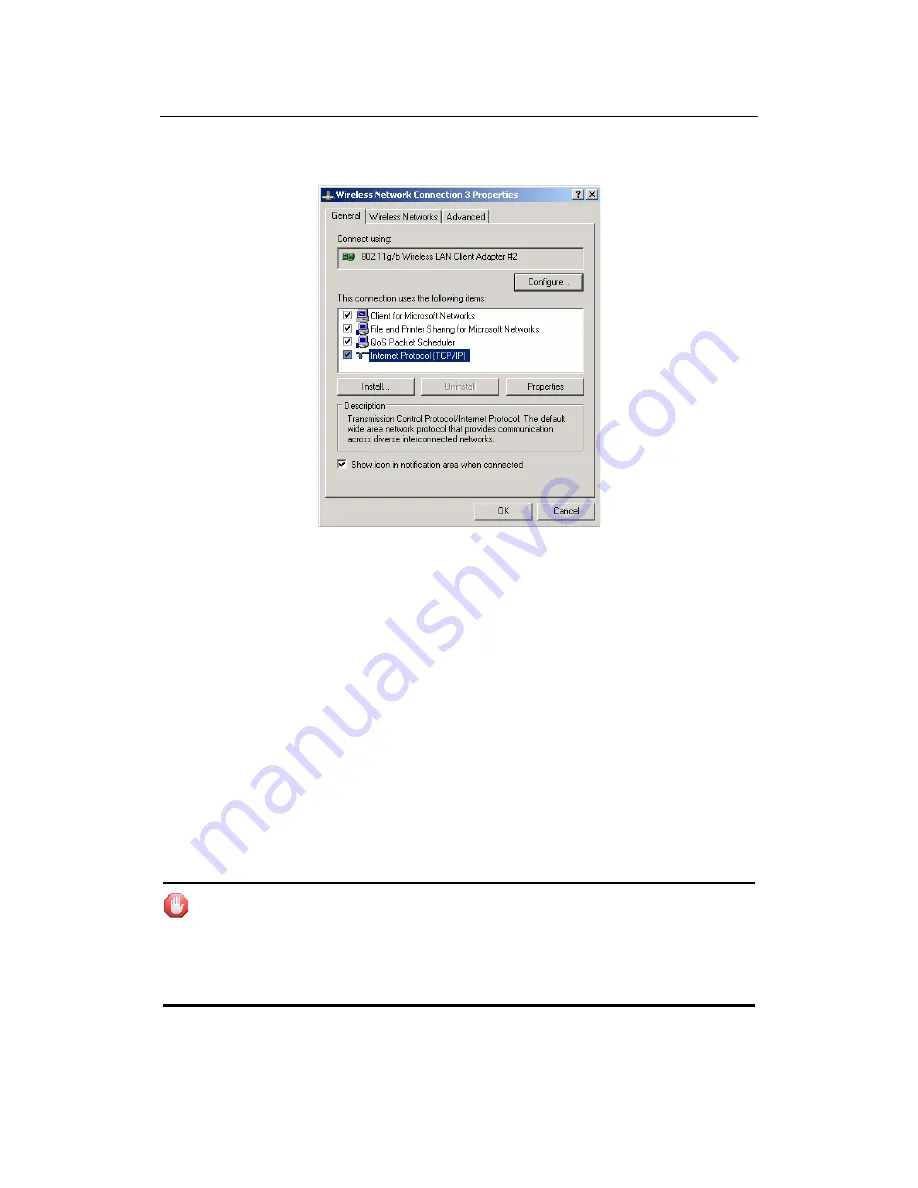
Step 7: Press OK to close the Local Area Connection Properties window 


Figure 14 

5.2 Additional Settings for Wireless Client 

If you chose to access the router via a wireless client, also verify the following: 
Step 1: Make sure your PC is equipped with 802.11g or 802.11b wireless 
adapter and has appropriate WLAN card driver/utility and TCP/IP installed. 
Step 2: Set the wireless adapter to use appropriate TCP/IP settings as 

described in previous section. 
Step 3: Launch the wireless adapter’s provided utility and verify that your 
wireless client is configured with these settings: 

z


Operation Mode: Infrastructure 

z


SSID: default 

z


Authentication: Disabled 

z


Encryption: Off 

z


Radio Band: 802.11B/G 


    If you only finished the wireless settings and didn’t configure the wireless 

adapter’s TCP/IP settings, even your link status indicates a successful 

connection with the AP. This connection applies to the “physical” network layer 

only. Your wireless adapter cannot communicate with the AP. Make sure to set 
the TCP/IP properties as described in this previous section. 
 

Содержание WLB5254AIP/X11

Страница 1: ...X11 Wireless Broadband Router User manual Page 1 of 69 WLB5254AIP X11 Wireless Broadband Router...

Страница 2: ...d Router 21 3 1 Back Panel 21 3 2 LED Description 22 Chapter 4 hardware connection 23 4 1 Connecting the Wireless Broadband Router 23 Chapter 5 Configuring Local PC to Access the Wireless Router 24 5...

Страница 3: ...l Server Setup 57 6 8 4 Port Tiger 58 6 9 Fire Wall 59 6 9 1 MAC Filtering 59 6 9 2 Access Control 60 6 9 3 URL Filtering 62 6 10 DDNS 62 6 11 MISC 63 6 11 1 Login ID Password Setup 63 6 11 2 Remote M...

Страница 4: ...X11 Wireless Broadband Router User manual Page 4 of 69 X11 Wireless Broadband Router Quick Installation Guide...

Страница 5: ...le ADSL modem to the WAN port of your Wireless Broadband Router Step 3 Connecting the power adapter Connect the single DC output connector of the power adapter to the power jack on the side of the Wir...

Страница 6: ...s Automatically is checked 7 From the WINS Configuration dialog box Ensure that Disable WINS Resolution is checked 8 From the Gateway dialog box remove all entries from the Installed gateways by selec...

Страница 7: ...69 Figure 3 4 Highlight Internet Protocol TCP IP and then press Properties button Figure 4 5 Choose Obtain an IP address automatically and Obtain DNS server address automatically and then press OK to...

Страница 8: ...al Page 8 of 69 Figure 5 6 Press OK to close the Local Area Connection Properties window Figure 6 Windows XP Please follow the steps below to setup your computer 1 Go to Start Settings Control Panel 2...

Страница 9: ...X11 Wireless Broadband Router User manual Page 9 of 69 Figure 7 3 Click Network Connections Figure 8...

Страница 10: ...ion right click your mouse Click Properties Figure 9 5 Highlight Internet Protocol TCP IP and then press Properties button Figure 10 6 Choose Obtain an IP address automatically and Obtain DNS server a...

Страница 11: ...X11 Wireless Broadband Router User manual Page 11 of 69 Figure 11 7 Press OK to close the Local Area Connection Properties window Figure 12...

Страница 12: ...ng the IP address of the Wireless Broadband Router at the DOS prompt To execute ping command open the DOS window by clicking on Start Run In the Run window type CMD At the DOS prompt type the followin...

Страница 13: ...tween the router and the computer 4 Accessing the Web Based Configuration Utility Step 1 Launch the Web browser and type http 192 168 10 1 in the Address field and click Enter Step 2 After connecting...

Страница 14: ...WAN Setup page link to configure the WAN interface Figure 16 Step 2 Select the Internet connection type The WAN Setup page configures the Internet connection of the Wireless Broadband Router Consult y...

Страница 15: ...X11 Wireless Broadband Router User manual Page 15 of 69 Figure 17 z PPPoE Figure 18 z Static IP...

Страница 16: ...Apply to save And enable these settings with the Router Step 4 Setting the wireless With the default values the router Access Point can be easily associated by a wireless client For security concern y...

Страница 17: ...default Channel 6 Authentication Disabled Encryption Off Radio Band 802 11B G 6 Checking the Connection to the Internet To check the connection to the Internet you can open the Web browser and go to a...

Страница 18: ...X11 Wireless Broadband Router User manual Page 18 of 69 11 Wireless Broadband Router User s Manual...

Страница 19: ...ing 802 11b infrastructure while migrating to the new screaming fast 802 11g The Wireless Broadband Router provides a total solution for the Small and Medium sized Business SMB and the Small Office Ho...

Страница 20: ...access account for Internet connection z One computer with 10 100Base T Ethernet card and TCP IP protocol installed for initial setup z Internet Explorer 5 0 or higher for Web configuration z 802 11g...

Страница 21: ...or switch which allows you to extend your network WAN Connect your modem to your router using this port with your supplied Ethernet cable This is the only port you can use for this procedure This ena...

Страница 22: ...is started After that the LED will stays green to show the Wireless Router is working normally If the LED stays blink dark that means the system failed you need to contact your agent or try to reboot...

Страница 23: ...Broadband Router Then follow the steps below to connect the related devices Step 1 Connecting your computer to the LAN port Attach one end of the Ethernet cable with RJ 45 connector to your hub switch...

Страница 24: ...ure that you have network card Step 4 Select TCP IP If TCP IP appears more than once please select the item that has an arrow pointing to the network card installed on your computer DO NOT choose the...

Страница 25: ...25 of 69 Figure 4 Step 2 Double click the icon Network and Dial up Connections Step 3 Highlight the icon Local Area Connection right click your mouse Click Properties Figure 5 Step 4 Highlight Interne...

Страница 26: ...nd Router User manual Page 26 of 69 Figure 6 Step 5 Choose Obtain an IP address automatically and Obtain DNS Server Address automatically and then press OK to close the Internet Protocol TCP IP Proper...

Страница 27: ...of 69 Step 6 Press OK to close the Local Area Connection Properties window Figure 8 5 1 3 Windows XP Please follow the steps below to setup your computer Step 1 Go to Start Settings Control Panel Step...

Страница 28: ...manual Page 28 of 69 Step 3 Click Network Connections Figure 10 Step 4 Highlight the icon Local Area Connection right click your mouse Click Properties Figure 11 Step 5 Highlight Internet Protocol TC...

Страница 29: ...d Router User manual Page 29 of 69 Figure 12 Step 6 Choose Obtain an IP address automatically and Obtain DNS Server address automatically and then press OK to close the Internet Protocol TCP IP Proper...

Страница 30: ...iate TCP IP settings as described in previous section Step 3 Launch the wireless adapter s provided utility and verify that your wireless client is configured with these settings z Operation Mode Infr...

Страница 31: ...G the IP address of the Wireless Broadband Router at the DOS prompt z For Windows 98 Me Start Run Type command and click OK z For Windows 2000 XP Start Run Type cmd and click OK At the DOS prompt type...

Страница 32: ...X11 Wireless Broadband Router User manual Page 32 of 69 Figure 16 Verify your computer s network settings are correct and check the cable connection between the router and the computer...

Страница 33: ...the Wireless Broadband Router s web based configuration utility From now on the Wireless Broadband Router acts as a Web server sending HTML pages forms at your request You can click the menu options...

Страница 34: ...right of the page Figure 18 To apply any settings you ve altered on any page click the Save button Otherwise you change settings would be lost after the Router reboot 6 2 Quick Setup Wizard The Quick...

Страница 35: ...onnection type and then input the configurations needed to connect to your Internet Service Provider ISP Figure 20 For Dynamic IP Address z Choose DHCP if your ISP will automatically give you an IP ad...

Страница 36: ...Password provided by your ISP for the PPPoE connection then click on Next Figure 21 For Static IP z Select Static IP if your ISP has given you a specific IP address for you to use Your ISP should pro...

Страница 37: ...ter The System will apply the new settings and start rebooting right away Figure 23 z After reboot the Wireless Router will enable these settings with the Router 6 3 Status 6 3 1 System Status This pa...

Страница 38: ...terface parameters of the wireless router This includes information such as Connection type DHCP PPPoE or Static IP The MAC address of LAN interface IP Subnet Mask Default Gateway Primary DNS Backup D...

Страница 39: ...er User manual Page 39 of 69 Figure 25 To terminate the connection click on the Disconnect button Figure 26 DHCP In DHCP mode press Disconnect button to release IP address and press Connect button to...

Страница 40: ...tion shows the WLAN interface parameters of the wireless router This includes information such as Wireless whether Wireless interface status is active Connection whether have active wireless stations...

Страница 41: ...se the WAN Setup screen if you have already configured the Quick Setup Wizard section and you would like to change your Internet connection type The WAN Settings screen allows to specify the type of W...

Страница 42: ...permitted for Internet transmission Enter your MTU number in the text box to set the limitation The recommended size entered in the Size field is 1496 You should leave this value in the 1200 to 1500 r...

Страница 43: ...specifies the largest packet size permitted for Internet transmission Enter your MTU number in the text box to set the limitation The default value of MTU is 1492 and use 1300 while the line condition...

Страница 44: ...er interface The router will not auto connect to the Internet To use this option click the radio button next to Connect on demand z Click Apply to save these settings with the Router The System will a...

Страница 45: ...server z Click Apply to save these settings with the Router The System will apply the new settings and start rebooting right away After reboot the Wireless Router will enable these settings with the R...

Страница 46: ...onnect you will need to renew the IP address of the PC or change to an IP address compatible with the new LAN port IP address 6 5 2 DHCP Info You can View all the pc which connect to the Wireless Rout...

Страница 47: ...eed 32 characters use any of the characters on the keyboard Make sure this setting is the same for all points in your wireless network For added security you should change the default SSID default to...

Страница 48: ...ng your PC from dropping into power saving sleep mode Higher settings allow your PC to enter sleep mode thus saving power but interferes with wireless transmissions z Transmit Rate The Transmit Rate i...

Страница 49: ...d the None If you select none any data will be transmitted without Encryption and any station can access the wireless router 6 6 3 2 WEP WEP Wired Equivalent Privacy is an encryption method used to pr...

Страница 50: ...A F a f and 0 9 range to be the WEP Key z Default Key The Key selected here must match the key selected in the client For example if you select Key 1 here you have to select Key 1 for the client The...

Страница 51: ...k The input format is in character style and key size should be in the range between 8 and 63 characters z Clear If you want to retype again Just click Clear and WPA Pass Phrase fields will be cleared...

Страница 52: ...be in the range between 8 and 63 characters z Clear If you want to retype again Just click Clear and WPA Pass Phrase fields will be cleared z Rekey Time sec Specifies the timer the WPA key must change...

Страница 53: ...less client The user has the flexibility to customize your own control policy based on these options Figure 44 z Enable Wireless Access Control To enable Wireless MAC Filter click the check box The de...

Страница 54: ...If you want to remove some MAC address from the Current Access Control List select the MAC addresses you want to remove in the list and then click Delete 6 6 5 Association Table You can see the statu...

Страница 55: ...Fill in the all of the setting to be added and then click Add Then this Special Application setting will be added into the Current Routing Table below z Current Routing Table This display shows the v...

Страница 56: ...irtual server re directs a particular service Internet application e g FTP websites to a particular LAN client server whereas DMZ re directs all packets regardless of services going to your WAN IP add...

Страница 57: ...and its service port number Figure 51 z Rule Name You can enter whatever you want It s just a string z Internal Server IP Enter the host IP address to which the packet will be forwarded The virtual se...

Страница 58: ...d in your private LAN to be accessible to Internet users The configuration below means that any request coming form the Internet to access your web server will be translated to your LAN s FTP server 1...

Страница 59: ...erver rule you can choose the rule z Forward Port Enter the port number to which the packet will be forwarded on LAN z Press Add button after enter the all fields to add the rule z Check to select the...

Страница 60: ...Address of a station z Description Enter the Comment of station z Click Add Then this wired station will be added into the Current Access Control List below Figure 57 z If you want to remove some MAC...

Страница 61: ...o access internet DENIED to access internet The Undefined items beside the Rule list are DENIED to access internet DENIED to access internet Rule Name Enter the rule name which you want it is just onl...

Страница 62: ...ature Enable URL Filtering is checked z You can choose a default operation for your factual security or management consideration Predefined URLs Keywords in list are BLOCKED others are PERMITTED Prede...

Страница 63: ...s N A and that for user is also password You can change the default password to ensure that someone cannot adjust your settings without your permission Every time you change your password please recor...

Страница 64: ...heckbox and click the Apply button Figure 64 z Management Port Enter the port number z Click Apply at the bottom of the screen to change the Management Port When you want to access the web based manag...

Страница 65: ...lt button Router will restart automatically Restart System Click Restart System button to reboot router Figure 68 6 11 5 Firmware Upgrade Upgrade the Broadband router s system firmware To upgrade the...

Страница 66: ...en changed you should enter the reassigned IP address instead 2 I forget Password Reset the Router without Login z Plug out the power of the Router z Use a pencil to press and hold the default button...

Страница 67: ...settings provided by the ISP z For cable users if your ISP requires a registered Ethernet card MAC address make sure you have cloned the network adapter s MAC address to the WAN port of the router Se...

Страница 68: ...he instructions may cause harmful interference to radio communications however there is no guarantee that interference will not occur in a particular installation If this equipment does cause harmful...

Страница 69: ...ent WEB Based Management Remote Management Plug Play UPnP Universal Plug Play support Only for Windows ME XP or higher OS Other Functio Multi segment LAN DHCP Server DHCP Client Information Routing ta...

Отзывы: