ZENN
iO
AVANCE Y TECNOLOGÍA
www.zennio.com
5
2. INSTALLATION
2.1. KLIC-DI INSTALLATION
The KLIC-DI installation is performed the same way that any other KNX device. We
just need to connect the device to KNX bus through the specific KNX connector.
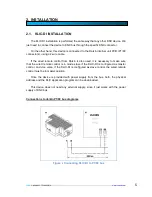
On the other hand, this device is connected to the Daikin internal unit PCB (P1/P2
connectors), using a 2-wire cable.
If the wired remote control from Daikin is also used, it is necessary to make sure
that the wired remote control is in mode slave if the KLIC-DI is configured as master
control. And vice versa, if the KLIC-DI is configured as slave control, the wired remote
control must be in master position.
Once the device is provided with power supply from the bus, both, the physical
address and the KLIC application program can be downloaded.
This device does not need any external supply, since it just works with the power
supply of KNX bus.
Connections to daikin P1/P2 bus diagrams
Figure 2 Connecting KLIC-DI to P1/P2 bus
DAIKIN
Содержание KLIC-DI
Страница 1: ...KLIC DI INTERFACE KNX DAIKIN ZN1CL KLIC DI Edition 4 0 Version 1 4 PRODUCT MANUAL...
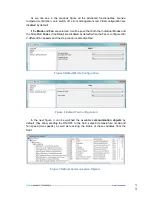
Страница 21: ...ZENNiO AVANCE Y TECNOLOG A www zennio com 2 1 Figure 16 Initial Configuration...
Страница 27: ...2 7 2 7 ZENNIO TECHNICAL DOCUMENTATION SIGN UP http zennioenglish zendesk com TECHNICAL SUPPORT...


