EN - 16
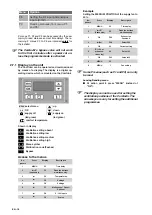
ON.
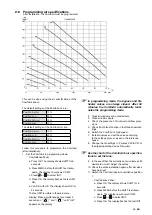
e. Confirm with OK. The display shows OK for
2 seconds.
- Display: Press simultaneously for at least 3
seconds on "
" and "
" until “InR”
disappears on the display.
2.9 Maintenance by the installer
The following maintenance must be carried out by the
installer:
■
Inspecting and (if necessary) cleaning the heat
exchanger;
■
Inspecting and (if necessary) cleaning the fans.
A concise explanation of these maintenance activities
is given in the paragraphs below.
Check the condensation drain once every 5
years.
Failure to carry out (periodic) maintenance
on the ComfoAir ultimately compromises
the performance of the ventilation system.
2.9.1 Inspecting and cleaning the heat
exchanger
Check the heat exchanger once every 2
years
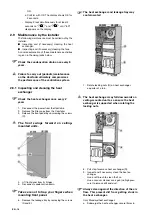
1. Disconnect the power from the ComfoAir.
2. Remove the filter caps from the ComfoAir.
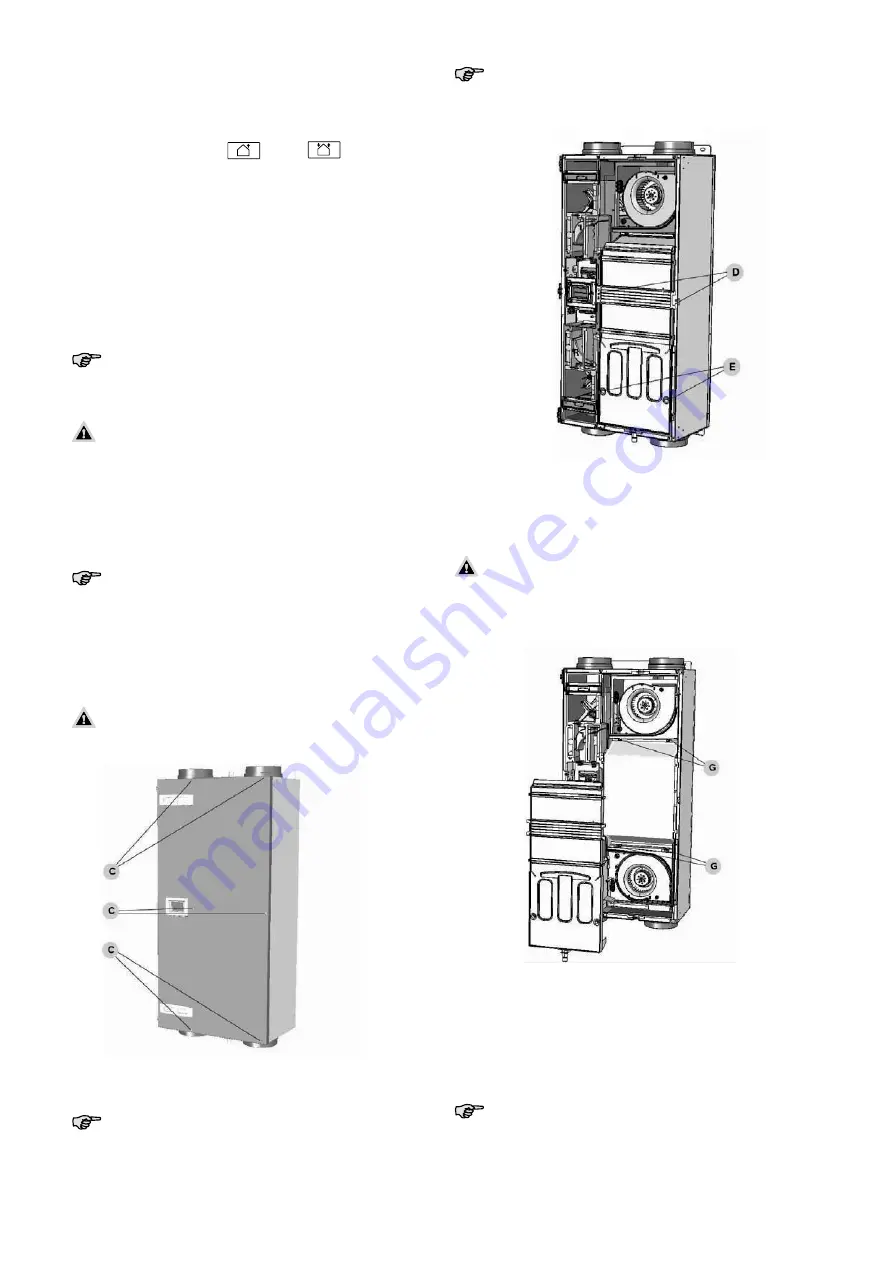
3. Release the front panel by unscrewing the screws
(C).
The front swings forward on ceiling-
mounted units.
4. Lift front panel from its hinges.
5. Disconnect condensation drain.
Take care not to trap your fingers when
mounting front panel.
6. Remove the leakage tray by removing the screws
(D and E).
The heat exchanger and leakage tray may
contain water!
7. Rotate locking nuts (G) on heat exchanger
a quarter of a turn.
The heat exchanger may fall downwards on
ceiling-mounted units, so ensure the heat
exchanger is supported when rotating the
locking nuts.
8. Pull strip to remove heat exchanger (D).
9. Inspect and if necessary clean the heat ex-
changer.
- Use a soft brush to clean the fins.
- Use a vacuum cleaner or air gun (no high pres-
sure) to remove dirt and dust.
Always clean against the direction of the air-
flow. This prevent dirt from getting stuck in
the heat exchanger.
Only Standard heat exchanger:
a. Submerge the heat exchanger several times in
C
B
A
Содержание ComfoAir 200
Страница 1: ...Cooling Fresh Air Clean Air Heating ComfoAir 200 Installer manual...
Страница 4: ...EN IV...
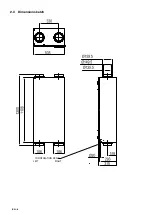
Страница 10: ...EN 6 2 3 Dimension sketch LEFT RIGHT CONDENSATION DRAIN...

