background image

AS220V2 

2x2 Dual Band 802.11ac Wave 2 Indoor Access Point 

QSG


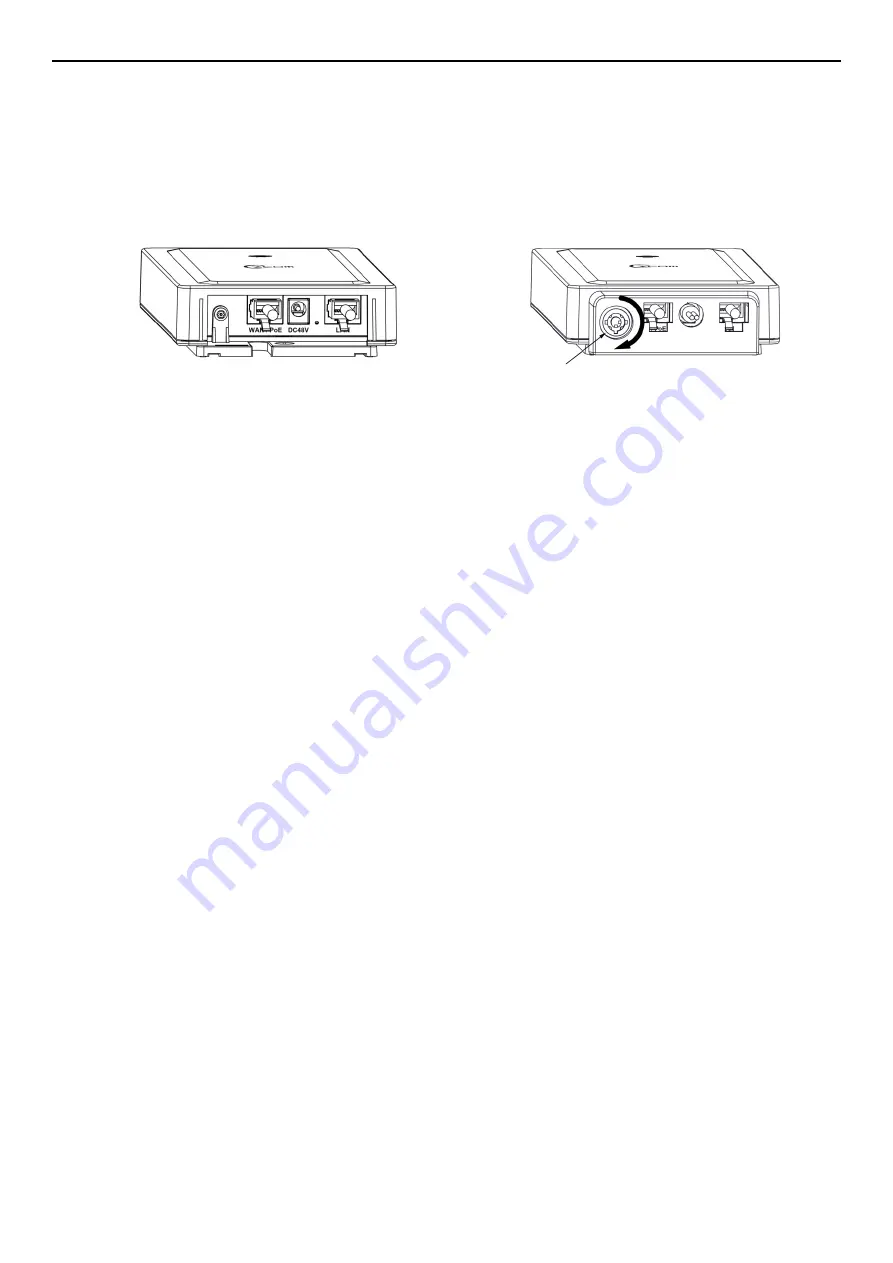
Installing the Anti-tamper Lock (Optional accessory_AS-LK18) 

 Slide all the cables through their respective holes on the anti-tamper lock. 

 Install the mounting bracket; plug all the 

cables into their respective ports on the 
device before installing the anti-tamper lock. 

 Position the anti-tamper lock onto the 

device and fasten the lock screw clock-wise 
with special anti-tamper lock key. 


Safety Notice 

1.


Do not install the device close to any electrical grounding device or lightning protection system. 
Place the device’s own grounding and lightning protection system apart from any electrical 
grounding device and lightning protection system as far as possible. 

2.


Protect components from electrostatic discharge: Please wear an ESD wrist strap or handle the 
power adapter by its edge and do not touch any component or printed circuit boards, 
especially for module device. 

3.


Make sure to keep the temperature and humidity of the installation location at an optimal 
level.   

4.


An excellent grounding system guarantees the stable operation of device, as well as to protect 
device from lightning, interference and electrostatic discharges. 

5.


If installed outdoors, the device may be damaged by lightning. We recommend that you install 
additional lightning protection devices if necessary, considering the conditions in your area. 

6.


Supply stable power to the device. Unstable power may cause the device to malfunction. The 
device supports PoE power supply and is recommended if the device is installed near grid lines 
within less than 100 meters radius. 


Содержание AS220V2

Страница 1: ...AS220V2 2x2 Dual Band 802 11ac Wave 2 Indoor Access Point QSG...

Страница 2: ...ed Twisted Pair STP cabling It is the professional installer s responsibility to follow local country regulations including operation within legal frequency channels output power indoor cabling requir...

Страница 3: ...unting bracket onto the wall using the two screws included in the packaging into the screw plugs in the wall Slide the device onto the mounting bracket to finish the installation Ceiling Mount Optiona...

Страница 4: ...stem as far as possible 2 Protect components from electrostatic discharge Please wear an ESD wrist strap or handle the power adapter by its edge and do not touch any component or printed circuit board...

Страница 5: ...receive its IP address through DHCP Note Switching from DHCP to assign a static IP address or DNS and L2 discovery mode to the access point please refer to the user manual for more information https w...

Страница 6: ...P address 192 168 1 168 or any available address in the 192 168 1 x network except 192 168 1 1 Subnet mask 255 255 255 0 Leave the Default gateway and DNS server fields empty Step 4 Click OK to save y...

Страница 7: ...refer to the user manual for more information https www zcom com tw index downloads Mobile APP Z COM offers the App for bridge mode settings which is available from our website https www zcom com tw i...

Страница 8: ...in compliance with all directives that are applicable to it Note This device meets Max TX power limit per ETSI regulations Note This device is restricted to indoor use only when operating in the 5150...

Страница 9: ...uipment type AS220V2 is in compliance with Directive 2014 53 EU The full text of the EU declaration of conformity is available at the following internet address https www zcom com tw index downloads O...

Отзывы: