YOKOGAWA VZ20X Скачать руководство пользователя страница 25

2.4 PC Time Setting Method and Restrictions

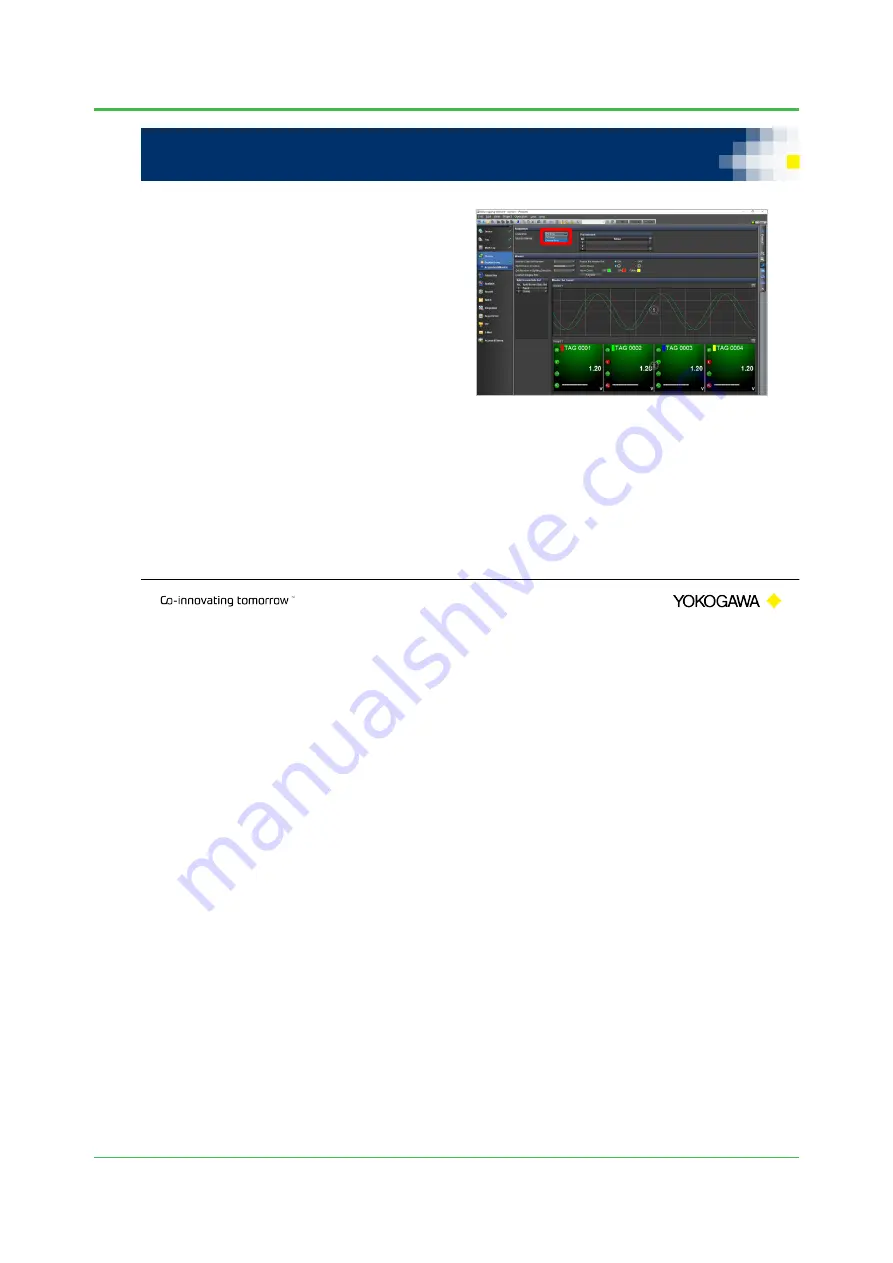
Set [PC time] for the data acquisition 

conditions.

Specify [PC time] for the [Data time] 

setting. The other steps are the same 

as those for the [Device time] setting.

Restrictions

· The fastest [Monitor Interval] setting is [100 Millisecond].
· The data time is the time that GA10 acquires the data.
· The measurement timing is not synchronized, even when the time 

synchronization setting has been configured for the VZ20X.

25

TI 77V01B01-11EN

Oct.18, 2021-00

Содержание VZ20X

Страница 1: ...g Remote I O Analog Sensing Unit VZ20X Host Device Connection Setup Procedure TI 77V01B01 11EN TI 77V01B01 11EN Copyright Oct 2021 1st Edition Oct 18 2021 The contents of this Technical Information ar...

Страница 2: ...ng Procedure 27 3 3 Setting the Time to VZ20X 29 3 4 Acquiring the Data 30 3 5 Converting the Acquired Measured Values 33 4 Modbus TCP Communication Monitoring the Data Using Function Code 03 35 4 1 O...

Страница 3: ...Yokogawa Electric s sales office or sales representative Under no circumstances may the contents of this manual in part or in whole be transcribed or copied without our permission Trademarks Our produ...

Страница 4: ...4 Modbus TCP Communication Monitoring the Data Using Function Code 03 1 Unpacking and Setting Up 1 1 Outline 1 2 Items to Prepare 1 3 Wiring Connection A to Connection D 1 4 Wiring the Inputs 1 5 Ins...

Страница 5: ...s TCP SMARTDAC GA10 PC e RT3 SMARTDAC GX MELSEC MELSEC is a product of Mitsubishi Electric Corporation 1 1 Outline Related Documents User s Manual Title No Model GA10 Data Logging Software User s Manu...

Страница 6: ...duct IM 77V01B01 11Z1 x1 After receiving the product and opening the package check the items described below If the wrong items have been delivered if items are missing or if there is a problem with t...

Страница 7: ...ized Programming Not required Not required Not required Depends on client Required 1 The number of connected units is restricted depending on the data acquisition interval the performance of the PC in...

Страница 8: ...g Connection A Power supply 24 V Power PC USB Type C to Type C Wiring Connection B Wiring Connection C Wiring Connection D For a permanent installation supply power from the 24 V power terminal Use th...

Страница 9: ...USB cable can not be used 1 3 Wiring Connection C USB Type A Type C Ethernet USB Type C For setting monitoring For data acquisition 24 V DC power supply DHCP server Power supply terminal layout PC Et...

Страница 10: ...2 Connection target VZ20X Daisy chain connection For setting monitoring power supply Note Type C to Type A USB cable can not be used 1 4 Wiring the Inputs Wiring 1 DC voltage Standard signal Wiring 2...

Страница 11: ...r temporary applications When performing transition wiring take care to prevent short circuits due to exposed sections of conductive parts including twin ferrule terminals and loose strands in twisted...

Страница 12: ...Start VZ Configurator 2 Click New connection 1 6 Configuring Settings via USB for Connection A Connection B 3 Click the Direct input tab 4 Set each item as indicated below Connection method USB USB p...

Страница 13: ...CP to OFF and change the IP address subnet mask and default gateway to fixed values Check with your network administrator before configuring the IP address subnet mask and default gateway settings 1 6...

Страница 14: ...displayed the display hide checkboxes for the channels are not selected Select the checkbox for each channel that you want to display Display hide checkboxes 1 7 Configuring Settings via Ethernet for...

Страница 15: ...3 Check that Obtain an IP address automatically is selected If it is not selected select it and click the OK button 1 7 Configuring Settings via Ethernet for Connection C Connection D 4 Start VZ Conf...

Страница 16: ...nection C Connection D 6 Click the Search tab 7 Select the VZ20X to connect in the list then click the Connect button 1 7 Configuring Settings via Ethernet for Connection C Connection D 8 Enter the us...

Страница 17: ...FF and change the IP address subnet mask and default gateway to fixed values Check with your network administrator before configuring the IP address subnet mask and default gateway settings 1 7 Config...

Страница 18: ...to the VZ20X reconnect VZ Configurator from a new connection and use Monitoring to perform a simple check Display hide checkboxes 1 8 Configuring the Network Settings for the PC 1 Check the network s...

Страница 19: ...he IP address subnet mask and default gateway and then click the OK button Example VZ20X settings IP address 192 168 1 1 Subnet mask 255 255 255 0 Default gateway 0 0 0 0 PC settings IP address 192 16...

Страница 20: ...Logging Software communicates with the VZ20X to acquire data for monitoring and recording on a PC Ethernet communication is used for the connection to the VZ20X VZ20X Exclusive communication protocol...

Страница 21: ...ply see section 2 4 For details on basic operations refer to the GA10 User s Manual 2 2 VZ20X Time Synchronization Settings 1 For Connection type in the VZ20X Time synchronization setting select eithe...

Страница 22: ...2 In the File menu select Create New Project to create a new project 2 3 Performing Monitoring and Recording with Detail Settings 4 Double click the project that was created and open the initial setti...

Страница 23: ...hronization if there is no VZ20X master unit of the daisy chain the VZ20X units specified as relay or terminal units of the daisy chain cannot be registered Check the VZ20X settings If you want to com...

Страница 24: ...setting is forcibly set to Device time Change the Monitor screen settings as necessary 2 3 Performing Monitoring and Recording with Detail Settings 11 You can start and stop monitoring or recording b...

Страница 25: ...ther steps are the same as those for the Device time setting Restrictions The fastest Monitor Interval setting is 100 Millisecond The data time is the time that GA10 acquires the data The measurement...

Страница 26: ...a 3 5 Converting the Acquired Measured Values 3 1 Outline Ethernet communication is used for the connection to the VZ20X Programming is required in order to use exclusive function code 70 71 for monit...

Страница 27: ...art communication command with FC 70 After that send the measured value acquisition communication command with FC 71 In the case of a 1 ms data acquisition interval send the first measured value acqui...

Страница 28: ...ition Function selection 0001 Acquisition of latest data acquisition value Function code 70 Data acquisition control Function selection 0002 Stop data acquisition Data acquisition status 00 normal Dat...

Страница 29: ...a acquisition completed normally 0x01 Data buffer incomplete 0x02 Data missing due to data overwrite Overwrite 3 3 Setting the Time to VZ20X Set the current time for the VZ20X Refer to the sample prog...

Страница 30: ...VZ20X settings before starting data monitoring See Appendix for details on preparing and running development environments for sample programs The sample program can be downloaded from our website aft...

Страница 31: ...ype in Time synchronization Data Acquisition Example 1 VZ20X Settings When Using PC with One VZ20X Unit 3 Select 1 ms for the Data acquisition interval setting Configure the other analog input setting...

Страница 32: ...mple program performs data acquisition only Description Details VZ20X connection type 1 unit Programming language on PC C e RT3 CPU F3RP71 F3RP70 Ubuntu image e RT3 IP address 192 168 1 128 Data Acqui...

Страница 33: ...ograms when programming 3 5 Converting the Acquired Measured Values The acquired measured values contain the data of 8 channels x 4 samples 4 ms of data if the sampling interval is 1 ms The values nee...

Страница 34: ...ing Acquired Strings to Readable Format When measured values are acquired with function code 71 they need to be converted to text strings that can be recognized according to the response described in...

Страница 35: ...e connection to the VZ20X This section describes the procedure for monitoring measured values with Modbus function code 03 Connection target devices Paperless recorder GX20 GA10 Programming with PC Py...

Страница 36: ...and Python development environments are required when using sample programs Sample programs are intentionally written to be easy to understand Perform error processing array creation and other tasks...

Страница 37: ...ring GX20 Settings 1 Modbus Client Function Settings Basic settings The menu locations vary depending on the setting method that is used GX GP unit MENU key Browse tab Setting Communication Ethernet s...

Страница 38: ...Function Settings 1 In Communication Ethernet settings select Basic settings 2 Specify the IP address subnet mask and default gateway and then click Save 4 2 2 Configuring GX20 Settings 1 Modbus Clie...

Страница 39: ...locations vary depending on the setting method that is used GX GP unit MENU key Browse tab Setting Communication Ethernet settings in Setting menu Modbus client settings Modbus server settings Web ap...

Страница 40: ...8 The menu locations vary depending on the setting method that is used GX GP unit MENU key Browse tab Setting Communication Ethernet settings in Setting menu Modbus client settings Command settings We...

Страница 41: ...7 R 40105 0068 Device status R The device status of the VZ20X can be read 40106 0069 CH1 measured value R Measured values can be read as 32 bit signed integers The range changes depending on the input...

Страница 42: ...and recording settings 4 2 2 Configuring GX20 Settings 4 Communication Channel Span Settings Display Channel Settings and Recording Settings 1 Select Communication channel settings Click On Off Span 2...

Страница 43: ...n click Save 2 Click Channel set on the Group settings screen 4 2 2 Configuring GX20 Settings 4 Communication Channel Span Settings Display Channel Settings and Recording Settings 1 Select Recording s...

Страница 44: ...s section describes how to monitor measured values from a VZ20X unit that uses the Modbus client function of GA10 To use the Modbus client function with GA10 create a definition file with the Modbus d...

Страница 45: ...Definition File Setting item Setting value Remarks Device Name VZ20X_8CH This is the name displayed in GA10 Port number 502 Command Delay 0 Register See the next page when setting this item Command Re...

Страница 46: ...ng on the input range 40107 006A R 40108 006B CH2 measured value R 40109 006C R 40110 006D CH3 measured value R 40111 006E R 40112 006F CH4 measured value R 40113 0070 R 40114 0071 CH5 measured value...

Страница 47: ...rmation then click OK to log in 4 3 3 Configuring GA10 Settings 3 Select File Create New Project to create a new project Enter the required information then click OK Select Simple Settings for Setting...

Страница 48: ...evice Type setting select the VZ20X_8CH Modbus definition file Enter 192 168 1 2 for Host Name IP Address select 100 Millisecond for Monitor Interval and then click the OK button 4 3 3 Configuring GA1...

Страница 49: ...ng of 100 ms is selected for Monitor Record 4 3 4 Starting Monitoring and Recording 11 You can start and stop monitoring or recording by clicking the icons displayed in the tab on the right side of th...

Страница 50: ...03 PC IP 192 168 1 1 Modbus client VZ20X IP 192 168 1 2 Modbus server PC FA M3 4 4 1 Configuring VZ20X Settings 1 Configure the Ethernet settings IP address 192 168 1 2 Subnet mask 255 255 255 0 Defau...

Страница 51: ...easured values can be read This setting is common to all channels The coordinated universal time or UTC can be read as a 64 bit unsigned integer 40102 0065 R 40103 0066 R 40104 0067 R 40105 0068 Devic...

Страница 52: ...Studio 2019 and install it on your Windows PC 2 Extract the downloaded sample program ZIP file 3 Double click the SLN file in the extracted file The solution file opens 4 Click Build in the menu bar t...

Страница 53: ...ystem folder 5 Type the command shown below in the Command Prompt window then press the Enter key Command cd C TEST 6 Enter the command shown below in the Command Prompt window to run the Python progr...

Страница 54: ...Blank Page...

Страница 55: ...ensing Unit VZ20X Host Device Connection Setup Procedure Manual number TI 77V01B01 11EN October 2021 1st Edition Newly published Written by Yokogawa Electric Corporation Published by Yokogawa Electric...

Отзывы: