SETUP
Enjoying the contents in another room
130
■
Connecting zone video monitors
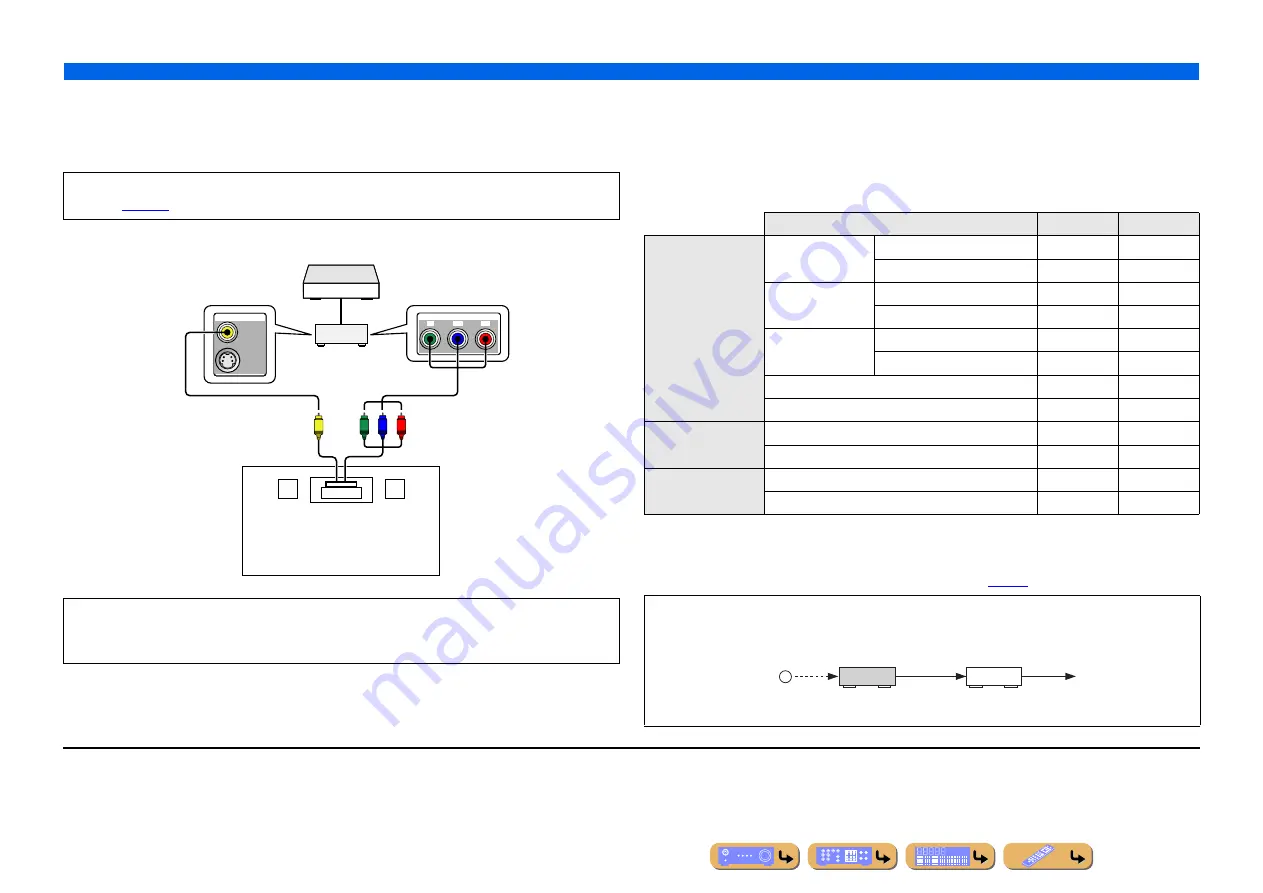
Connect the video monitor(s) in Zone2, Zone3 to MONITOR OUT/ZONE OUT jacks. If you connect
the multiple zone video monitors to these jacks, the video monitors play back the selected input source
for the assigned zone.
■
Features of the Zone2/Zone3 OSD
When “Monitor Out Assign” is set to “Zone2” or “Zone3,” the Zone2 or Zone3 OSD is displayed on
the TV monitor in Zone2 or Zone3.
The Zone2 or Zone3 OSD differ from the main OSD by available features. The available features for
Zone2 or Zone3 OSD are as follows.
✓
: available feature
■
Controlling this unit with the remote control in other rooms
This unit is equipped with two REMOTE IN and REMOTE OUT jacks. These jacks can be used to
control this unit and other components from Zone2 and Zone3 (
To assign the MONITOR OUT/ZONE OUT jacks to Zone2 or Zone3, configure “Monitor Out
Assign” (
When “Monitor Out Assign” is set to “Zone2” or “Zone3,” the content window and Option menu of
the input selected for the assigned zone can also be displayed on the TV monitor in the assigned
zone.
MON.OUT/ZONE OUT
MON.OUT/ZONE OUT
MONITOR OUT/ZONE OUT
Y
P
B
P
R
P
B
Y
P
R
V
Video in
e.g., Zone2
Component video in
Source component
This unit
Video monitor
or
Features
Main OSD
Zone OSD
ON SCREEN menu
Input menu
Selecting Input
✓
—
Configuring Input
✓
—
Sound Program
menu
Selecting Sound Program
✓
—
Configuring Sound Program
✓
—
Scene menu
Selecting Scene
✓
—
Configuring Scene
✓
—
Setup menu
✓
—
Information menu
✓
—
Content window
Now Playing view
✓
✓
Browse
view
✓
✓
Option menu
Tone Control, Repeat
J
1
, Shuffle
J
1
✓
✓
Other functions
✓
—
Some Yamaha models can be directly connected to the REMOTE jacks of this unit. These models may not require
an infrared signal emitter. Up to 6 Yamaha components can be connected as shown below.
REMOTE
IN
Infrared signal
receiver
This unit
Yamaha
component
REMOTE
OUT
IN
REMOTE
OUT
J
1 :
Only when selecting DOCK/PC/USB, Repeat and Shuffle can be displayed.


