14
4: Playing the Patterns & Their Variations (continued)
DETAIL
Any changes you make to the tempo of the preset patterns (00 — 49) are only temporary, and
the default value will be automatically restored as soon as you select a different pattern or mode.
Tempo settings you make for original combination and user patterns (pages 36 and 37), however, are
retained in memory even if the QR10 power is turned off and it is disconnected from the power supply
(i.e. the batteries are removed or the AC adaptor is unplugged).
DETAIL
When the MIDI Synchronization function described on page 44 is turned ON, a series of dashes
appears on the display in place of the tempo value and the tempo cannot be changed (when MIDI Syn-
chronization is ON the QR10’s playback tempo is controlled by an external MIDI clock signal).
Changing Chords
The QR10 features a sophisticated ABC (Auto Bass Chord) system that automatically re-harmonizes the accompaniment
sound to match chords you specify. This makes creating complete accompaniments fast and easy … just select a pattern, then
specify the required chord changes. Here’s how to specify chord changes.
1
Play a Pattern
Select and play one of the preset patterns, as described in the preceding section.
2
Enter a Chord
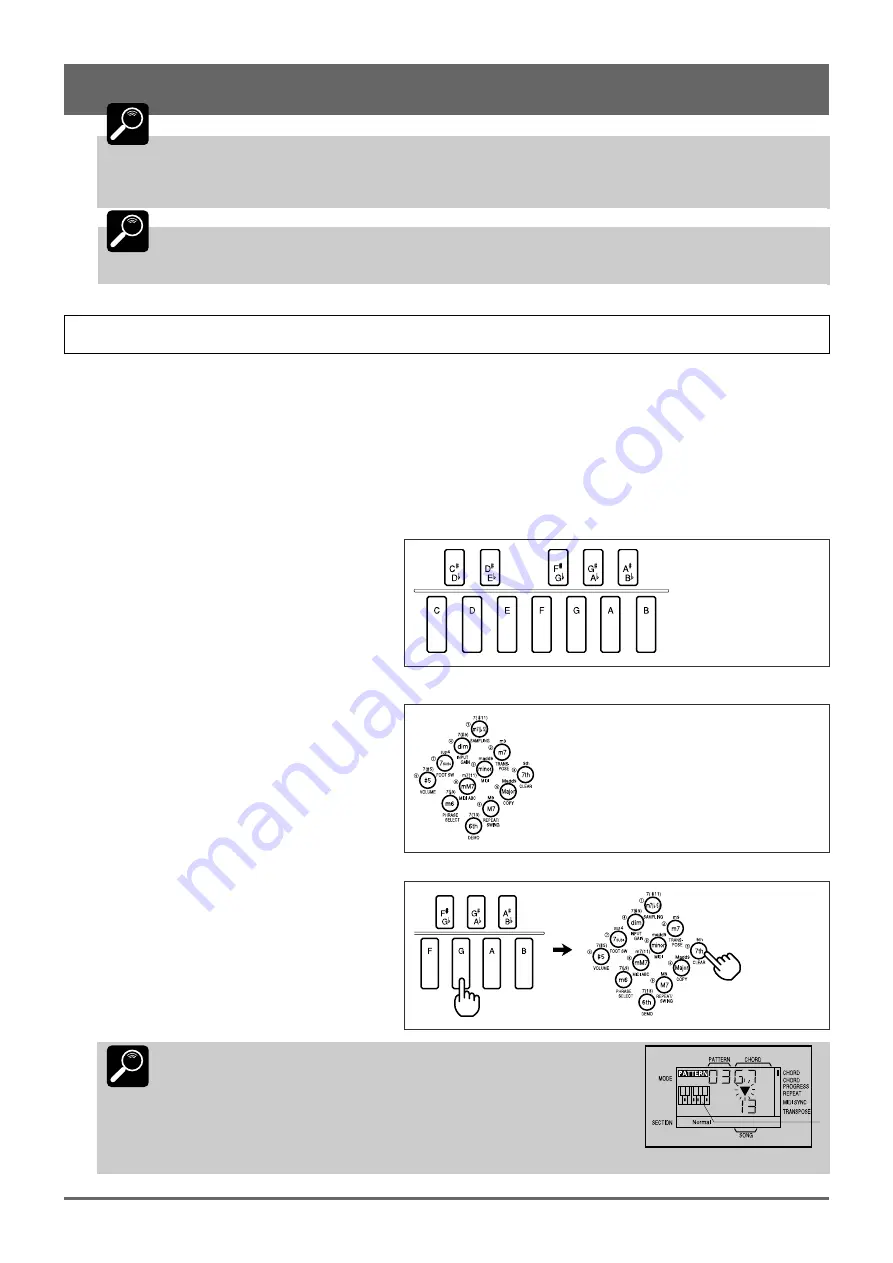
Note that the micro-keyboard is arranged in the
form of a small piano keyboard, and has the appro-
priate chord root names “C” through “B” marked on
the keys.
The chord type keys have chord types marked on
the keys themselves as well as above the keys.
To enter a chord, press the key corresponding to
the desired chord root together with the key corre-
sponding to the desired chord type. To enter a G7
chord, for example, simultaneously press the “G”
micro-keyboard key and the “7th” chord type key.
DETAIL
Note that the selected chord type is shown immediately below
“CHORD” on the display, and that the fingering for the chord is
show by dots on the display’s keyboard symbol.
Standard fingerings are shown on the display and these may, in some cases,
be different from the actual chord sound.
Fingering
Содержание QR10
Страница 1: ......
Страница 58: ...52 Appendix continued MIDI IMPLEMENTATION CHART ...
Страница 61: ...VN00000 JCADR0CMS00 0 ITP ...


