


4-11
1
2
3
4
5
6
7
8
9
10
11
RES
This indicates reserve. With the fuel cock lever in
this position, the fuel reserve is made available.
Turn the fuel cock lever to this position if you run
out of fuel while riding. When this occurs, refuel as
soon as possible and be sure to turn the fuel cock
lever back to “ON”!
EBU18840
Starter (choke)
Starting a cold engine requires a richer air-fuel mix-
ture, which is supplied by the starter (choke).
Move the starter (choke) in direction (a) to turn on
the starter (choke).
Move the starter (choke) in direction (b) to turn off
the starter (choke).
See the “Starting a cold engine” section on page 6-
1 for proper operation.
EBU18880
Seat
To remove the seat
Pull the seat lock lever upward and pull up the seat
at the rear.
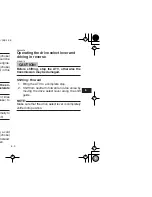
1. Arrow mark positioned over “RES”
OFF
ON
FUEL
RES
RES
1
1. Fully open
2. Half open
3. Closed
4. Starter (choke)
(b)
(a)
4
1
2
3
Содержание Grizzly YFM125GW
Страница 2: ......
Страница 8: ... 8 44 8 46 8 47 8 48 8 48 8 49 8 51 9 1 9 1 9 2 10 1 11 1 11 1 11 3 11 4 11 5 11 7 ...
Страница 13: ...1 5 1 2 3 4 5 6 7 8 9 10 11 d may h with ith ad ...
Страница 14: ...2 1 RNING AND SPECIFICATION LABELS 6 8 2 3 7 8 5 ...
Страница 17: ...3 1 1 2 3 4 5 6 7 8 9 10 11 DESCRIPTION EBU17700 Right view 5 6 1 Seat 2 Drive select lever 3 Headlight 1 2 3 ...
Страница 18: ...3 2 slightly from the figures shown in this manual ...
Страница 31: ...4 13 1 2 3 4 5 6 7 8 9 10 11 esult in ...
Страница 46: ...6 8 ry slow terrain lity and esult in owing which ty for nd se r pull brak ...
Страница 47: ...7 1 1 2 3 4 5 6 7 8 9 10 11 DING YOUR ATV ...
Страница 50: ...7 4 e and ident ssen t is to eeded g pas ...
Страница 55: ...7 9 1 2 3 4 5 6 7 8 9 10 11 uring op he rear ity for nd se or pull r brak r Own lling a ...
Страница 74: ...7 28 moving let wa YOUR N when inue to equate esult in ...
Страница 93: ...8 19 1 2 3 4 5 6 7 8 9 10 11 ving the 3 Disconnect the coupler shown 1 1 Panel 2 Quick fastener 1 2 2 1 ...
Страница 94: ...8 20 moving 5 Remove the air filter element 1 Air filter case cover 2 Screw 1 2 ...
Страница 102: ...8 28 ing the coupler 2 1 Panel 2 Quick fastener 1 2 2 1 ...
Страница 104: ...8 30 equaliz d If the cknuts he front ecomes 1 Brake equalizer 2 Cable joint a a a a 1 2 ...
Страница 124: ...8 50 ng or ere in l sys mes or s from ...
Страница 132: ...10 4 ...
Страница 134: ...11 2 o identi n the il abel in e need ha deal 1 Model label 1 ...
Страница 141: ...11 9 1 2 3 4 5 6 7 8 9 10 11 ...


