Assembly Guide
DTX400K/DTX430K/DTX450K Owner’s Manual
13
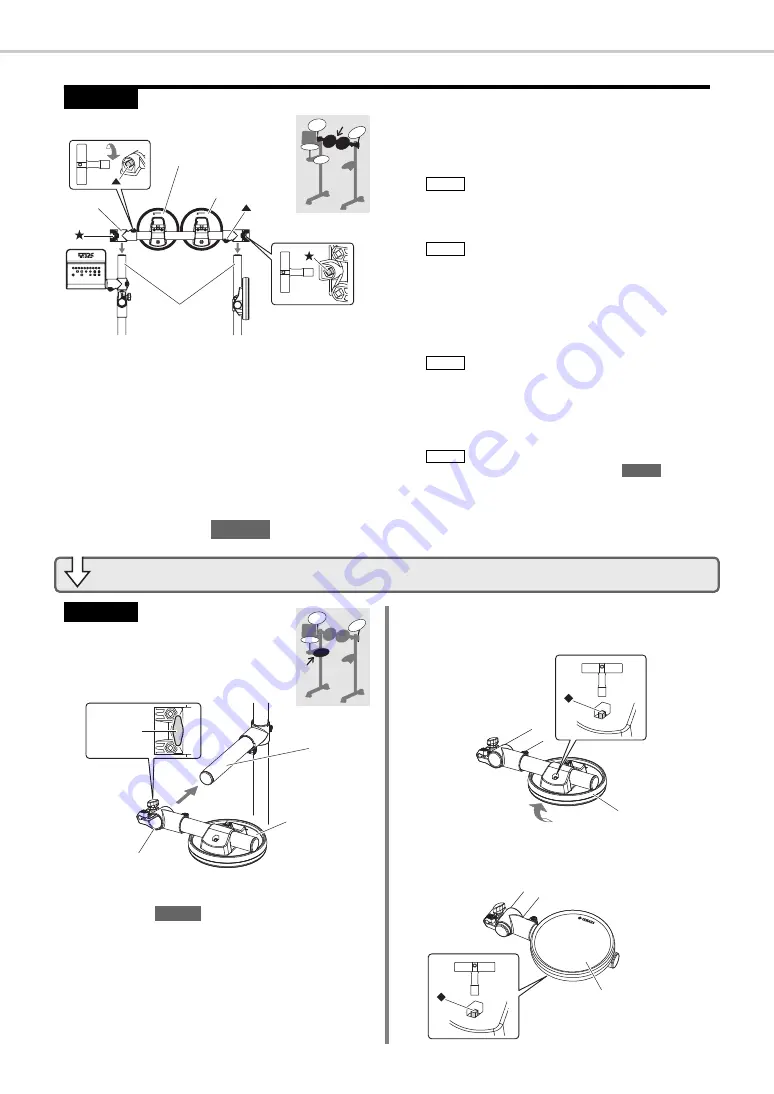
Attaching the first/second tom part
1.
Take the first/second tom part (
y
) from the package,
and using the tuning key, securely tighten the
s
key
bolts.
2.
Loosen the
key bolts.
3.
Slide the first/second tom part (
y
) onto the vertical
supports and move it down until the tops of the supports
are flush with the tops of the holes. Ensure that the tom
part is oriented as shown in the above figure at this time.
4.
Tighten the
key bolts to secure the first/second tom
part (
y
) in place.
The details of
are different for the DTX400K, DTX430K, and DTX450K.
Attaching the snare
pad
1.
Take the snare part (
i
) from the pack-
age and lightly tighten the wing bolt.
2.
Place the snare part (
i
) on the left arm, which was
assembled in
, and slide it back until the front
end of the arm is flush with the joint.
3.
Securely tighten the wing bolt.
4.
Loosen the
key bolt located on the back of the snare
pad (
i
), and rotate the pad 180°, turning it over.
5.
Tighten the
key bolt to secure the snare pad (
i
) in
place.
Step 6
y
Rear of first tom pad
Rear of second
tom pad
Vertical supports
This part has two
s
key bolts, one each on the left and right.
This part has two
key bolts, one each on the left and right.
Care should be taken to avoid assembling the first and sec-
ond tom pads upside-down or back-to-front.
The tom pads will be rotated into place in
.
NOTE
NOTE
NOTE
NOTE
Step 12
Step 7
For DTX400K Owners
Step 7
i
Wing bolt
Left arm
Joint
Step 4
i
180°
i
Содержание DTX400K
Страница 66: ...DTX400K DTX430K DTX450K Owner s Manual 66 ...


