1. Installing the Software
4. In-depth information
on DME Units
3. Advanced Setup
(via Ethernet cables)
2. Basic Setup
(via USB cable)
Appendix: Detailed
DME-N Network Driver Settings
Host setting from the MIDI page on the hardware's Utility Display
The MIDI Setup page from the hardware's Utility Display contains a Host
option, and if this is set to "USB-1" or "USB-2", MIDI data will also be
exchanged via USB. In certain cases, this can make it impossible to
connect successfully with DME Designer using a USB cable; accord-
ingly, these settings should be avoided.
Troubleshooting & Tips
Problem:
The DME unit does not operate correctly in response to
control from your computer via USB.
Possible cause #1 and corrective action:
DME Designer was launched
before connecting the USB cable and turning on the DME unit. Ensure
that the USB cable is connected and the DME unit is turned on before
launching DME Designer.
Possible cause #2 and corrective action:
The USB-MIDI Driver Thru
ON/OFF parameter is not set to “OFF”. Select [Start]
→
[Control Panel]
→
[Yamaha USB-MIDI Driver] and ensure that the [Thru ON/OFF]
parameter is set to “OFF”.
Possible cause #3 and corrective action:
The same USB ports
have been selected for DME Designer and other MIDI applications.
Change port settings so that DME Designer and the other MIDI
applications use different ports.
Possible cause #4 and corrective action:
The number of registered
MIDI devices exceeds the Windows limit. The Windows operating
system allows a maximum of 10 MIDI device drivers to be installed and
registered. In certain cases, connecting a device to a different USB port
can lead to it being recognized as a different device, thereby
“artificially” exceeding the limit. If MIDI does not function properly,
therefore, try uninstalling and then reinstalling the USB-MIDI driver.
Possible cause #5 and corrective action:
Your USB-MIDI driver
is not the most up-to-date version supported by DME. Download
and install the most up-to-date USB-MIDI driver from the Yamaha
website (http://www.yamahaproaudio.com/)
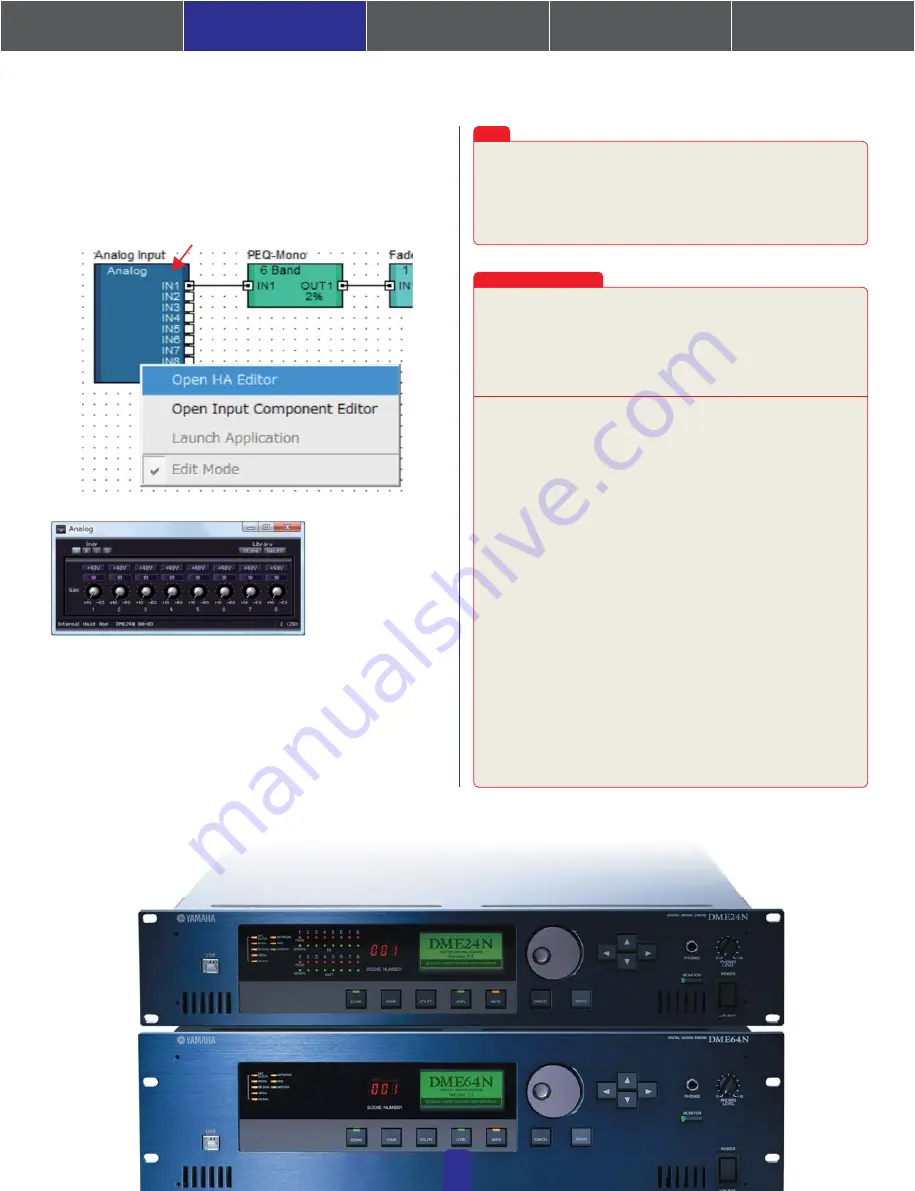
By default, the gain is set to +10 dBu (i.e., the lowest possible level). Adjust
the sensitivity to the correct level for the connected audio equipment.
The level displayed by [Gain] is the sensitivity level to be matched. As
the sensitivity of most professional audio equipment (using XLR
connectors) is +4 dBu, the level shown by [Gain] should be set to "4" in
such a case. When using input from microphones or other similar
sources, turn the dial clockwise to adjust the input volume to a suitable
level. Specifically, it is recommended that the level shown by the input
meter be peaking at around -18 dB.
Note
2-6.
Checking sound output
In the case of models with head amps, it will be necessary to configure
HA control before sound output from the system can be
checked.Right-click the [Analog Input] icon and select [Open HA Editor]
from the drop-down menu.
Right-click
07


