1. Installing the Software
4. In-depth information
on DME Units
3. Advanced Setup
(via Ethernet cables)
2. Basic Setup
(via USB cable)
Appendix: Detailed
DME-N Network Driver Settings
2-2.
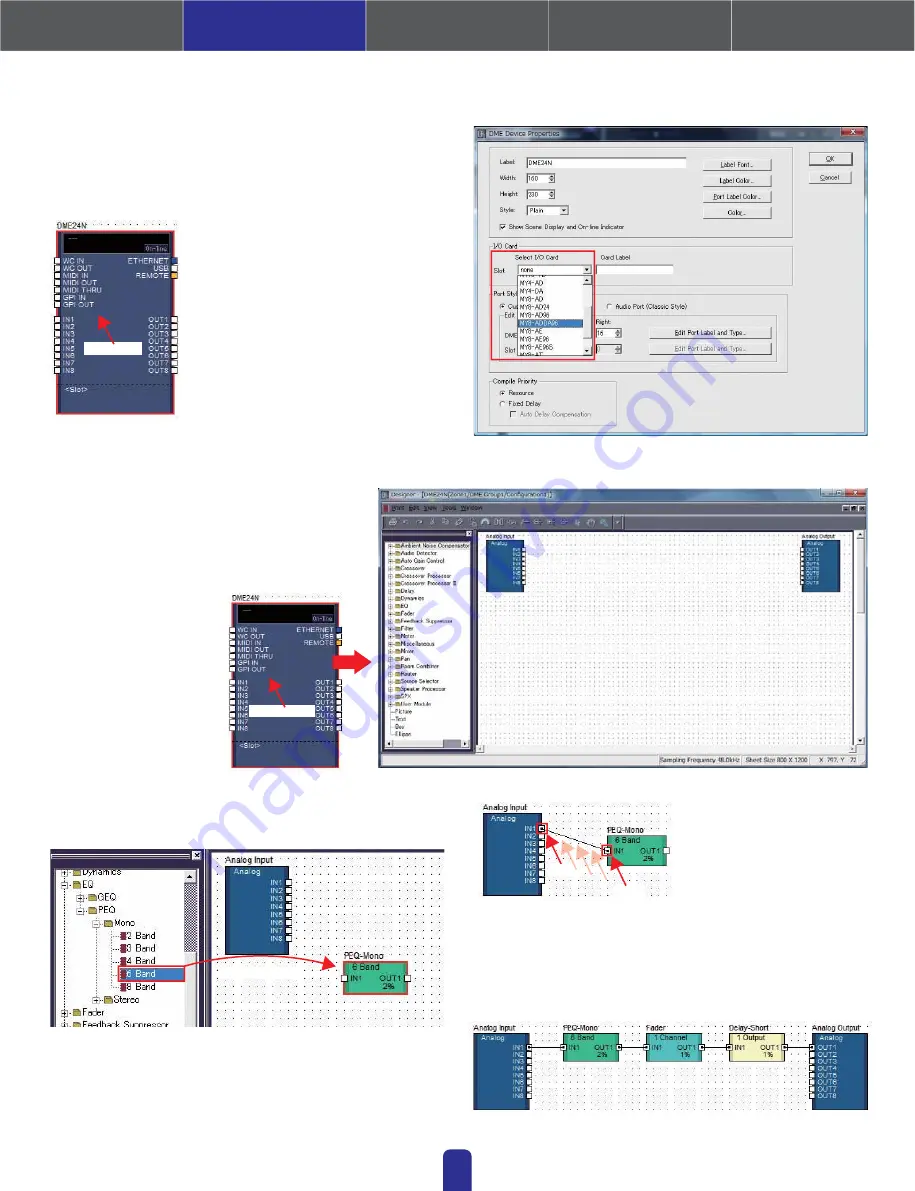
Setting up DME cards
The following settings are required only when expansion cards will be
used with the DME24N, or DME64N. If this is not the case, proceed to
Step (2-3) below.
With the expansion card
already inserted into the DME
unit, right-click on the
corresponding DME icon and
select [Properties…] from the
bottom of the menu displayed.
In the DME Device Properties
window that is displayed, select
the currently-inserted
expansion card as shown below
and click the [OK] button.
05
Right-click
Drag and drop the components that you require into the configuration
area from the list on the left-hand side.
To connect components, click the
required input or output port and
drag the end of the connecting
wire to the required destination.
When you have setup all connections in the same way as shown below,
its time to write the configuration to the DME unit.
* Components can also be freely dragged around the configuration area using the mouse.
To remove a component or an incorrectly connected wire, click the component or wire,
confirm that it turns red, and then press the [Delete] button on the computer keyboard.
2-3.
Configuring components
First of all, double-click the icon for your DME unit to
display the Configuration window.
Double-click
Drag and drop
Click
Click
k


