61U5H11
7-54
9
8
7
6
5
4
3
2
1
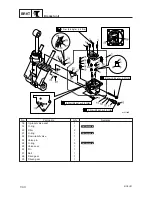
Tilt cylinder and trim cylinder
c
C
9
Make sure that the tilt ram is fully
extended when installing it.
9
Once installed, never push the tilt ram
down, otherwise fluid can spurt out.
11. Install the joint
0
and gear pump filter
q
into the gear pump housing.
12. Fill the gear pump housing with the rec-
ommended fluid to the correct level as
shown.
13. Remove all of the air bubble using a
syringe or suitable tool.
NOTE:
Turn the joint with a screwdriver to bleed the
gear pump.
14. Install a new O-ring
w
and the PTT motor
e
, and then tighten the bolts
r
to the
specified torque.
NOTE:
Align the armature shaft with the recess in the
joint.
15. Remove the reservoir cap, and then
check the fluid level in the reservoir.
NOTE:
If the fluid is at the correct level, the fluid
should overflow out of the filler hole when the
reservoir cap is removed.
16. If necessary, add sufficient fluid of the
recommended type until it overflows out
of the filler hole.
17. Install the reservoir cap, and then tighten
it to the specified torque.
18. Bleed the PTT unit.
19. Check the hydraulic pressure of the PTT
unit.
6G470650
9
2
6G470660
q
0
Trim and tilt wrench
2
:
90890-06587
Tilt cylinder end screw
9
:
127 N·m (12.7 kgf·m, 93.7 ft·lb)
Reservoir cap:
7 N·m (0.7 kgf·m, 5.2 ft·lb)
6G470670
6G470680
r
e
w
PTT motor mount bolt
r
:
5 N·m (0.5 kgf·m, 3.7 ft·lb)
61U5H11_07_1 06.2.13 1:24 PM Page 57
Содержание 115B
Страница 1: ...115B SERVICE MANUAL 61U 28197 5H 11 140B E115A E115A 115B 140B ...
Страница 4: ......
Страница 79: ...61U5H11 4 18 9 8 7 6 5 4 3 2 1 MEMO ...
Страница 136: ...POWR 5 55 61U5H11 Power unit MEMO ...
Страница 159: ...61U5H11 6 22 9 8 7 6 5 4 3 2 1 Shimming Shimming 6G46090E T3 M3 M4 M1 M2 T1 T2 F R P ...
Страница 255: ......
Страница 256: ...YAMAHA MOTOR CO LTD Printed in Japan Oct 2005 1 2 1 E_1 Printed on recycled paper E115A 115B 140B ...


