59
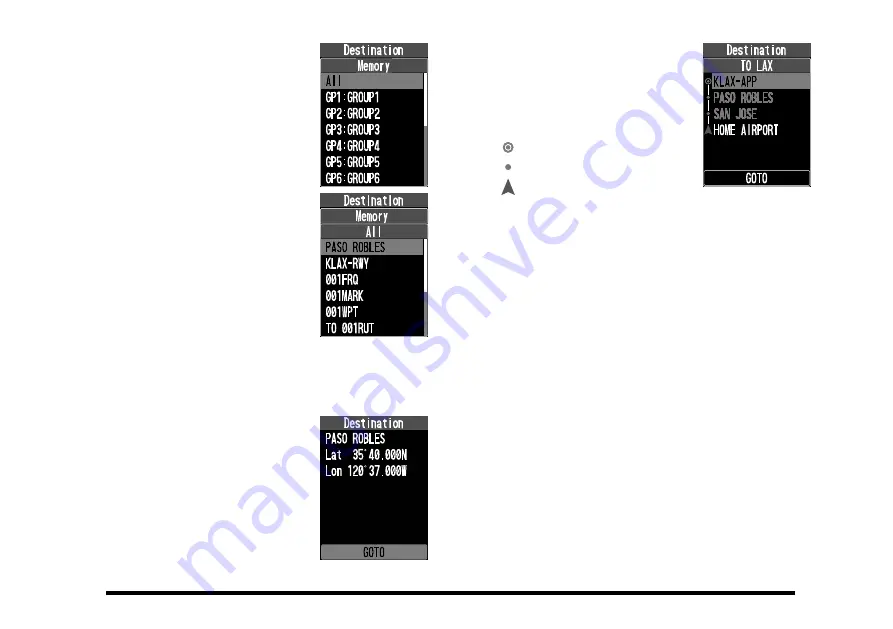
2. Press the [▲] / [▼] keys to
select the group in which
the desired memory is
saved, and then press the
[
ENT
] key.
All memory channels are
displayed in the “All” group.
FLAG
3. Press the [▲] / [▼] keys
to select waypoint or route
and then press the [
ENT
]
key.
•
Waypoints appear at the
top of the list, followed
by routes.
•
“TO” is displayed before
the name of the route
memory.
• Only the memory where the latitude / longitude
information is stored is displayed.
When a waypoint is selected
A confirmation screen for the
latitude and longitude of the
waypoint to be set as the
destination is displayed.
When a route is selected
The route confirmation screen
is displayed. Waypoints reg-
istered in route order are
displayed from bottom to top.
: Destination
: Waypoint
: Orign
Display the latitude and longitude of waypoints
on the route confirmation screen
If you select a route, press the [▲] / [▼] keys
to select a waypoint and press the [
ENT
] key to
display the latitude and longitude of that point.
Press the [
ENT
] key or the [
BACk
] key again to
return to the original screen.
4.
Follow the steps below to start navigation.
When a waypoint is selected:
Press the [
ENT
] key to display the compass screen
and start waypoint navigation from your current
location.
When a route is selected:
Press the [▲] / [▼] keys to select “
GOTO
” and
press the [
ENT
] key to display the compass screen
and start route navigation.


