DVR User’s Manual
27
•
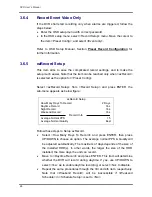
Select <Average Normal PPS> and press ENTER, then press UP/DOWN
to make a choice. The <How Many Days To Record> will be computed
automatically.
•
Select <Average Normal Quality> and press ENTER, then press
UP/DOWN to make a choice. The <How Many Days To Record> will be
computed automatically.
NOTE:
The current number of connected cameras will affect the
recording quality automatically calculated through the <ezRecord
Setup>. Therefore, once the number of connected cameras is
changed, the <ezRecord Setup> should be reset.
3.6.6
Data Lifetime
Data Lifetime indicates the duration that a video is saved and recallable in the
HDD. Only those video recorded within Data Lifetime can be displayed on the
screen and played back. The video exceeded Data Lifetime will be hidden
and cannot be retrieved for playback.
Press ENTER to select this item in Record Setup menu, and then use UP /
DOWN keys to set the data lifetime. The value ranges from <1> to <365>
days, or select <0> to disable the function.
NOTE
: To play back a video exceeding the data lifetime, please extend
the duration until the recording data / time of the video is included.
3.6.7
Pre-Alarm Recording
This item is used to set the recording duration of pre-alarm video. The
pre-alarm recording function aims to allow the user to view a complete event
video. What user can view is not only the video recorded after the alarm is
triggered, but also the video recorded few seconds before the alarm is
triggered.
When an event is triggered while normal recording is in effect, the unit will
start copying the pre-alarm and the post-alarm video to the event video. The
pre-alarm duration can be set from 0~30 seconds.
The quality of the pre-alarm video is the same as the quality setting for normal
record video; and the quality of the post-alarm video is the same as the
quality setting for event record video.
Содержание XPR8/16P
Страница 2: ...DVR User s Manual 1...


