


2.4 Setting Up the Port
21
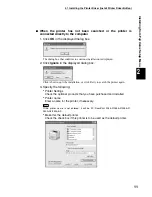
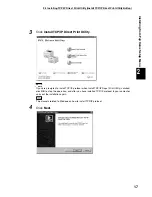
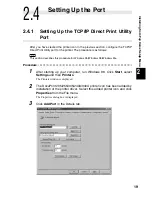
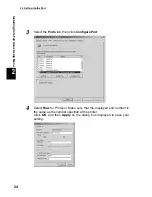
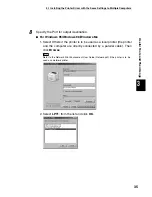
Installing from Fuji Xerox Setup Menu
2
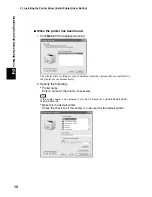
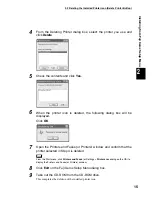
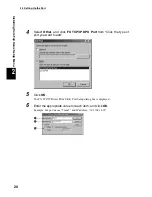
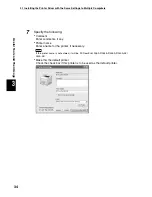
If you do not know the IP address of the printer, check with your network administrator, or print
out the System Settings list. Refer to the Setup and Quick Reference Guide.
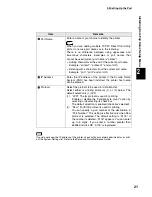
Item
Remarks
Port Name
Enter a name of your choice to identify the printer.
When you are adding multiple TCP/IP Direct Print Utility
ports, do not use port names as in the following.
There is no difference between using upper-case and
lower-case characters. Examples of port names that
cannot be used (current port name is “printer”):
●
Adding characters at the end of the current port name.
Example: “printer1”, “printer-01” and so forth.
●
Deleting some characters from the current port name.
Example: “prin”, “print” and so forth.
IP Address
Enter the IP address of the printer. If the Domain Name
System (DNS) has been installed, the printer host name
can be entered.
Protocol
Select the protocol to be used for data transfer.
Select either of printing protocols (1) or (2) below. The
default selection is (1) LPR.
(1)
“LPR”: The lpr protocol is used for printing.
Enable or disable the “Validate byte count” option by
selecting or deselecting its check box.
The default selection is enabled (check box selected).
(2)
“Raw”: Port9100 protocol is used for printing.
You can specify a port number at the destination in
“Port Number”. This setting is effective only when Raw
protocol is selected. The default setting is “9100”. If
the number is deleted, “9100” appears. You can enter
up to 5 digits. If you enter a number greater than
65536 and click OK, “9100” is registered.
Содержание DocuPrint 205
Страница 6: ......
Страница 7: ...Chapter 1Software Pack CD ROM 1 1 Using the Software Pack CD ROM 2...
Страница 11: ...1 1 Using the Software Pack CD ROM 5 Software Pack CD ROM 1...
Страница 12: ......
Страница 56: ......
Страница 58: ......


