background image

quick use guide

35


E

n

g

lis

h

Help

When using your device, detailed and timely help is available at your fingertips. 
You can access Help information and tips from a variety of sources.

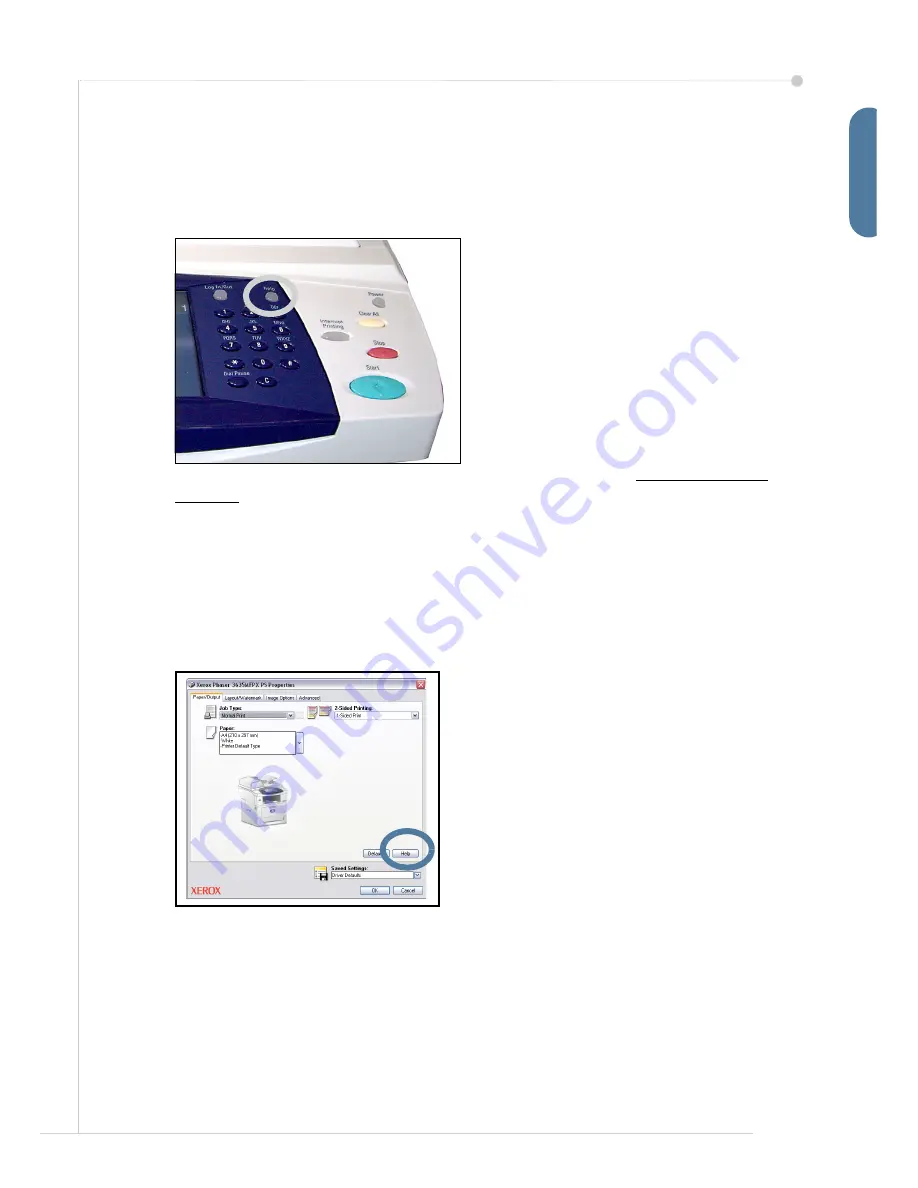
On the device

Press 

Help

 at any time to access the on-

line help screens. Messages, screen 
instructions and graphics provide 
additional information. 

Documentation

Most answers to your questions will be 
provided by the documentation that is 
supplied on CDs with the Phaser 
3635MFP. Alternatively you can access 
the documents from 

www.xerox.com/

support.

User Guide

 - contains instructions and information about all the features 

on the device.

System Administration Guide

 - provides detailed instructions and 

information about connecting your machine to the network and installing 
optional features.

On the Print Driver

Click 

Help

 on the printer driver screen or 

press [F1] on the PC keyboard for 
information on the displayed printer driver 
screen. 

Содержание 3635MFP - Phaser B/W Laser

Страница 1: ...Phaser 3635MFP Quick Use Guide Version 3 2 25 01 08...

Страница 2: ......

Страница 3: ...Phaser 3635MFP Quick Use Guide...

Страница 4: ......

Страница 5: ...r 3635MFP Install optional features Operate the Phaser 3635MFP Contents Install the Phaser 3635MFP 3 Switch On the Machine 4 Your Phaser 3635MFP 6 Connecting to the Network 10 Install Print Drivers 13...

Страница 6: ...8 by Xerox Corporation All rights reserved Copyright protection claimed includes all forms and matters of copyrighted material and information now allowed by statutory or judicial law or hereinafter g...

Страница 7: ...ddition you will have Power Cord User Documentation CD System Administration Documentation CD Print Driver CD Quick Use Guide this book print cartridge control panel labels Product Enablement Key and...

Страница 8: ...y outlet 3 Switch on the machine 4 Install the Product Enablement Key into the Card Reader Slot at the back of the machine 5 The Language Default screen will be displayed Select your chosen language a...

Страница 9: ...lations screen will be displayed This indicates that you have successfully completed the System Settings portion of the Xerox Installation Wizard Select Finish to continue NOTE In some locations a pop...

Страница 10: ...laceable The Serial Number is on the inside of the front cover 1 5 2 3 1 1 3 5 Control Panel Touch Screen and Numeric Keypad 4 2 Paper Trays Tray 1 is standard and Tray 2 is optional Output Tray Colle...

Страница 11: ...ct machine features Help Displays help messages for features and error messages Language Used to select the language shown on the display Power Use to reactivate the machine from power save mode Log I...

Страница 12: ...ded either into the Document Feeder or onto the Document Glass 1 Load documents to be copied face up in the input tray of the Document Feeder with the top of the document to the left or rear of the tr...

Страница 13: ...guide 9 English 3 open the Document Feeder and place single documents face down on the Document Glass aligned with the rear left corner NOTE Documents are only scanned once even when several copies ar...

Страница 14: ...server to automatically assign an IP address This is the factory default setting Static IP address Use this method to manually assign an IP address provided by the network administrator When the machi...

Страница 15: ...trator IP Address Gateway Address Subnet Mask DNS Server Address 1 Press the Log In Out button on the Control Panel enter the Administrator s passcode 1111 and select Enter 2 Press the Machine Status...

Страница 16: ...12 quick use guide 9 The static IP address is now set Press the Log In Out button and select Confirm to logout and close the Tools menu...

Страница 17: ...s are Install Print and Scan Drivers Installs both the print drivers and the scan drivers Install Print Driver Installs just the print drivers Install Scan Driver Installs just the scan drivers To ins...

Страница 18: ...ain Name address if applicable Create an E mail account which the machine will use as the default From address Test the E mail account by sending an E mail to the Xerox device account This task should...

Страница 19: ...required 8 Enter the Login Name and Password 9 Click Apply to confirm your settings 10 From the Properties menu Click Services E mail Settings Defaults 11 To amend the settings on the E mail Setup sc...

Страница 20: ...Fax The Fax Install Screen will appear 7 Select the required or nearest country location by selecting the entry in the Country Setup list and select Next 8 Select the required dialing method For a to...

Страница 21: ...ully installed a pop up message will tell you that the feature is configured and ask you to remove the Feature Enablement Key Network Accounting Network accounting provides the ability to manage usage...

Страница 22: ...the kit Refer to Installing Option Kits on page 17 Enable Server Fax 2 Press the Log In Out button to access the Tools pathway 3 Press the Machine Status button then select Tools User Interface Servic...

Страница 23: ...25 to 400 Original Type Define the original document as text text and photo or photo to optimise resolution settings Book Copying Copy bound documents Booklet Creation Automatically print document as...

Страница 24: ...20 quick use guide NOTE To confirm the Copy job press the Job Status button on the Control Panel to display the Job Status screen The queued copy job will be displayed in the queue...

Страница 25: ...copying colored paper or newspaper originals Creating booklets A sequential set of either 1 sided or 2 sided originals can be copied to create handy booklets The machine produces 2 sided prints autom...

Страница 26: ...river has various tabs that contain options and properties The Advanced tab contains various font and printing options Use the Paper Output tab to choose the type of media size and color and output ch...

Страница 27: ...d Settings down arrow Select Save As to save current settings or select a previously saved setting Toner Saver If you are printing draft documents you can reduce the toner dry ink used by using the To...

Страница 28: ...to several recipients This button provides access to the dial directory for individuals and groups Select the required features for your fax job from the following table NOTE The Fax Options tab provi...

Страница 29: ...choose from the available options under Resolution You can select Standard for most text documents Fine for line art and photos Set up an Address Book Use this feature to store destination names fax n...

Страница 30: ...t 4 If required modify the template settings from the options on the Network Scanning Advanced Settings Layout Adjustment and Filing Options tabs Network Scanning Advanced Settings Layout Adjustment F...

Страница 31: ...the Job Status screen The queued job will be displayed Resolution Sets the scan settings to suit how the scanned image will be used Update Templates Use a recently created or updated template before t...

Страница 32: ...list on the left hand side Name Format 4 To select the name and the format of the scanned document click Edit Enter a name for the scanned document and choose the format from PDF Multi Page TIFF TIFF...

Страница 33: ...ts can be added to the send list in this way 6 Select any setting appropriate for your document from either the E mail Advanced Settings Layout Adjustment or the E mail Options tabs 7 Press Start to s...

Страница 34: ...s a powerful multi function device with many digital functions integrated into one sleek system It is designed to support large workgroups in different production environments You can do more with les...

Страница 35: ...Address Book with recipients details like E mail address or fax numbers Address Numbers registered for the Address Book can also be used as speed dial codes If configured your machine is able to supp...

Страница 36: ...h as paper staples and customer replaceable units Units like the Print Cartridge and Staple Cartridge are customer replaceable meaning you can replace the consumable without having to call out a Xerox...

Страница 37: ...ON I Documents will not feed through the Document Feeder Ensure that all staples or paper clips have been removed from the originals Ensure the document feeder is not overloaded Max 50 docu ments Ensu...

Страница 38: ...vary depending on your machine model and configuration Document jams The display will indicate when a document jam has occurred Follow the instructions on the display and remove all the documents fro...

Страница 39: ...our questions will be provided by the documentation that is supplied on CDs with the Phaser 3635MFP Alternatively you can access the documents from www xerox com support User Guide contains instructio...

Страница 40: ...36 quick use guide On CentreWare Internet Services Click Index to view the contents of the Internet Services site Click Help to take you to the Xerox on line support web site...

Страница 41: ...on the sign to expand the menu 6 Select Disabled from the Banner Sheet options 7 Select Apply 8 Select OK Disable the Banner Sheet at the Printer Use the following instructions to disable the banner...

Страница 42: ...38 quick use guide...

Отзывы: