XE210C Hydraulic Excavator
Operating and Maintenance Manual
123
There are two
negative
(-)
grounded
12V batteries on the machine. If one battery of 24V system fails
but the other is still good, replace the failed battery with the battery of the same type. For example,
replace the failed and maintenance-free battery with new battery. The charging speeds of batteries in
different forms may be different, which may make one of these batteries fail due to overload.
Replacement of fuse
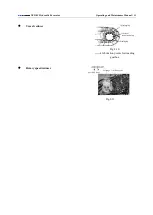
If the electric device doesn’t work, check the fuse at first. The fuse box is located behind the seat,
open the fuse box cover up, and the spare fuse is located under the cover.
Important: avoid the damages to electric device due to overload, and install the fuse with
correct amperage.
24
Schematic of fuse box layout
Schematic
Code
Name
Rated Current
Schematic
Code
Name
Rated Current
F4
Horn
10A
F5
Headlamp/ arm lamp switch
10A
F12
Radio
10A
F9
Wiper and washer
10A
F14
Controller
5A
F13
Excitation/Preheating
Protection
10A
F16
Safety Handle
5A
F15
Monitor
10A
F19
Air-conditioner
Controller
10A
F18
Traction and booster
10A
F23
Rotary Brake
5A
F20
Traction and booster ring
10A
F17
Pump Controller
5A
Spare Fuse
10A
Spare Fuse
10A
Spare Fuse
20A
F1
Shutdown of engine
10A
F3
Key switch
20A
F7
Indoor lamp
5A
F6
Arm lamp and working lamp
20A
F8
Air-conditioner
compressor
20A
F22
Controller 2
5A
F11
Cigar lighter
20A
F10
Pump
30A
Fuse box cap
Fuse box
Horn 10A
Headlamp/ arm lamp
switch 10A
Radio 10A
Controller 5A
Safety handle 5A
Air conditioner
controller 10A
Feed pump controller
5A
Spare fuse 10A
Spare fuse 10A
Shutdown of engine
10A
Indoor lamp 5A
Air conditioner
compressor 20A
Cigar lighter 10A
Wiper and washer 10A
Excitation/Preheating
Protection 10A
Monitor 10A
Traction and booster
10A
Traveling booster ring
10A
Spare fuse 10A
Spare Fuse 20A
Key switch 20A
Working lamp/arm
lamp 20A
Controller 5A
Feeding pump 30A


