Lawn Mowing Robot
EN
13
7.2 Burying the Boundary Wire
If you are planning to bury the Boundary Wire then it should be noted that when entering its Charging Base for the first time,
your Landroid
®
may find problems with the way you have laid the wire. It is recommended to first peg down the Boundary
Wire to the lawn so it is easy to make adjustments if necessary. This will allow the Landroid
®
to become adjusted to its new
environment and ensures it will successfully work with the Charging Base before the Boundary Wire is buried.
When you have completed installing the boundary wire, it is recommended that you ask Landroid
®
to follow the boundary
wire by pressing and
.
Whilst observing Landroid
®
locating the charging station you can then make alterations to the boundary wire route to ensure
trouble free tracking of the boundary wire by Landroid
®
when locating the charging station.
7.3 Joining the boundary wire
If you want to extend and splice the boundary wire, use a connector. The connector is waterproof and provides optimal
connection.
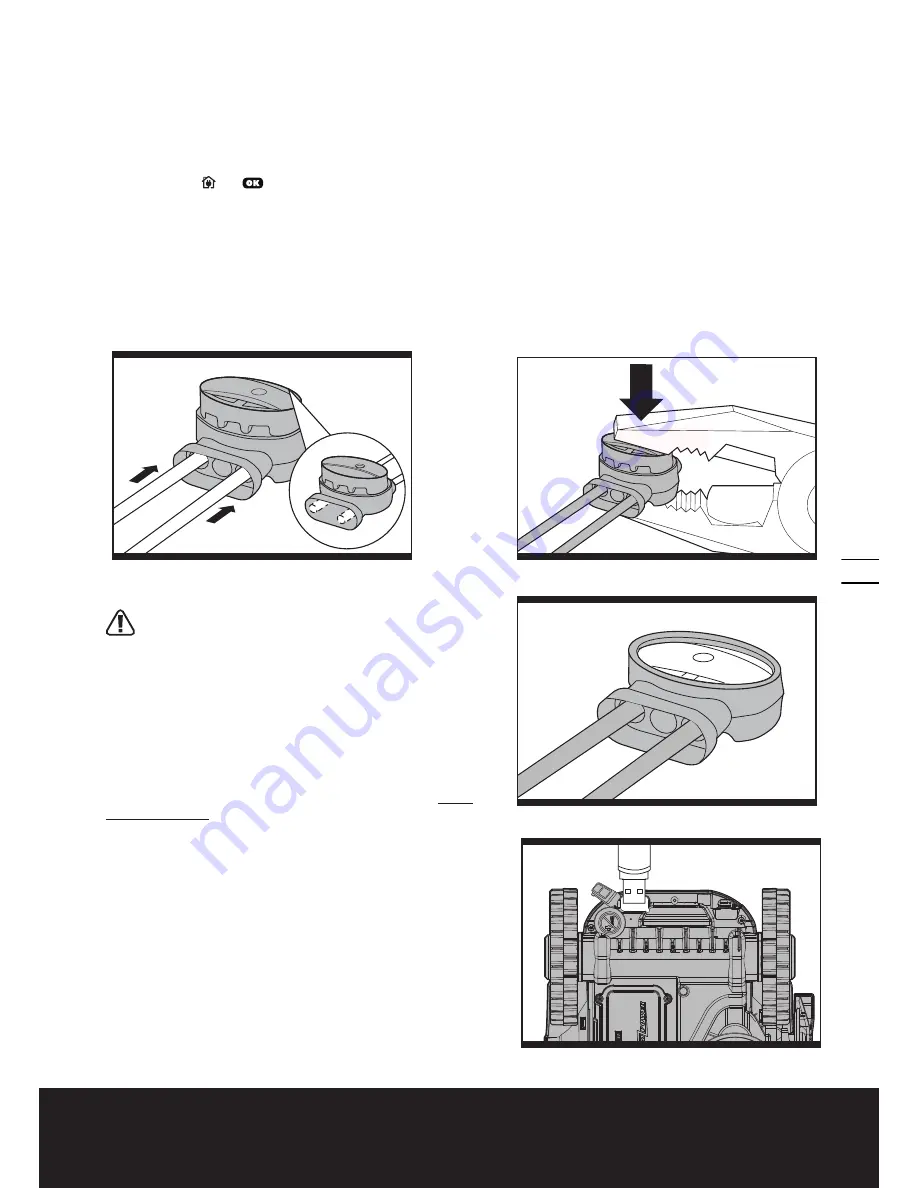
Insert both wire ends in any two of the three holes of the connector. Insert the wires fully until both wire ends are visible
on the other side of the connector. (See Fig. J1) Press the connector together by using a gripper. (See Fig. J2, J3)
WARNING!
It is not recommended to simply splice the
boundary wire with insulating tape or use a screw terminal
block for connection. A broken circuit may occur after a period of time
as soil moisture can oxidize the wire.
8. Software update
The software can be updated when new versions become available.
The latest software can be downloaded from our website www.
worxlandroid.com. There are two methods to update software.
Method 1:
Update via USB. See below for download and installation
instructions:
(1) Locate the latest software version at: www.worxlandroid.com.
Save the file to an empty FAT32 formatted USB (flash drive).
Delete any other files on the drive and check the format. If the
drive is not formatted in FAT32, please reformat the drive.
NOTE:
the software update is downloaded as a zipped file. You
will need to unzip or extract it before proceeding.
(2) Place Landroid
®
on a secure and level surface. Turn the Main
Switch to the “O” position to turn off your Landroid
®
.
(3) Lift the rear of the Landroid
®
to access the underside.
(4) Open the protective rubber cover under the Landroid
®
to access
the USB port.
(5) Insert the USB drive (flash drive) in the port. (See Fig. K)
(6) Place the Landroid
®
on the ground again.
J1
J2
J3
K


