


14
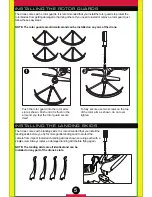
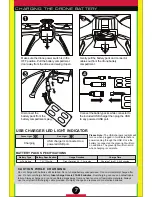
REPLACING THE ROTORS
The rotors can be damaged during a collision.
The drone comes with 4 spare rotors. Please
replace damaged rotors immediately.
The drone comes with 2 A rotors and 2 B rotors.
The A and B rotors must be installed on specific
locations on the drone for it to fly properly. Check
each rotor to see if it’s labeled either A or B. Use
the illustration above to install them in the correct
location.
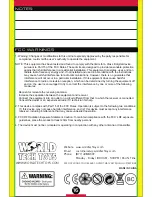
FRONT
BACK
A
B
B
A
POST FLIGHT
After you are done flying the drone make sure the battery pack is disconnected and the transmitter
power is turned off. If you are not going to use the drone for an extended period of time, please
remove the AA batteries from the transmitter to prevent them from draining or leaking.
Use the included screwdriver to
unscrew and remove the screw on the
rotor.
Remove the damaged rotor by lifting
upward. Be sure not to misplace the
screw.
Place the correct A or B rotor on top of
the peg.
Replace the screw on the rotor.
Repeat the process for any other
damaged rotors.


