


13
SPECIAL FUNCTIONS CONTINUED
AUTO-RETURN (GPS)
Utilizing an internal Global Positioning System (GPS), the drone will remember
the approximate location it took off from and return to that spot and land. Press
the Auto-Return button or in app icon when you want the drone to return. The
transmitter will beep twice and the drone will fly in a straight line towards its take
off point and land.
If the drone is at an altitude lower than 50 feet it will ascend up to 50 feet and then
start its return. If the drone is higher than 50 feet it will immediately return.
If there are any potential obstacles
in the drone’s flight path and you
are not connected to the app, activate Easy Mode
before pressing the Auto-Return button so that you can
easily pilot the drone and avoid any hazards.
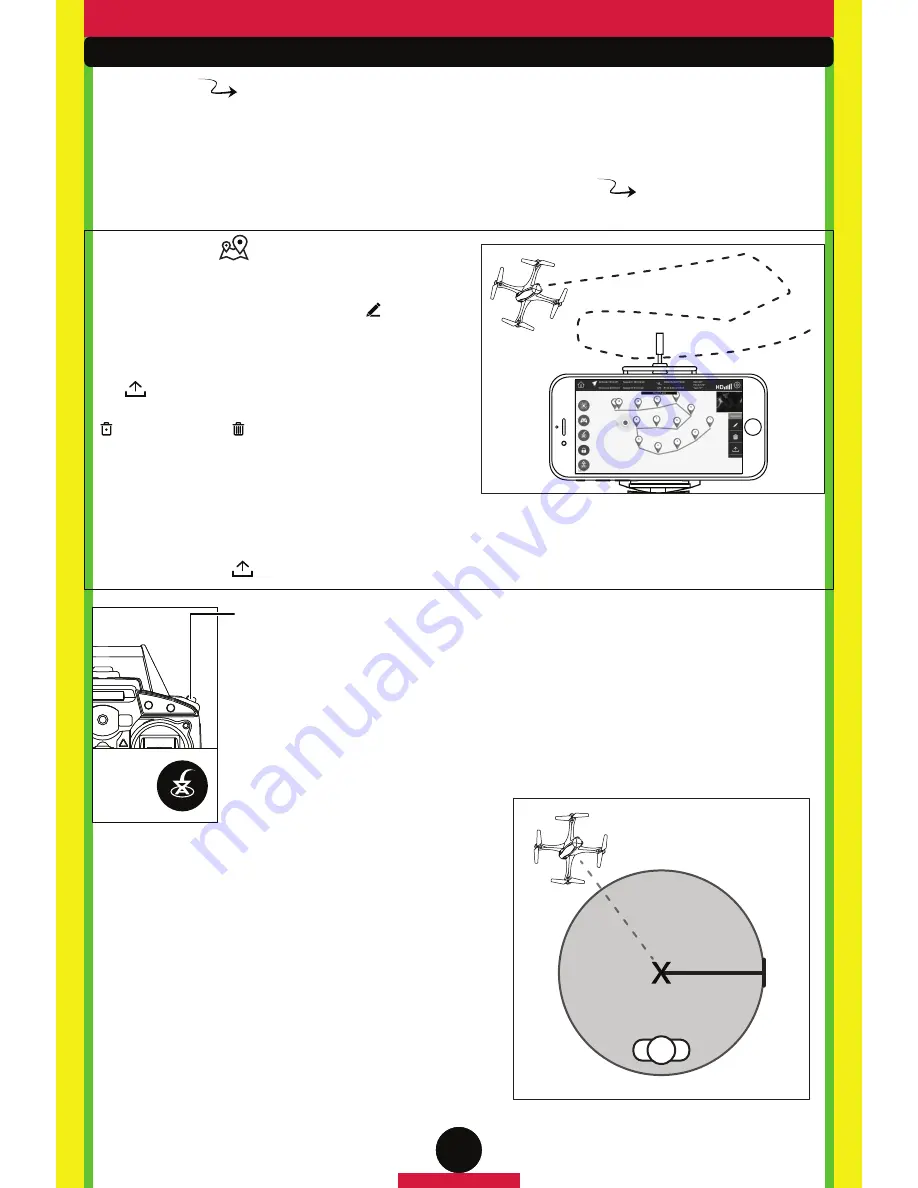
The drone’s GPS signal is approximate. When using
this feature it is recommended to take off in an open
area with at least a 25 foot radius to ensure a safe
landing area.
Only use this function when there is enough battery
power to finish the trip. If the power level is too low,
press the Auto-Land button and land the drone in its
current position.
FLIGHT AREA
LANDING AREA
TAKE OFF
POINT
25ft.
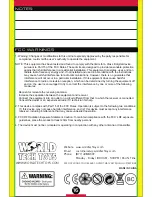
FLIGHT TRACE
Activate Flight Trace via the Venom FPV app after
the transmitter has been turned off. This mode is
under the Waypoint Mode. Select the “ ” icon to
draw a path on the touch screen that the drone will
follow using GPS telemetry. Way points will
automatically drop along the path you make. Press
the “ ” Icon to start the flight. You can delete single
waypoints on the path created by clicking the
“ ” icon. Use the “ ” icon to delete all the
waypoints on the current path to make a new path.
Only perform this action in an open area where there
are no potential obstacles within a 25 foot radius. Start with simple routes and experiment to see what
your drone can copy in the sky. Hard press any waypoint for over a second to edit the height. The drone
will attempt to reach the specified height when at that waypoint. The default height for all waypoints is
98 feet. Press the “ ” Icon to stop the flight and resume normal function.
FOLLOW ME
Activate Flight Trace via the Venom FPV app drone functions after the transmitter has been turned off.
The drone will autonomously hover near the smart phone with the Venom FPV app active and follow it if
moving. Always use this mode in an open area with no overhead wires or obstacles. The drone will
follow your approximate location based on the app's GPS location. If the GPS signal is weak the
function may not work as expected. Activate the mode by pressing the “ ” icon. Press the icon
again to stop and resume normal function.
IN
APP
ICON


