32
Assembly
MAN0160 (Rev. 8/19/2005)
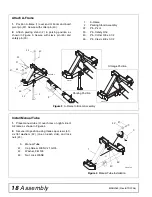
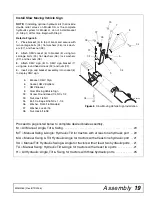
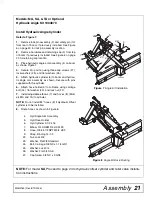
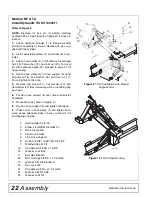
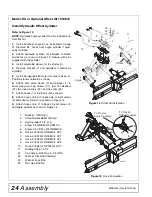
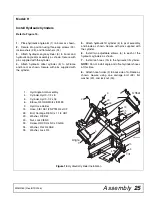
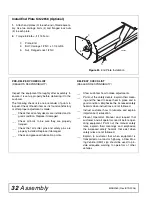
Install End Plate Kit 22658 (Optional)
1.
Attach end plates (3) to each end of blade assem-
bly. Use two carriage bolts (4) and flanged lock nuts
(5) to each plate.
2.
Torque to 85 lbs.-ft (115 N-m).
3.
Plate, End
4.
Bolt, Carriage 1/2 NC x 1-1/4 GR5
5.
Nut, Flanged Lock 1/2 NC
Figure 25
End Plate Installation
PRE-DELIVERY CHECK LIST
(DEALER’S RESPONSIBILITY)
DELIVERY CHECK LIST
(DEALER’S RESPONSIBILITY)
Inspect the equipment thoroughly after assembly to
ensure it is set up properly before delivering it to the
customer.
The following check lists are a reminder of points to
inspect. Check off each item as it is found satisfactory
or after proper adjustment is made.
___ Check that all safety decals are installed and in
good condition. Replace if damaged.
___ Check all bolts to be sure they are properly
torqued.
___ Check that all cotter pins and safety pins are
properly installed. Replace if damaged.
___ Check and grease all lubrication points.
___ Show customer how to make adjustments.
___ Point out the safety decals. Explain their mean-
ing and the need to keep them in place and in
good condition. Emphasize the increased safety
hazards when instructions are not followed.
___ Instruct customer how to lubricate and explain
importance of lubrication.
___ Present Operator's Manual and request that
customer and all operators read it before oper-
ating equipment. Point out the manual safety
rules, explain their meanings and emphasize
the increased safety hazards that exist when
safety rules are not followed.
___ Explain to customer that when equipment is
transported on a road or highway, a Slow Mov-
ing Vehicle (SMV) sign should be used to pro-
vide adequate warning to operators of other
vehicles.
3
4
5
CD5856

