Page
32
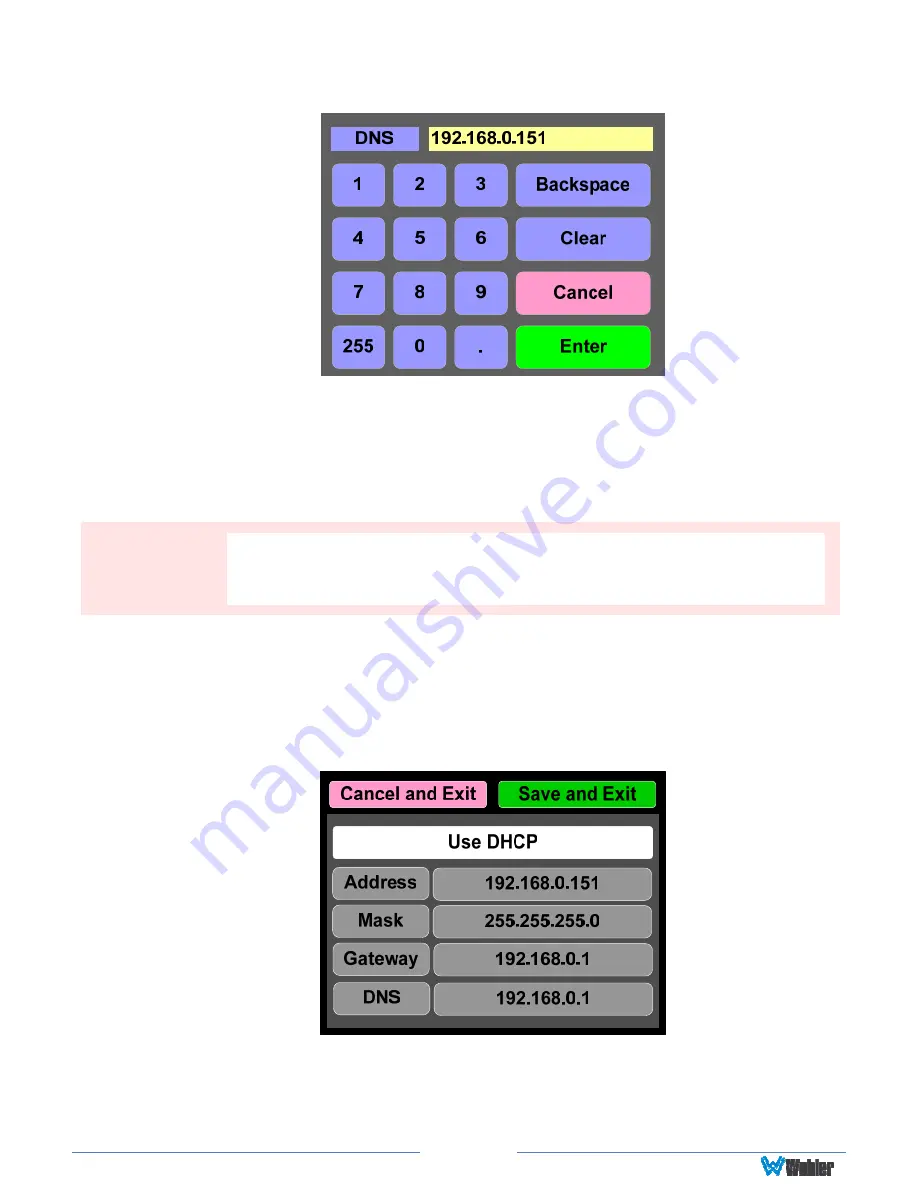
Figure 2-25: Network Configuration: Setting Change
2.
Touch the digits to be entered and then touch the
Enter
button. The
Clear
button may be touched to erase any mistyped digits.
3.
Now repeat steps 1 and 2 until you have replaced all of the necessary digits.
4.
To save the newly entered address, touch the
Enter
button. Touch the
Cancel
button to return to the previous screen without saving any changes.
To change from a static (fixed) to a dynamic (DHCP) network address, touch the
DHCP
button. The screen will change, as shown in Figure 2-26. To change back to
a static (fixed) network address, touch the
DHCP
button again. The colors of the
buttons will return to the ones depicted in Figure 2-24.
Figure 2-26: Network Settings: DHCP
1.
To complete the network addressing scheme change, touch the
Save
button.
This will save the changes you selected.
Important:
There is no confirmation for
Save
, so make sure you want to perform
this action before taking it. The system does not need to reboot before
it is once again ready for operation.


