16
IP65 Stainless B Series Panel PC User Manual
Chapter 2: Installation
Follow this quick installation procedure:
1. Mount your Panel PC according to your application requirements (VESA, Yoke).
2. Connect all the cables to the Panel PC.
3. Use waterproof caps to cover all not used connectors.
4. To ensure enclosure rating protection make sure the cables is firmly fixed and tightened.
Caution
Use waterproof cables to ensure the IP65 rating.
Attention
. Utilisez des câbles étanches pour garantir l'indice IP65.
Caution
When not in use, cover connector with waterproof cap.
Attention
Lorsqu'il n'est pas utilisé, couvrez le connecteur avec un capuchon
étanche.
2.1 Mounting
The IP65 Stainless B Series Panel PC devices come with different mounting options suitable
for most of the industrial and commercial applications.
2.1.1 VESA Mount
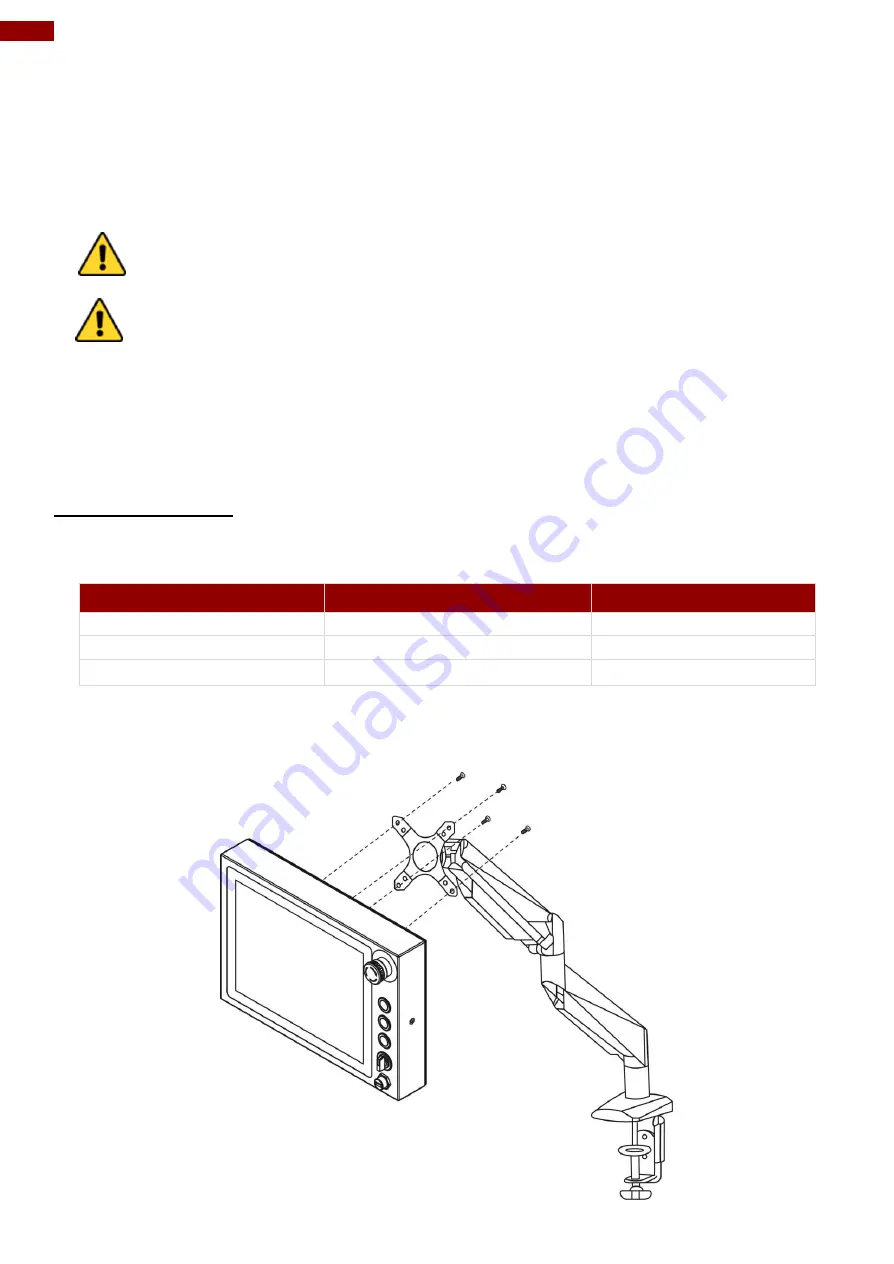
The Panel PC has VESA mount holes on the rear side. Follow instructions below to mount the
unit with VESA Mount bracket (not supplied by Winmate).
Size
VESA Plate Dimensions
Screw Hole Diameter
10.1”
75 x 75 mm
VESA M4x5 mm
15”, 19”
100 x 100 mm
VESA M4x5 mm
21.5”
200 x 100 mm
VESA M4x5 mm
Installation Instruction
1. Screw VESA bracket to the fixture (ex. swing arm) with four VESA screws.
2. Place the device on VESA bracket.


