15
OPM-108/B
REFILLING COOLANT
1. Remove radiator cap.
Slowly
add coolant to the filler
opening.
2. Loosen the air bleeder plug of the EGR cooler to
remove any air from the coolant.
3. Tighten the air bleeder plug when the coolant
overflows.
4. Firmly close the radiator cap.
5. Fill the reserve tank up to the specified level, close the
reserve tank cap.
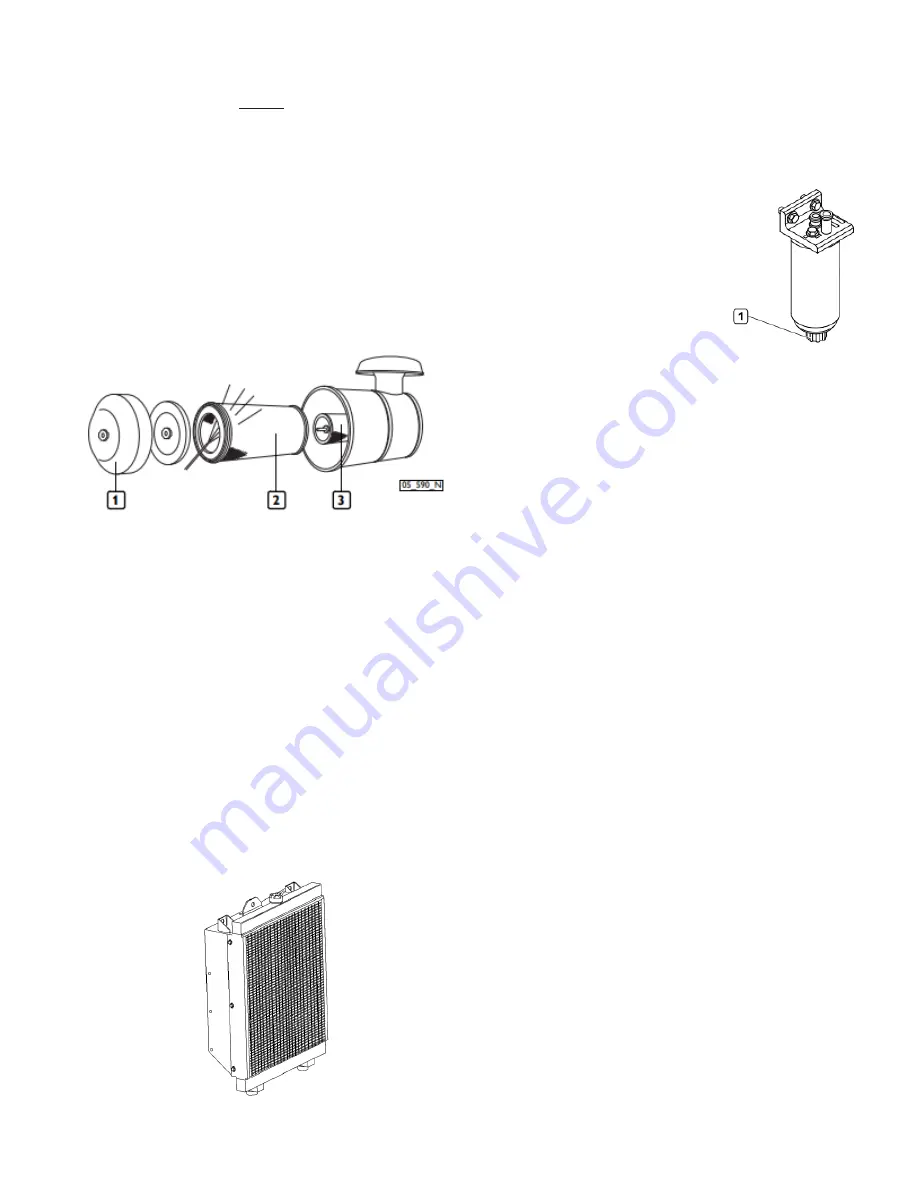
CHANGING AIR FILTER
Do NOT remove filter while engine is running.
1. Remove the air filter cover (1) after unscrewing the
locking
handle.
2. Remove the external cartridge (2), after unfastening
the second locking handle; during this operation, take
care to ensure that no dust get into the sleeve.
3. Replace the filter. Check that the gasket at its base is in
good
condition.
4. Reassemble by repeating the above operations in
reverse
order.
CLEANING RADIATOR
The surfaces of the radiator come into contact with the
outside air and can be subject to deposits and impurities.
Clean in accordance to the maintenance schedule with
compressed air or steam.
DRAINING WATER IN FUEL FILTER
WARNING: EQUIPMENT DAMAGE
Clean the exhaust valve prior to checking the pre-filter to
reduce the risk for system contamination.
Do NOT perform while the engine is running.
1. Place a container for collecting
liquids under the pre-filter.
2. Unscrew the plug located at the
bottom of the filter.
3. Drain the fluid until only fuel
comes out.
4. Fully hand-tighten the plug.
5. Dispose of liquid in accordance to local codes. DO NOT
dispose or allow liquid to seep into the ground or
sewer systems, doing so will cause environmental
damage.
CHANGING THE FUEL FILTER
1. Should the filter be fitted with a sensor to detect the
presence of water, remove the whole sensor from its
seat.
2. Remove the pre-filter by unscrewing it.
3. Check that the new filter has performance levels that
satisfy the needs of the engine (e.g. by comparing
them with the old one).
4. Damp the new filter seal with diesel or engine oil.
5. Hand screw the new filter into place until the seal
gasket touches the support, then lock by a further
3/4 of a turn.
6. (If equiped) Place the water presence sensor in
its seat, taking care to couple the threads correctly.
Loosen the bleeder screw on the pre-filter support
and activate the hand pump until the supply circuit is
full. Ensure that any fuel coming out is not dispersed
into the environment. Lock the bleeder screw tightly.
7. Start the engine and run it at minimum speed for a few
minutes to eliminate any residual air.
STORAGE
PREPARING THE ENGINE FOR A LONG PERIOD
OF INACTIVITY
In the case of a planned period of inactivity that lasts longer
than two months, to prevent the interior parts of the
engine and some components of the injection system from
oxidizing, prepare the engine as follows:
1. Drain the lubricant oil from the sump after heating the
engine.
2. Pour 30/M protective oil into the engine up to the
Содержание DR175F4
Страница 20: ...20 OPM 108 B ENGINE HARNESS SCHEMATIC DR175F4...
Страница 21: ...21 OPM 108 B ENGINE HARNESS SCHEMATIC DR250F4...


