13
WATER DRAINAGE INSTRUCTIONS
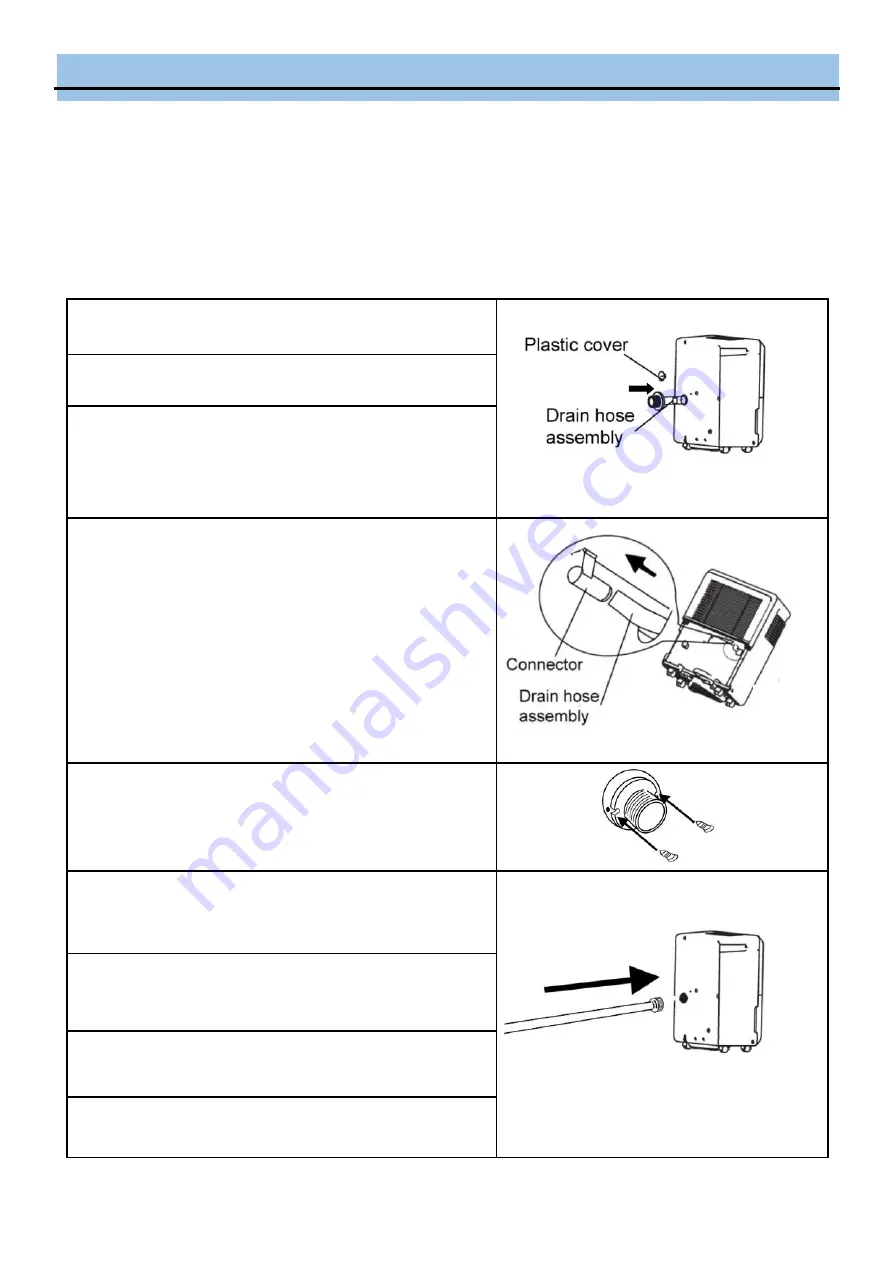
1. Remove the rubber drain cover from the continuous/
gravity drain outlet at the back of the unit.
2. Remove the drain bucket.
3. Insert the continuous/gravity drain hose assembly through
the continuous/gravity drain outlet (See Fig. 3).
4. From the front of the unit and with the drain bucket re-
moved, make sure the continuous/gravity drain hose is se-
curely inserted to the internal connector (See Fig. 4).
5. Install the two screws provided to the continuous/gravity
drain hose adapter from the back of the unit.
6. Attach the 20” continuous/gravity drain hose. Make sure
the hose is securely fastened to prevent leakage (See Fig.
5).
7. Direct the drain hose toward a drain or other suitable drain-
age outlet. Make sure that there are no distortions with the
hose that may stop the water flow.
8. Place the drain bucket back into the unit and make sure
that it is installed correctly.
9. Select the desired humidity setting and fan speed on the
unit for continuous draining to start.
Fig. 3
Fig. 4
Fig. 5
2. CONTINUOUS / GRAVITY DRAIN METHOD
Water can be automatically emptied into a floor drain by attaching the 20” continuous/gravity drain hose to the
continuous/gravity drain outlet. To use gravity to drain your portable dehumidifier, it must be installed on a level
surface or at least 12 inches above the ground, on a sturdy table or shelf unit. When using the function of continu-
ous/gravity drainage, your drain hose must be placed horizontally below the drainage hole. Avoid uneven ground
and folding the hose.


