


13
Installation and Operation
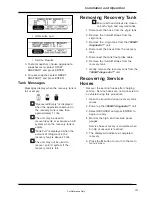
Tank Preparation
Follow this procedure to install a new
recovery tank in your
1090AT diagnostic™
unit. New recovery tanks are charged with
dry air which must be vented before using.
WARNING
• Wear safety goggles, user and
bystander. Everyday eyeglasses only
have impact resistant lenses, they are
NOT safety glasses.
• Cover the blue hand valve port with a
shop towel to help prevent debris from
becoming projectiles.
• Read, understand and follow
Safety
Information in the front of this manual.
1. Vent dry air by slowly opening blue hand
valve on the recovery tank.
2. Gently set the recovery tank in the
1090AT diagnostic™ cabinet with the
hand valves up, and the ports facing the
back of the unit.
3. Connect the float probe electrical
connector to the recovery tank.
4. Place the shorter pair of
Velcro® straps
securely around the recovery tank.
✓
✓
✓
✓
Use only the 50 pound capacity
recovery tank supplied with your
1090AT diagnostic™ unit or one
indicated by the warning label on
the back of the unit. Using any
other type or capacity tank could
create the danger of explosion and
potential for personal injury.
Power Up
Refer to this section to understand the
power up sequence of the
1090AT
diagnostic™ unit.
1. Connect the power cord to the proper
wall outlet with the correct voltage for the
unit. For additional information refer to
Specifications.
2. Turn power switch ON.
3. The
1090AT diagnostic™ unit will:
—
initialize, and
—
go to main menu screen.
✓
✓
✓
✓
In the unlikely event the LCD
screen is unreadable upon power
up, adjust LCD contrast. Refer to
Adjusting LCD Contrast.
For Reference Only


