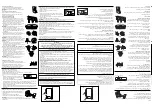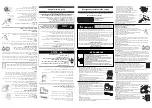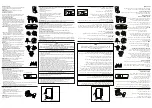
Your new refrigerator has an innovative water dispenser located over
the exterior of refrigerator compartment door. This dispenser will let you
have cool water available and reduce energy consumption due less
refrigerator door openings.
Water storage bin
The water storage bin is manually filled and is located at upper side of inner door of
refrigerator compartment. The water storage bin has a 3 lt. maximum capacity of water.
IMPORTANT:
·
Clean all system before use for first time. Fill water storage bin completely with
drinking water and press the water dispenser paddle with a medium size glass or
jar until you draw and discard 1 lt. The water you draw and discard cleans the system
and helps clear air from lines.
·
Allow several hour for the refrigerator to cool down and chill water before using the
water dispenser again.
·
Water dispenser system is TO USE WITH PURE WATER EXCLUSIVELY. Any different
kind of liquids (like flavored or soft drinks) could damage the system.
·
Whirlpool Mexico will not pay for damage resulting from misuse or use with different
liquids than purified water in the water dispenser system.
Filling the water storage bin
To fill the water storage bin, turn and remove the small cap
located in top of bin. Then fill with purified water with a jar or
container.
NOTE
: The small cap does not remove completely from the
bin for security reasons.
IMPORTANT:
Always fill the water storage tank when it is
properly installed in inner door.
How to use the water dispenser:
1.
Press a sturdy glass or jar against the dispenser paddle to start
dispensing.
2.
Release pressure on the paddle and be sure the water has
stopped dispensing before removing the glass or jar.
IMPORTANT
: Always dispense water holding the glass (or jar)
with the hand.
Do not try
to stand a glass alone in the dispenser
cavity.
NOTE:
Water may have a strange flavor if you do not use the
dispenser periodically.
3.
Levelling the refrigerator.
Detach grill by removing screws.
If your refrigerator has levelling screws only, follow
the steps shown in figure 1.
If your refrigerator has rollers with levelling screws,
follow the steps shown in figure 2.
To raise or lower the front of the refrigerator, turn
each screw in a clockwise or counterclockwise
direction (figure 1 or 2).
For greater levelling accuracy you should place a
spirit level on the upper surface of the refrigerator.
It is recommended to incline lightly back the
refrigerator in order to let the door close by itself.
4.
Before starting the refrigeration process allow the
refrigerator to rest from 2 to 3 hours in order to let
the gas and oil be settled.
Connecting your refrigerator
A 220-240 V~ , 50-60 Hz, 15 or 20 A fused and properly
grounded electrical supply is required.
Before connecting the new refrigerator follow these steps:
1.
Remove all packing material.
2.
Install your refrigerator under the following conditions:
Allow 7,5 cm (3 inches) between overhead cabinets and
refrigerator top.
Allow at least 5 cm (2 inches) between the refrigerator
condenser on the back and the wall.
Allow 1,25 cm (1/2") on each side of the refrigerator for
ease of installation.
If the hinge side of the refrigerator is to be against the
wall, you might want to leave extra space so the door can
be opened wider.
Important safety instructions
Before using your refrigerator
Do not use the refrigerator in an area where the room temperature will fall below
13°C (55° F).
Keep the refrigerator out of the weather.
Connect the refrigerator only to the proper kind of outlet, with
the correct electrical supply and grounding.
Do not load the refrigerator with food before it has time to get
properly cold.
Use the refrigerator only for the uses described in this manual.
Properly maintain the refrigerator.
Be sure the refrigerator is not used by anyone unable to operate it properly.
The refrigerator is only for domestic use.
M
A
N
U
A
Use and Care Guide
This guide contains useful information, read it carefully
This use and care guide apply for the following models:
EWT8002Q, EWT8002A, EWT8503A
Nominal Technical Specifications
Nominal Current
Frecuency
Voltage
2,0 A
50 - 60 Hz
220 - 240 V ~
Made by Industrias Acros Whirlpool S.A. de C.V.
Antigua carretera a Roma km 9
Col. Milagro Apodaca, N.L.
México, C.P. 66634
Phone (01-81) 83 29 21 00
How to install the refrigerator
Warning - this appliance must be earthed
Plug type 1 (some models)
Fuse replacement
If the amins lead of this appliance is fitted with a BS 1363A 13 amp fused plug, to change
a fuse in this type of plug use an A.S.T.A. aproved fuse to BS
1363A type and proceede as follows:
1. Remove fuse cover (A) and fuse (B).
2. Fit replacement 13 A fuse into fuse cover.
3. Refit both into plug.
Important:
The fuse cover must be fitted when changing a fuse and if the
fuse cover is lost the plug must not be used until a correct replacement is fitted.
Correct replacement are identified by the color insert or the color embossed in words on
the base of the plug.
Replacement fuse covers are available from your local electrical store.
Plug type 2 (some models)
A 220-240 V~, 50-60 Hz, and grounded (earthed) electrical supply
is required.
It is recommended that a separate circuit serving only your
refrigerator be provided. Use an outlet that cannot be turned off
by a switch. Do not use an extension cord.
Socket outlet
If the fitted plug is not suitable for your socket outlet, please contact your dealer for further
instruction. please do not attempt to change plug by yourself. The procedure needs to be
carried out by qualified technician in compliance with the manufactures instructions and
current standard safety regulations.
NOTE:
Before performing any type of installation, cleaning, or removing a light bulb, turn
the control, (Thermostat, Refrigerator or Freezer Control depending on the model) to OFF
and then disconnect the refrigerator from the electrical source, When you are finished,
reconnect the refrigerator to the electrical source and reset the control (Thermostat,
Refrigerator or Freezer Control depending on the model) to the desired setting.
Water dispenser (some models)
Grill
WARNING
!
To reduce the risk of fire, electrical
shock, or injury when using your
refrigerator, follow these basic
precautions:
Read all instructions before using the refrigerator.
Child entrapment and suffocation are not problems of the past. Junked or
abandoned refrigerators are still dangerous ... even if they will "just sit in the
garage a few days".
If you are getting rid of your old refrigerator, do it safely.
Never allow children to operate, play with, or crawl inside the refrigerator.
Never clean refrigerator parts with flammable fluids. The fumes can create a fire
hazard or explosion.
We suggest to remove the door or thigh it with a resistant cord.
If supply cord is damaged must be replaced by our service department or a
qualified person to avoid hazard.
FOR YOUR SAFETY
DO NOT STORE OR USE GASOLINE OR OTHER FLAMMABLE VAPORS
AND LIQUIDS IN THE VICINITY OF THIS OR ANY OTHER APPLIANCE. THE
FUMES CAN CREATE A FIRE HAZARD OR EXPLOSION.
-SAVE THESE INSTRUCTIONS-
WARNING
!
Electrical shock hazard
The refrigerator must be properly grounded.
Do not modify the electrical cord
Do not use an extension cord with this appliance, consult with
a qualify technician any doubts about the proper grounding of
this appliance.
If your wall outlet is not proper one have a qualify technician
install it.
Not complying with the above precautions may result in high
risk of injury and even death
Install in correct way
Figure 1.
Use a screwdriver to
adjust roller
Roller
Levelling
screw
Raise
Lower
Levellin
g screw
Lower
Raise
Figure 2.

