background image


030-300432 Rev. A 

30 December 

2004 


User Guide 

 
2. 

Windows ME

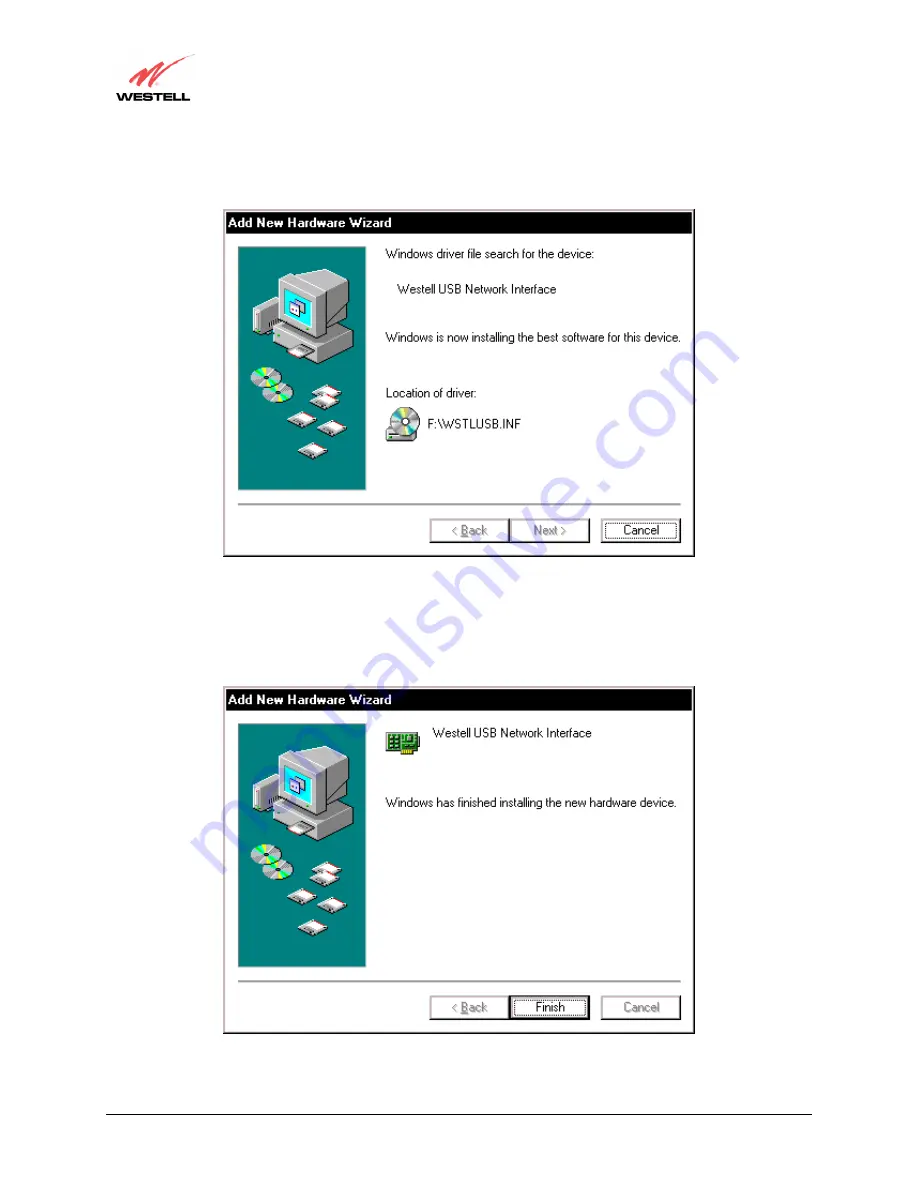
: Windows will display the location of the driver (Figure 18). Click 

Next.


Figure 18.  Windows ME 


3. 

Windows ME

: The window below confirms that the PC has finished loading the drivers (Figure 19). Click 

Finish.


Figure 19.  Windows ME 


Содержание ULTRALINE 7400

Страница 1: ...Copyright 2004 Westell Inc 030 300432 Rev A ULTRALINE MODELS 7400 7401 VERSALINK MODELS 328W10 328W11 USER GUIDE...

Страница 2: ...crofilters 17 6 4 Hardware Installations 18 7 INSTALLING THE USB DRIVERS Models 7400 328W10 23 7 1 CD ROM Installation 23 7 2 Installing the USB Drivers for Windows 98 SE 23 7 3 Installing the USB Dri...

Страница 3: ...ts 136 14 2 Adding Port Forwarding Ports 136 14 3 Port Forwarding Trigger Ports 137 14 4 Adding Local Trigger Ports 138 14 5 Static NAT 139 14 6 Enabling Static NAT 140 14 7 Disabling Static NAT 141 1...

Страница 4: ...aneous voice fax communications and high speed Internet access eliminating the need for dedicated phone lines for voice and data needs The Router supports a variety of networking interfaces such as wi...

Страница 5: ...which can provide 1 cm separation distance from the antenna to the body of the user or a nearby person Thin laptop computers may need special attention to maintain antenna spacing while operating Thi...

Страница 6: ...Canada label identifies certified equipment This certification means that the equipment meets certain telecommunications network protective operations and safety requirements as prescribed in the appr...

Страница 7: ...y to the requirement that the sum of the Ringer Equivalence Numbers of all the devices does not exceed five Users should ensure for their own protection that the electrical ground connections of the p...

Страница 8: ...requires an available Ethernet port with a 10 100 Base T Network Interface Card NIC installed WIRELESS IEEE 802 11g Models 328W10 328W11 Pentium or equivalent class machines Microsoft Windows 98 SE ME...

Страница 9: ...either direction ETHERNET E1 E2 E3 E4 OFF Modem power is OFF no cable or no powered device is connected to the associated port Solid Green USB link established Flashing Green Transmit or Receive Acti...

Страница 10: ...OFF no cable or no powered device is connected to the associated port Solid Green Good DSL sync Flashing Green DSL attempting to sync DSL OFF Modem power is OFF Solid Green Internet link established F...

Страница 11: ...AN activity is present traffic in either direction WIRELESS OFF Modem power is OFF or No Link Solid Green USB link established Flashing Green Transmit or Receive Activity USB OFF No USB link establish...

Страница 12: ...ng to sync DSL OFF Modem power is OFF Solid Green Internet link established Flashing Green IP connection established and IP Traffic is passing through device in either direction Note If the IP or PPP...

Страница 13: ...less only Model 328W10 Rear View Model 328W11 Rear View Ethernet Connectors E1 through E4 DSL Line Connector ON OFF Switch Power Connector Ethernet Connectors E1 through E4 Reset Button Wireless Anten...

Страница 14: ...to the PC ETHERNET 8 pin RJ 45 modular jack Connects the Ethernet device to the PC 15 VAC POWER Barrel connector Power source Wireless ANTENNA SMA connector and antenna Connects to wireless IEEE 802...

Страница 15: ...s the Ethernet device to the PC DC 12V POWER Barrel connector Power source Wireless ANTENNA SMA connector and antenna Connects to wireless IEEE 802 11b g g Model 328W11 SYMBOL NAME TYPE FUNCTION DSL L...

Страница 16: ...d 3 DSL Tip 4 DSL Ring USB Pin outs Models 7400 328W10 Pin Name Description Cable Color 1 VBUS Vcc 5 Vdc Red 2 D Data White 3 D Data Green 4 GND Ground Black Optional UPLINK E1 E2 E3 and E4 Ethernet P...

Страница 17: ...gh yellow USB Cable blue Models 7400 328W10 only RJ 11 Phone cable SMA Antenna Models 328W10 328W11 only Westell CD ROM containing User Guide in PDF format Quick Start Guide 6 3 Microfilters ADSL sign...

Страница 18: ...cord to the power connector marked 15 VAC on the rear panel of the Router Plug the other end of the power supply into a wall socket 2 Connect the DSL phone cable from the connector marked DSL on the...

Страница 19: ...ess network adapter and enter the SSID value The PC s wireless network adapter must be configured with the SSID in order to communicate with the Router before you begin the account setup and configura...

Страница 20: ...ock it into place 4 Connect the power supply cord to the power connector marked 15 VAC on the rear panel of the Router Plug the other end of the power supply into a wall socket 5 Connect the DSL phone...

Страница 21: ...he power supply into a wall socket 5 Connect the DSL phone cable from connector marked DSL on the rear panel of the Router to the DSL equipped telephone line jack on the wall IMPORTANT Do not use a DS...

Страница 22: ...power connector marked 15 VAC on the rear panel of the Router Plug the other end of the power supply into a wall socket 2 Connect the DSL phone cable from the jack marked DSL on the rear panel of the...

Страница 23: ...USB Driver for Windows ME Windows 2000 Installing the USB Driver for Windows 2000 Windows XP Installing the USB Driver for Windows XP 7 1 CD ROM Installation 1 Place the CD ROM that you received in t...

Страница 24: ...030 300432 Rev A 24 December 2004 User Guide Figure 5 Windows 98 SE 2 Windows 98 SE Select Search for the best driver for your device Recommended See Figure 6 Click Next Figure 6 Windows 98 SE...

Страница 25: ...ndows 98 SE Note If Figure 7 does not appear at this step and Figure 8 appears with the text USB Composite device C Windows Inf USB Inf do not continue Click Back to Step 3 and specify the location of...

Страница 26: ...9 The drive letter may vary Click Next Figure 9 Windows 98 SE 6 Windows 98 SE Remove the Westell CD from the CD ROM Drive Next insert the Windows operating system CD into the CD ROM Drive Figure 10 Cl...

Страница 27: ...n Figure 12 Windows 98 SE If the Operating System CD is not available or if Figure 12 pops up again you will have to manually specify the location of the files The required files may be stored on your...

Страница 28: ...k Finish Figure 14 Windows 98 SE 10 Windows 98 SE Click Yes to restart your computer Figure 15 Figure 15 Windows 98 SE Congratulations You have completed the software installation for the USB drivers...

Страница 29: ...s inserted in the appropriate drive before continuing this installation 1 Windows ME After you connect the Router to your PC the Found New Hardware window will appear Figure 16 After a brief delay the...

Страница 30: ...Guide 2 Windows ME Windows will display the location of the driver Figure 18 Click Next Figure 18 Windows ME 3 Windows ME The window below confirms that the PC has finished loading the drivers Figure...

Страница 31: ...you must return to section 6 4 4 Installation via USB to complete the installation instructions 7 4 Installing the USB Driver for Windows 2000 IMPORTANT Confirm that the CD ROM provided with the Rout...

Страница 32: ...l Hardware Device Drivers window appears Select Search for a suitable driver for my device recommended See Figure 23 Click Next Figure 23 Windows 2000 3 Windows 2000 The Locate Driver Files window app...

Страница 33: ...00 The Driver Files Search Results window appears Figure 25 Note The drive letter may vary Click Next Figure 25 Windows 2000 5 Windows 2000 The window below confirms that the PC has finished loading t...

Страница 34: ...hed installing the USB drivers you must return to section 6 4 4 Installation via USB to complete the installation instructions 7 5 Installing the USB Driver for Windows XP IMPORTANT Confirm that the C...

Страница 35: ...finished loading the drivers Figure 29 Click Finish Figure 29 Windows XP Congratulations You have completed the software installation for the USB drivers After you have finished installing the USB dri...

Страница 36: ...installation manual to install the software required for your Internet connection NOTE Internet service provider subscriber software and connection requirements may vary Consult your Internet service...

Страница 37: ...u are at a screen and need help click the Help button to learn more about the functions in that screen Type in your account parameters Account parameters are required before connecting to the Internet...

Страница 38: ...the account parameters to take effect or if you want to retype the parameters Type the VPI and VCI values 0 for VPI and 35 for VCI default you obtained from your Internet service provider The actual V...

Страница 39: ...lick on next When the SET UP COMPLETE screen appears you have successfully completed your Account Profile setup Click done NOTE Depending on your Internet Service Provider the PROTOCOL screen may come...

Страница 40: ...ou did not change any of these values this pop up screen will not appear and the Router will not be reset If your Router s connection setting is set to Always On and you have changes any of these valu...

Страница 41: ...iew section see the following Home page If the status reads No DSL Connection check the DSL physical connection explained in section 6 INSTALLING THE HARDWARE of this User Guide NOTE If no DSL sync is...

Страница 42: ...SYNC has been established The connection rate values represent the transmission speed of your DSL line The Router may take time to report these values Click the Connect button to establish a PPP sess...

Страница 43: ...P If the connection setting is set to Manual you must click on the Connect button to establish a PPP session Once the PPP session has been established PPP Status displays UP you may proceed with your...

Страница 44: ...d you may now browse the Internet For example to visit Westell s home page type http www westell com in your browser s address window and then press Enter on your keyboard When you are ready to return...

Страница 45: ...ction to your Internet service provider However your DSL session will not be affected When you are ready to end your DSL session simply power down the Router via the power switch on the Router s rear...

Страница 46: ...m Ethernet installation Refer to section 6 INSTALLING THE HARDWARE Open the System Preference Screen After you have connected the Westell Router to the Ethernet port of your Macintosh the screen below...

Страница 47: ...em Preferences screen the Network screen will be displayed Select New Location from the Location field Name the New Location After selecting New Location from the Network screen the following screen w...

Страница 48: ...erify that the computer is communicating with the Router follow the instructions below 1 Go to the Apple icon in the upper right corner of the screen and select System Preferences 2 From the System Pr...

Страница 49: ...window of your Internet Explorer web browser type http dslrouter and then press Enter on your keyboard The Getting Started screen will be displayed You may now begin your Account Setup Refer to secti...

Страница 50: ...030 300432 Rev A 50 December 2004 User Guide The following sections explain the advanced features of your Westell Router This Page Intentionally Left Blank...

Страница 51: ...o the Router s settings A menu is displayed at the top of each screen and will allow you to navigate you to the various configuration options of your Router If you are at a screen and need help click...

Страница 52: ...ttings will be displayed when you click on your Home page Click on profile editor to edit your connection profile NOTE If you have created multiple account profiles select the option button for the ac...

Страница 53: ...add a connection profile click on Close in the New Connection screen NOTE NAT Profiles allow you to create specific service settings A NAT Profile may be associated with a certain connection setting o...

Страница 54: ...ervice Profile Westell recommends that you use the Default parameter Manual Factory default MANUAL Selecting this feature allows you to manually establish your PPP session On Demand Selecting this fea...

Страница 55: ...nnection Rate This field will indicate if you have a DSL signal and the DSL rate at which you are connected Connection Status This field will show how much information was received IN or sent OUT in p...

Страница 56: ...t you established in section 8 Connection Duration This field will display how long your PPP session has been connected Status This field will display the status of your PPP session UP Connected DOWN...

Страница 57: ...Windows Help screen for instructions NOTE Single Static IP SSI allows the user to share the WAN assigned IP address with one device on the LAN By doing this the device with the SSI becomes visible on...

Страница 58: ...isted in the window Click on enable NOTE The Single Static IP Configuration screen allows you to select the device on your LAN that will share your Single Static IP If you select a device and clicked...

Страница 59: ...up screen the following pop up screen will appear The Router must be reset to allow the new configuration to take effect Click on OK If you clicked OK in the preceding screen the following screen wil...

Страница 60: ...session Next select Single Static IP from the Configuration menu to confirm that Single Static IP is enabled as shown in the following screen STOP After you enable Single Static IP you must reboot you...

Отзывы: