T-360
Page 19 of 35
Eclipse ES Mounted CAFS
1.
Use high pressure grease to coat the driven shaft.
2.
Press the bearing (1) onto the shaft and secure in place with retaining
ring.
3.
Tap the key for the driven sprocket into place.
4.
Place high pressure grease in the front bore of the cap.
5.
Tap the bearing (2) into place.
6.
Set the bearing cover on cap and secure with hex head screws and
lock washers. Hand tighten only at this stage of reassembly.
7.
With the cap resting on the front face, position the spacer and driven
sprocket inside the cap.
8.
Take the driven shaft, bearing and key assembled previously and from
the rear face of the cap, slide the shaft through the bore in the cap into
the bore of the driven sprocket, spacer and ball bearing lining up the
key in the shaft with the keyway in the sprocket.
9.
Tap into place until the shaft seats.
10. Install the oil seal in the oil seal housing.
11. Install the shim and oil seal housing.
12. Tap lock nut end of driven shaft towards oil seal housing to seat
assembly.
13. Remove the bearing cover and install the O-ring, bearing lock washer
and lock nut. Make sure the tang of the washer aligns with the keyway
in the shaft.
14. Tighten nut 1/4 turn from finger tight and bend one of the locking tangs
on the washer into one of the slots in the locknut.
15. Install wave spring and bearing cover.
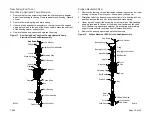
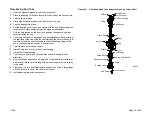
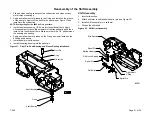
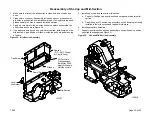
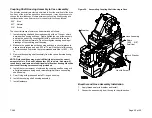
Figure 29.
Eclipse ES Mounted CAFS
Reassembly of the Driven Shaft
Sprocket
Key
Ball Bearing (1)
Ball Bearing (2)
Driven Shaft
Cap
Spacer
Wave Spring
Oil Seal
IL2617
Retaining Ring
Bearing Lock Nut
Bearing Lock Washer
Spacer
Cap Screw
Cap Screw
Lock Washer
Lock Washer
Front
Rear
Oil Seal Housing
Shim,
.010 in.
O-ring
Bearing Cover


