


User Guide
4
water-protec.com
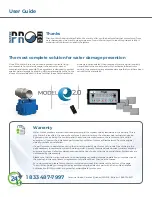
Live with peace of mind
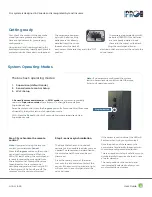
Sensors should be installed at the lowest point of the floor to allow
water to reach the sensor. They must be securely fastened with the
Velcro supplied and must never be installed directly on concrete.
A sticker to prevent contact with concrete is provided in the box.
Remember to respect the locations you have numbered. Remove the
top plate from the dishwasher and attach the sensor to the lowest
level of the floor near the water inlet. You can also order a wired
sensors or detection plates can be used for better protection in hard
to reach areas, such as dishwasher.
Sensors installation
Now that all the preparation is done and that the sensors are
correctly synchronized and identified, you can install the valve.
First, find an installation point for the valve. It must be located
immediately after the residence’s main water supply and, where
applicable, before the junction of the outdoor sprinklers.
In order to power the control panel, an electrical outlet must be
available nearby.
Close the circuit breakers for appliances connected to a water supply
and the water heater. Close the water inlet.
Empty the water pipes by opening a tap at the lowest
point of the residence. If necessary, also
open the bathtub at the highest point
of the residence. Once the pipes have
been emptied, turn off the tap at the
lowest point of the property.
Measure the length of the pipe to be
cut and cut the pipe. Apply Teflon tape
to the end caps and securely thread the
end caps into the valve using an adjustable
wrench. Insert the valve into the piping and
seal securely with a pex conduit clamp.
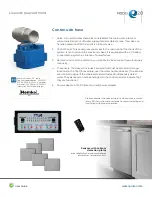
Install the control panel in an accessible place. Plug the valve into
the control panel and then the control panel into the power outlet.
Reopen the water inlet.
Make sure there is no air in the plumbing by
opening a tap at the highest point of the residence.
If the bathtub has been left open, turn off the faucet
once the water has started flowing again. Switch on
the circuit breakers.
Installation de la valve
We recommend that
the valve be installed
by a certified plumber
A Booster Relay is
necessary for the
system to operate
valves of more
than 1 in.
Replacing the remote control :
First, press the
Program
button on the control panel to activate
the synchronization mode; the first LED is flashing. Press the
Reset
button 3 times. The first three LEDs flashing. The system is ready to
receive a synchronization signal from a remote control.
Replacing or adding a water sensor
Press the
Program
button. The first LED flashes. Press the
Open
button on the remote control. Each press will move the flashing LED
to the next position. Once the desired page and sensor number are
set, synchronize the new sensor by shorting the electrodes. The LED
in the selected position will glow steadily and the next LED will flash.
Battery replacement
- Sensors
The water sensors are equipped with two 3V/20mm lithium batteries
(e.g. type CR2032). To replace the weak battery (2.7 V or less), open
the sensor by first removing the central screw. Remove them and
install the new batteries. Caution: + facing up. Replace the sensor
and turn it on again.
Battery replacement- Remote
The remote control is equipped with a 3V/16mm lithium battery
(e.g. type CR-1632). Simply unscrew the shell, remove the weak
battery and install the new battery (position B1).
9V Battery replacement- Control Panel
The control panel is equipped with a 9V Battery (ex.: 6LR61). To
replace, slide out the access hatch from control panel, remove the
old battery and insert the new, then replace the cover.
Replacement of parts and batteries
Program button
Power supply
Stereo Jack
1 valve
2 valves


