

MODEL
E-2.0
User Guide
3
Our system is designed in Canada and is recognized by most insurers
First, check the content of the box: make
sure all parts are present and that you
have enough sensors for your property
configuration.
Using a pencil and inventory sheet (p.10),
browse your property. Identify each place to
protect and write them down on the sheet.
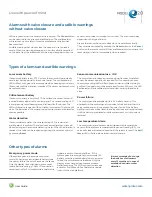
The sensors are powered
by two 3V batteries. If the
batteries are not already
installed, insert them into
the socket on the back of
each sensor. Make sure they are in the “ON”
position.
The sensors are powered by two 3V
batteries (CR2032). If the batteries
are not already installed, insert
them into the socket on the back.
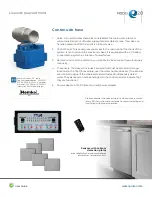
Plug the control panel into an
electrical outlet and connect the valve to the
control panel.
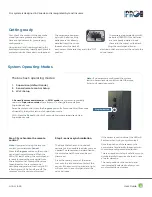
Getting ready
Step 1: Synchronize the remote
control
Note
: If you are not using the remote
control, you must press
Cancel
.
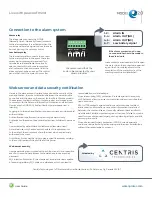
Press the
Program
button on the control
panel to activate this mode. When the
LEDs (1-3) start flashing, the control panel
is ready to receive the sync signal from
the remote control. Press both buttons
(open/close) on the remote control
simultaneously and wait until only LED 1
is flashing and LEDs 2 and 3 are off. The
remote control is now synchronized.
Step 2 : sensor synchronization
The basic Water-Protec kit includes 5
sensors but it is possible to add as many as
needed. The sensors can be identified on
the control panel 20 zones can be pro-
grammed.
Press the metal portion of the tester
tool onto the two metal contacts of the
sensor. If the sensor is functional, a light
will come on the control panel and the
valve will close.
If the sensor is not functional, the LED will
flash red when trying to synchronize it.
Note the position of the sensor on the
control panel and identify the sensor with
the corresponding numbered sticker.
This is an important step. It will allow you to
quickly identify the source of a leak in case
of water damage.
The next position on the control panel
is automatically selected to allow you to
synchronize the next sensor
System Operating Modes
1. Supervision (default mode)
2. Sensor/remote control Setup
3. Wi-Fi Setup
Note :
If no sensors are configured, the system
starts in Sensor/remote control mode. Otherwise,
it starts in Supervision mode.
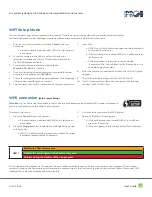
In
Sensor/remote control mode
and
Wi-Fi mode
, the system automatically
returns to
Supervision mode
after a timeout. To change the mode from
Supervision mode:
Sensor/remote control: Press the
Program
button for 3 seconds. After 15 seconds
of inactivity, the system returns to Supervision mode.
Wi-Fi: Press the
Cancel
button for 3 seconds. Alarms are supervised only in
Supervision mode.
The box has 3 operating modes:
Program button


