26
ventilators. The connection must be carried out by a
certified installer in accordance with the prevailing
standards. Please ensure that there is no extra wiring
inside, onto or through the chimney breast. Electrical
parts may melt by the heat emission of the fireplace and
create unsafe situations. Always connect the fireplace
to an earthed wall socket. Moreover, there must be the
possibility to disconnect the stove from the electricity
supply during any service or maintenance.
Connecting the front and the corner fireplace
1.
First follow the instructions given in the previous
chapter on ‘Preparation’.
2.
Remove any valves from the existing hearth.
3.
Insulate the stove between the wall and the outer
cover with fireproof materials (please see the insu-
lation materials in the table on page 29).
4.
Be sure that the connection to the outside is airtight.
When there is a chimney you may install a stove-
pipe with a diameter of 150 mm.
Fit this pipe to the stove.
5.
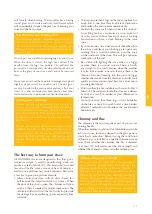
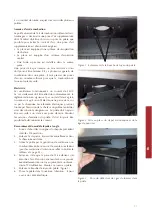
Remove the pipe collar from the hearth. (see illus-
tration 1)
6.
Place the hearth in the opening and mind any pow-
er cables.
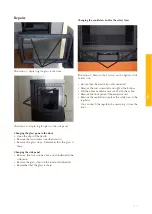
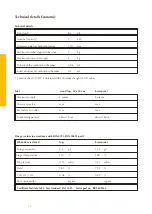
Illustration 1 Remove the pipe collar from the hearth
Illustration 2 Install the energy-saving valve and the
push rod.
Illustration 3 Place the deflector inside the stove
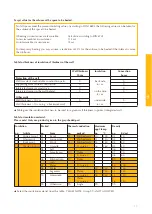
Illustration 4 Photograph of the place of the
typeplate
7.
Connect the pipe to the pipe collar. Then fit the pipe
collar again to the hearth.
8.
Fit the energy-saving valve and place the push rod
towards the door into the recess on the front side
of the hearth. Hang the valve in the hinge brackets
(see illustration 2).
9.
Place the flue gas deflector on the supports under-
neath the energy-saving valve (see illustration 3)
10. Fit the supplied frames on the sides and on top of
the hearth.
11. Put the plug in the earthed wall socket.
12. If you want you can change the type plate into the
type plate in your own language (Illustration 4)
Ensure that the electric wire does not crack or break
during installation.
The hearth should only be connected to an earthed
socket outlet.
Содержание ECONOMIC
Страница 13: ...13 NL...
Страница 16: ...16 User s Guide and Installation Manual Economic GB...
Страница 30: ...30...
Страница 31: ...31 FR Mode d emploi et instructions d installation Economic FR...
Страница 46: ...46 Gebrauchsanweisung und Installationsvor schriften Economic DE...
Страница 60: ...60 Technische tekeningen Technical drawings Dessins techniques Technische Zeichnungen...
Страница 61: ...Technische tekeningen Technical drawings Dessins techniques Technische Zeichnungen 61...
Страница 62: ...62...
Страница 63: ......


