20
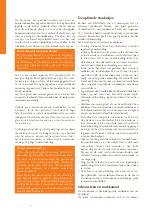
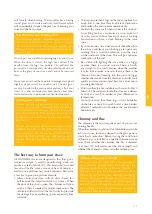
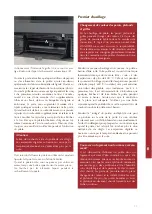
Operation of the shaking grate (A) with the shaking bar.
Button for the automatic thermostat valve (B).
Open the door and put some balls of paper or firelighters
in the stove and place some wood kindling or brown coal
briquettes on top. Fully open the automatic thermostat
valve (see photograph). Open the grate shaker with the
shaking bar and keep the ash pan open for the first five
to ten minutes to let extra air in. Light the kindling or
briquettes and leave the door ajar for extra air supply.
You can close the door after a couple of minutes. Once
the kindling or briquettes is burning you can add extra
fuel and close the ash pan. Do not place more than three
logs in the stove at a time. Once the stove is burning the
air supply is regulated automatically. Be sure that there
is always enough ventilation when the stove is burning.
It is prohibited to light the stove with liquids like petrol
or spirits. Do not have the cooker hood on in the room
where you operate your stove. Never touch the varnished
parts when you heat your stove.
Lighting the stove for the first time
When you light the Economic for the first time, the
hearth must still ‘anneal’ and temper itself. The unit has
a heat resistant lacquer which must burn in the stove
at temperatures above 400 °Celsius. This will happen
during the first few times of lighting the stove and
temperatures rise to 600 °C. Though this may give an
unpleasant smell, it is otherwise harmless. It is advisable
to keep the stove burning with limited fuel for at least 6
hours when lighting the stove for the first 4 or 5 times.
Air the room well when the stove is burning. Make sure
that any cooking hood is not turned on when the stove
is burning; a cooking hood extracts the combustion air
that the stove needs.
Some deposit may form on the glass panes of the stove
when you ‘anneal’ your hearth. You can easily remove
this deposit with a damp cloth after the stove has cooled
down. You can also use some cleansing agent for
ceramic rings. Please make sure you do not leave any
finger marks on the clean glass. Finger marks burn into
the glass and cannot be removed later.
Fuel: wood and browncoal
Wood species
Drying time
Fir,
Poplar
1
year
Lime, Willow, Spruce, Birch, Ash, Alder 1.5
years
Fruit trees, Beech
2
years
Oak
2.5
years
The Economic burns on wood and coal. Do not put more
than 3 to 4 kg of fuel in the stove at the time. Always
use clean and cut logs, which have sufficiently dried.
Please see the above list for drying times. Wet wood
does not burn well and gives heavy smoke emission. It
may blacken the glass pane of your stove with soot and
build up smut in the flue pipe. This may increase the risk
of chimney fire.
Fresh, moist wood contains about 50% moisture.
Cleaved wood still contains 20% moisture after drying
it for a year and moisture percentage will be decreased
to 12 to 15% after drying it for two years. Dry wood
gives nice flames and little or no smoke, and the fire
A
B
Avoid finger marks
Do not touch the glass of the stove with your fingers.
Finger marks will burn into the glass and cannot be
removed later.
Discolouration of walls, ceilings and grates
The walls, ceilings and grates may show some
discolouration after lighting your hearth. This
is caused by the dust particles that burn in the
convection cover. This is a natural process for
which WANDERS cannot be held responsible. To
minimize discolouring we refer to the advice given
for atmospheric hearths. Your installer can give you
more information about this.
Newly-built house or recently renovated?
It is advisable to wait six weeks before lighting
the stove in a newly-built house that has recently
been completed, or in a space that has recently
been renovated drastically. The walls and ceilings
still contain gases, softeners and moisture from
plasterwork or paint. The warm air-streams may
discolour the dust particles in the space which may
stick to walls and ceilings. Even the moisture in the
walls and ceilings will become warm and may cause
yellow stains.
Содержание ECONOMIC
Страница 13: ...13 NL...
Страница 16: ...16 User s Guide and Installation Manual Economic GB...
Страница 30: ...30...
Страница 31: ...31 FR Mode d emploi et instructions d installation Economic FR...
Страница 46: ...46 Gebrauchsanweisung und Installationsvor schriften Economic DE...
Страница 60: ...60 Technische tekeningen Technical drawings Dessins techniques Technische Zeichnungen...
Страница 61: ...Technische tekeningen Technical drawings Dessins techniques Technische Zeichnungen 61...
Страница 62: ...62...
Страница 63: ......

