background image


220.805.011 

10 

Date: 2021-12-09


Safety functions 

The control system ensures that the motor only is powered when: 


The control signal is reliable. 


The position and speed control is on.


The drum position is within the span of the soft and hard limits. 


No overload. 

Winch  25  should  only  be  operated  by  an  experienced  DMX-controlled-lighting-desk-
operator.  The  lighting  desk  has  to  be  programmed  according  to  the  manual,  so  the 
winch will stop when the speed is put to 0 %. It is also possible for the user to stop the 
winch  by  disconnecting  it  from  the  mains  power.  After  power  failure  the  soft  TOP 
position of the winch needs to be reset before the winch can function again.   
 
Manual operation of the winch is only intended for mounting, service, and tests. 


Area of use 

For indoor use only! 
Caution! To reduce the risk of electric shock or injury: use indoors only 
Caution! To reduce the risk of electric shock, do not expose to rain: store indoors! 

 
The  Winch  is  intended  for  indoor  use  only.  It  is  designed  for  lifting  and  lowering 
material  at  the  weight and  speed  stated  in  "Technical  specifications"  on  page  6.  Any 
other use of the winch may result in a risk of injury of persons or equipment damage. 
Exceeding the load rating may cause failure of the equipment. 
Use only approved rigging connectors to secure the load to the wire and do not wrap 
the wire around the load as this will damage the wire and result in a risk of injury of 
persons or equipment damage. 
Do not modify the winch. For any modification of your winch, contact Wahlberg Motion 
Design. 
 
It  is  the  customer's  sole  responsibility  to  comply  with  any  relevant  local  laws, 
regulatory requirements, and restrictions, concerning the use of the winch. 


Using for the first time 

Important!  The  Winch  25  must  be  protected  from  environmental  factors  such  as 
physical shocks and vibration during transportation and storage. 


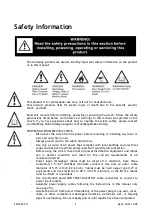
Warning!  Read  “Safety  Information”  on  page 

2  before  installing,  powering, 

operating, or servicing the winch. Before applying power to the winch: 


Check the Wahlberg Motion Design website at 

www.wahlberg.dk

 for the most recent 

documentation  and  technical  information  about  the  Winch  25.  Wahlberg  Motion 
Design user manual revisions are identified by the revision number in the bottom of 
each page. 


Carefully review the “Safety Instructions” on pag

2. 


Check that the local AC mains power source is within the winch power voltage and 
frequency ranges. 


See  “Power  cables  and  power  plug”  on  page 

2.  Install  a  Neutrik  powerCON  TRUE1 

NAC3FX-W power input connector on a suitable power cable. If using the power from 
a mains power outlet, install a suitable power plug on the power cable. 

Содержание Winch 25

Страница 1: ...WWW WAHLBERG DK JENS JUULS VEJ 1 TELEPHONE 45 86 18 14 20 8260 VIBY EMAIL sales wahlberg dk DENMARK Winch 25 Winch 25 Double Item No 220 221 User Manual Winch 25 220 Winch 25 Double 221...

Страница 2: ...only a source of AC power that complies with local building and electrical codes and has both overload and ground fault earth fault protection Before using the winch check that all power distribution...

Страница 3: ...ation where it may cause injury or damage if it falls install as described in on page 12 If possible allow enough clearance beneath the winch so it cannot cause any danger to personnel beneath it Alte...

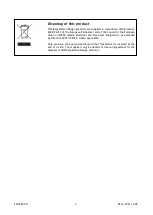
Страница 4: ...ean Parliament and of the Council of the European Union on WEEE Waste Electrical and Electronic Equipment as amended by Directive 2003 108 EC where applicable Help preserve the environment Ensure that...

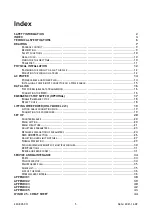
Страница 5: ...GENCY STOP SWITCH OPTIONAL 17 ENABLE EMERGENCY STOP 18 READY TO USE 18 LIFTING WIRE POWER ONLY MODEL 221 19 LIFTING CABLE CONNECTION PLUG 19 CONNECTING THE POWER WIRE 19 SET UP 20 COUNTERBALANCE 20 ME...

Страница 6: ...ft Lifting capacity 25 kg 55 lb Lifting speed Variable 3 60 cm s 1 2 23 6 in s Minimum load 1 0 kg 2 2 lb Noise emission 50 dB Ambient temperature 0 40 C 32 104 F Own weight 220 21 kg 46 5 lb 221 32...

Страница 7: ...220 805 011 7 Date 2021 12 09 Drawing W25 220 More detailed drawings and from more angles can be found in Appendix 1 on page 38...

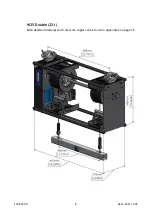
Страница 8: ...220 805 011 8 Date 2021 12 09 W25 Double 221 More detailed drawings and from more angles can be found in Appendix 2 on page 39...

Страница 9: ...f winches a standard lighting desk can be used but when many winches are used more advanced desks should be used to maintain easy control of the units The Winch 25 uses 6 channels of the DMX line and...

Страница 10: ...cause failure of the equipment Use only approved rigging connectors to secure the load to the wire and do not wrap the wire around the load as this will damage the wire and result in a risk of injury...

Страница 11: ...it is important to roll the wire of the winch up Fix the wire with a cable tie or an elastic cord If the wire is loose it may jump off the wire wheel during transport and cause damage to the winch Us...

Страница 12: ...surface can support at least 10 times the weight of all winches and equipment to be installed on it Mounting the winch on a truss The Winch 25 can be clamped to a truss or similar rigging structure T...

Страница 13: ...ad must be mounted on the wire in a way to insure that the load never can run into the winch The load can be mounted using the supplied loading hook or any other hooks designed for lifting Ensure that...

Страница 14: ...applying power to the winch Do not apply AC mains power to the winch at any other voltage than that specified on the winch s serial number label Power cables and power plug The Winch 25 requires a pow...

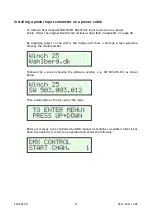
Страница 15: ...in Appendix 3 in page 40 By supplying power to the winch the display will show a start up screen sequence showing the model number Followed by a screen showing the software version e g SW 503 003 012...

Страница 16: ...limit is reached add a DMX universe and another daisy chained link Tips for reliable data transmission Use shielded twisted pair cable designed for RS 485 devices standard microphone cable cannot tran...

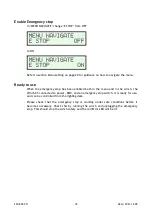
Страница 17: ...ton that sets all signals to 0 and this will also cause the winch to stop If the emergency stop switch is activated the red Error LED will be lit and the screen display shows EMERGENCY STOP PRESSED an...

Страница 18: ...op has been enabled both in the menu and in the winch the Winch 25 connected to power DMX and an emergency stop switch it is ready for use and can be controlled from the lighting desk Please check tha...

Страница 19: ...applying power to the lifting wire Do not apply power to the lifting wire at any other voltage than that specified in this manual Lifting cable connection plug The Winch 25 double requires a power inp...

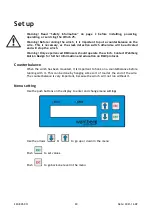
Страница 20: ...ers should operate the winch Contact Wahlberg Motion Design for further information and education on DMX protocol Counterbalance When the winch has been mounted it is important to hook on a counterbal...

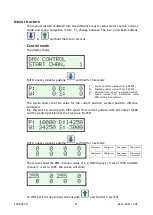
Страница 21: ...om current position with TAC value 10 000 and the wanted position has the TAC value 24 250 Shift to next screen by pushing and hold for 3 seconds The screen shows the DMX channel values if e g DMX cha...

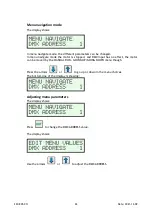
Страница 22: ...otor is stopped and DMX input has no effect the motor can be moved by the MANUAL RUN GOING UP GOING DOWN menu though Press the arrows or to go up or down in the menu choices The bottom line of the dis...

Страница 23: ...able emergency stop OFF ON OFF ADV MENU Show advanced menu OFF ON OFF SLACK DELAY Delay from slack activation to stop 0 9999 0 POS OUT Position feedback OFF ON OFF UNSAFE MODE CAUTION Disable all limi...

Страница 24: ...SP MIN UP Minimum speed up Range 50 1 000 The motor minimum speed for the up direction The motor can run at different minimum speeds for each direction this is to differentiate between different mech...

Страница 25: ...QUICK SLACK Stop quickly when slack activates OFF ON Stops the winch quickly if slack is enabled If the load is light or fast accelerations are used slack may be activated by accident leading to a st...

Страница 26: ...own the soft top limit must be set again when the unit is powered on 5 Setting the soft TOP limit Channel 5 is used to manually move the fabric up and setting the soft TOP When the value is set 2 the...

Страница 27: ...un into the winch itself this will damage the winch The hard limit switch determines the maximum and minimum travel distance of the winch The hard limits are adjusted by rotating the white levers usin...

Страница 28: ...ext to it 6 The hard TOP limit is adjusted by turning the screw with a 2 next to it 7 When adjustments are done tighten the middle screw again 8 Mount the lid with the two screws again The hard limits...

Страница 29: ...length in minutes E g a max duty cycle of 30 10 min ON 23 min OFF means that the motor may not be active more than 10 minutes every 33 minutes or after 10 minute of ON the motor must be OFF for 23 min...

Страница 30: ...osition to another over a certain amount of time In that way the winches will follow the fade curve and multiple winches can follow the same fade curve When fading the positions 1 The speed channel sh...

Страница 31: ...wire comes out of the winch evenly Afterwards the wire is rolled back onto the drum Reset the soft TOP limit afterwards Display says Not in Pos The winch cannot move to its position this usually occur...

Страница 32: ...e temperature of the motor PTC is exceeded The motor is being insufficiently cooled for example due to a defective fan The drive can only be restarted when it has been allowed to cool down 6 INV OVERC...

Страница 33: ...cycle the winch Unplug the power and wait 30 seconds before applying power again 13 INVERTER SYSTEM System error Power cycle the winch Unplug the power and wait 30 seconds before applying power again...

Страница 34: ...e wire significantly Wire damage caused by mounting the winch in an angle is not covered by the product warranty Attention Signs of malfunction or poor operation should always lead to an inspection of...

Страница 35: ...detection limit switches emergency stop Check that the wire is wound neatly on the drum Check the wire ferrule crimp and thimble Check that the load is securely mounted Monthly At regular intervals bu...

Страница 36: ...nch must immediately be taken out of service and the wire replaced before using the winch again The wire should be discarded when When the overall diameter of the wire is reduced by 8 or the outer wir...

Страница 37: ...llapsed When the wire has been subjected to a high temperature or heat due to fire When the wire has been subjected to severe shock load or over load due to an accident with the winch W25 Double 221 W...

Страница 38: ...220 805 011 38 Date 2021 12 09 Appendix 1 Winch 25 220...

Страница 39: ...220 805 011 39 Date 2021 12 09 Appendix 2 Winch 25 Double 221...

Страница 40: ...220 805 011 40 Date 2021 12 09 Appendix 3...

Страница 41: ...220 805 011 41 Date 2021 12 09...

Страница 42: ...220 805 011 42 Date 2021 12 09 Appendix 4...

Страница 43: ...220 805 011 43 Date 2021 12 09 Appendix 5 Block diagram of the control system of the winch...

Страница 44: ...imit 8 Set DMX channel 1 to 100 and DMX channel 3 to 20 The winch moves with 20 speed to the 100 position 9 Set DMX channel 1 to 90 and DMX channel 3 to 50 The winch moves with 50 speed to the 90 posi...

Отзывы: