background image

Customizing
Page  28

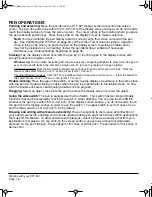
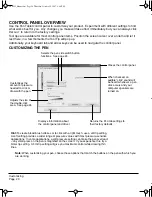
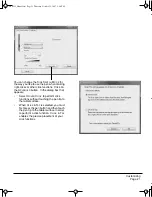
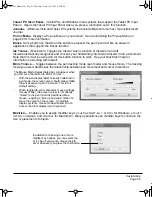
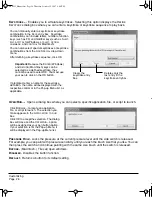
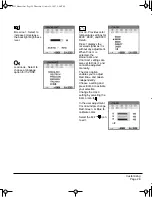
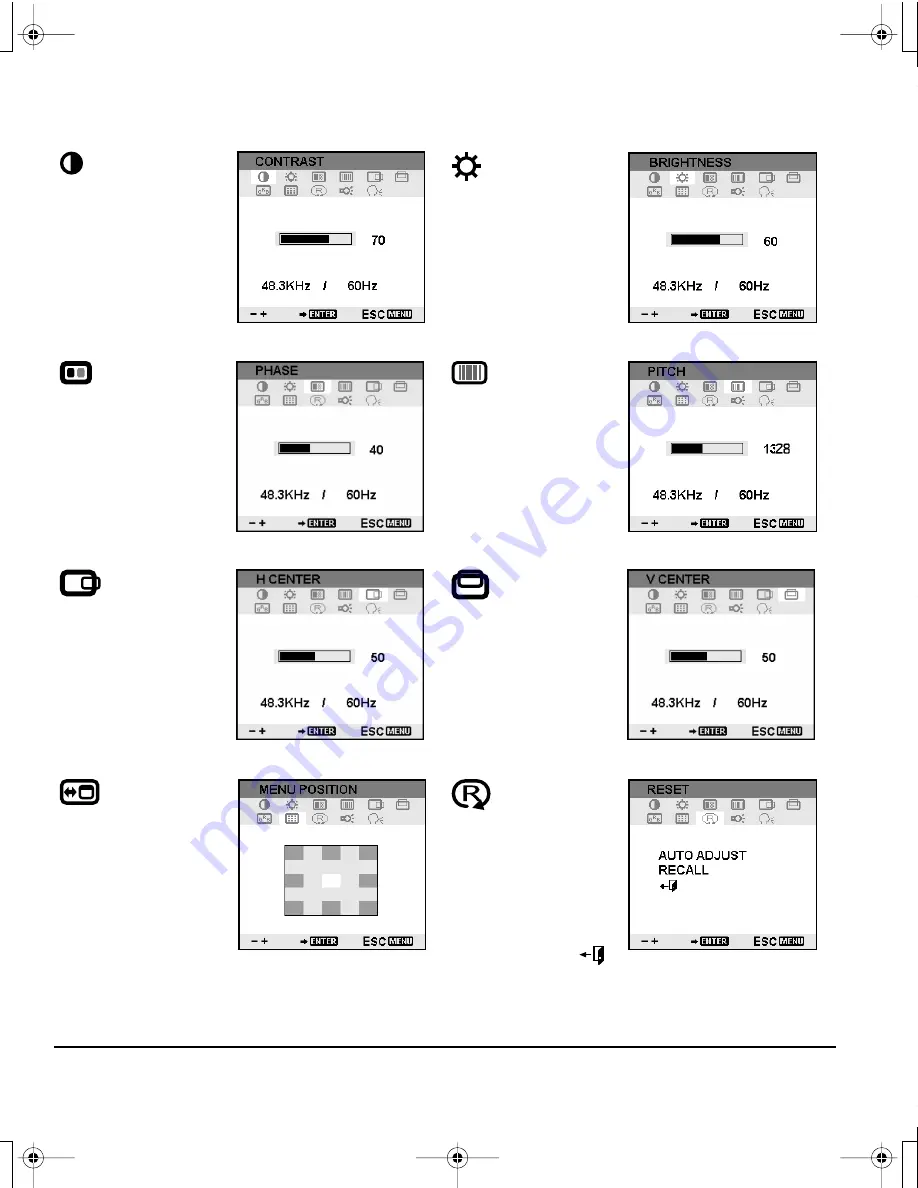
When you open the OSD menu, the following options are displayed:

C

ONTRAST

.  Select to 

increase or decrease 
image contrast.

B

RIGHTNESS

.  Select to 

increase or decrease 
image brightness.

P

HASE

.  Select to 

reduce or eliminate 
horizontal distortion 
lines.  

To automatically adjust, 
use the R

ESET

 option.

P

ITCH

.  Select to reduce 

or eliminate vertical 
distortion lines.

To automatically adjust, 
use the R

ESET

 option.

R

ESET

.  Provides two 

options: Use A

UTO


A

DJUST

 to reset only the 

image parameters.

Use R

ECALL

 to reset all 

screen options to the 
factory default.

Selecting the E

XIT


icon exits the R

ESET


window without 
resetting anything.

V

ERTICAL

 C

ENTER

.  

Select to move the 
screen image up or 
down.

To automatically adjust, 
use the R

ESET

 option.

H

ORIZONTAL

 C

ENTER

.  

Select to move the 
screen image left or 
right.

To automatically adjust, 
use the R

ESET

 option.

M

ENU

 P

OSITION

.  

Select to move the OSD 
menu around the 
display screen.

DTF521_Manual.fm  Page 28  Thursday, October 25, 2007  3:46 PM

Содержание DTF-521 series

Страница 1: ...DTF 521 interactive pen display Installation Guide User s Manual DTF521_Manual fm Page 1 Thursday October 25 2007 3 46 PM ...

Страница 2: ...on to include such changes in this manual DuoSwitch is a trademark and Wacom is a registered trademark of Wacom Co Ltd Microsoft Windows and Vista are either registered trademarks or trademarks of Microsoft Corporation in the United States and or other countries Apple the Apple logo and Macintosh are trademarks of Apple Computer Inc registered in the U S and other countries Any additional company ...

Страница 3: ...puter treats the DTF 521 as two separate devices the display and the pen tablet Therefore the installation process is completed in two stages First install the DTF 521 as a display Then install the DTF 521 as a pen tablet Both stages require hardware and software installations and adjustments Please follow all instructions carefully IMPORTANT You MUST install the Wacom pen tablet driver software f...

Страница 4: ...requires extremely high reliability it may cause other electronic devices to malfunction or other devices may cause the pen display to malfunction Where use is prohibited power off the DTF 521 to prevent the possibility of it causing other electronic devices to malfunction Wacom does not accept any liability for direct or consequential damages For details please refer to your Warranty located at t...

Страница 5: ...leaking from it this liquid is an irritant In case of contact with skin eyes or mouth rinse immediately with running water for at least 15 minutes or more If contact is made with the eyes or mouth also consult a physician WARNING LAMP S INSIDE THIS PRODUCT CONTAIN MERCURY AND MUST BE RECYCLED OR DISPOSED OF ACCORDING TO LOCAL STATE OR FEDERAL LAWS The DTF 521 pen display has a backlight which cont...

Страница 6: ...ation and blotching of the display If discolorations occur leave the display on and the discolorations should disappear within a few hours Reuse recycling and recovery You are urged to recycle this product when replacing it with a newer product or when it has outlived its useful life by bringing it to an appropriate collection point for recyclable materials in your community or region By doing thi...

Страница 7: ... diagram 14 Software installation 15 Working with your DTF 521 16 Setting up your work area 16 Using the pen 17 Pen components 17 Pen operations 18 Customizing 19 Opening the control panel 19 Control panel overview 20 Customizing the pen 20 Calibrating the DTF 521 22 Customizing the Pop up Menu 23 Control panel details 24 Adjusting double click 24 Customizing the side switch button functions 24 Ad...

Страница 8: ... mount or stand 45 Pen and digital ink capabilities in Windows Vista 46 About the Windows Vista Tablet PC Input Panel 47 Uninstalling the DTF 521 48 Product specifications 49 General specifications 49 Display 49 Pen tablet 50 Power adapter 50 Pen model FP 320 50 Ordering parts and accessories 50 Radio and television interference 51 Federal Communications Commission FCC notice 51 Industry Canada Ca...

Страница 9: ...tions review the instructions that came with those CDs or DVDs Retain the package box for use when storing or shipping the DTF 521 DTF 521 interactive pen display main unit Power adapter and power cable POW A096 and SCD A039 01 for USA POW A096 and SCD A038 01 or SCD A040 01 for Europe USB cable STJ A250 VGA to VGA cable STJ A228 Pen with replacement nibs pen tether tether connection ring and atta...

Страница 10: ...detected by the DTF 521 e g Your computer is turned off starting up or has entered a power management mode in which video signals are not sent Power switch Turns power to the unit on or off Status LED Lights blue when the pen is in the active area of the pen display tablet and the pen tip is pressed Note that the USB cable must also be plugged into an active USB port before the LED will light Inte...

Страница 11: ...ore packaging the DTF 521 If you do not close the stand the notched mechanism may be damaged during transportation and storage Do not lift the unit by the stand this may damage the stand mechanism When lifting or moving the DTF 521 always do so by grasping the main body casing CAUTION Be careful to avoid catching your finger in the gap of the movable portion of the stand Stand The stand can be use...

Страница 12: ...e to the unit Depending on the capabilities of your video card and operating system you may be able to set up the DTF 521 as a mirrored extended or independent display Refer to your video card documentation for more information on its capabilities When you are working with more than one monitor the DTF 521 will map to the monitors based upon how your system is configured By default if you are in m...

Страница 13: ...omputer or DTF 521 are powered on this can damage the display or video card If your computer has only one analog VGA video connector you will need to unplug your previous monitor or add a second VGA card Connect the power adapter to the DTF 521 Then connect the adapter s power cable and plug the adapter into an AC outlet See B and C Turn on the DTF 521 The power LED will light orange Plug one end ...

Страница 14: ...s while the DTF 521 or your computer are turned on this can damage the display or computer video card Make sure that the display refresh rate does not exceed 70 Hz for XGA mode or 75 Hz for other modes ANALOG RGB IN VGA port The ANALOG RGB OUT port is used to connect a second VGA device such as a projector or monitor that mirrors the pen display Be sure to fully install the DTF 521 hardware and so...

Страница 15: ...n of the DTF 521 For troubleshooting tips see page 32 Notes Each DTF 521 LCD panel is produced under very stringent quality standards Production techniques cannot guarantee an absolutely perfect TFT display and some panels may exhibit a certain number of pixels that show an incorrect color See the specifications on page 49 for more information If an image has fine striping such as screen stripes i...

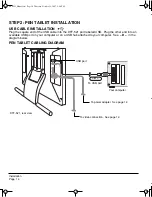
Страница 16: ...led USB Plug the other end into an available USB port on your computer or on a USB hub attached to your computer See D in the diagram below PEN TABLET CABLING DIAGRAM DTF 521 rear view To USB port Your computer D USB port To power adapter See page 12 To video connection See page 12 DTF521_Manual fm Page 14 Thursday October 25 2007 3 46 PM ...

Страница 17: ...e display screen surface in a different location the screen cursor should again jump to the new position This is known as absolute positioning and enables you to position the screen cursor without having to drag your pen across the display screen surface Be sure to check the Read Me file for updated information If you have trouble installing the DTF 521 see the Troubleshooting section beginning on...

Страница 18: ...t cause discomfort Change your position if you feel any discomfort due to your work position Alternate between different modes of use Note Wacom makes no representation promise or guarantee that Wacom products will cure or prevent in whole or in part mouse induced repetitive stress symptoms injuries or conditions Individual results may vary Always obtain competent medical advice to determine the m...

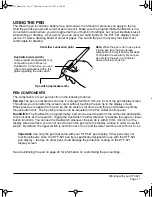
Страница 19: ...ame click and double click functions as the tip switch Toggle the DuoSwitch in either direction to activate the upper or lower button functions You can use the DuoSwitch whenever the pen tip is within 5 mm 0 2 inch of the display screen surface you do not need to touch the pen tip to the display surface in order to use the switch By default the upper switch is set to DOUBLE CLICK and the lower swi...

Страница 20: ...T TO SELECT For other Windows versions from the TOOLS pull down menu choose FOLDER OPTIONS From the GENERAL tab select SINGLE CLICK TO OPEN AN ITEM POINT TO SELECT Double clicking Press the upper side switch or quickly tap the display screen twice in the same place with the pen tip Double clicking is easier when the pen is perpendicular to the tablet screen To fine tune the double click area see A...

Страница 21: ...Open SYSTEM PREFERENCES from either the Dock the Apple menu or from the APPLICATIONS folder Then click on the PEN TABLET icon After opening the control panel see Control panel overview on page 20 Notes For Windows Vista XP and Macintosh OS X user specific preferences are supported After logging in each user can customize their personal settings in the Pen Tablet control panel Switching to another ...

Страница 22: ...e pen Adjusts the size of the double click area See page 24 Selects the pen side switch button functions See page 24 When checked an audible click sound will be heard whenever a pen click occurs and your computer speakers are turned on Displays information about the control panel and driver Note When customizing your pen choose those options that match the buttons on the pen with which you are wor...

Страница 23: ... box that appears Select HOVER CLICK to perform click functions without touching the pen tip to the tablet surface When CLICK TAP is selected you must first press the pen button and then touch the pen tip to the tablet surface in order to perform a click function CLICK TAP enables the precise placement of your click functions DTF521_Manual fm Page 21 Thursday October 25 2007 3 46 PM ...

Страница 24: ...displayed in the lower right corner Test the alignment by positioning the pen at a few different points on the display Click OK to accept the calibration Click TRY AGAIN to recalibrate Be sure to read the directions in the calibration screen for detailed instructions and additional options The calibration setting applies to all applications Crosshairs Adjustment pattern for pitch and phase See Adj...

Страница 25: ...out making a selection click outside of the Pop up Menu Displays a list of functions that have been added to the Pop up Menu To change the order of an item drag it to a new location Double click on an item to make edits Select a button function to add to the Pop up Menu list See page 24 Removes the selected item from the list Sets the FONT and FONT SIZE of the Pop up Menu Returns all tab settings ...

Страница 26: ...sition of the side switch Simulates a double click For easier double clicking use this function instead of tapping twice with your pen tip MIDDLE CLICK Simulates a middle mouse button click RIGHT CLICK Default setting for the lower position of the side switch Simulates a right mouse button click which displays a context menu CLICK LOCK Simulates holding down the primary mouse button Press the side...

Страница 27: ...mode and mouse mode The tracking mode you select determines the relationship between pen movement and cursor movement MODIFIER Enables you to assign modifier key s such as SHIFT ALT or CTRL for Windows or SHIFT OPTION COMMAND and CONTROL for Macintosh Many applications use modifier keys to constrain the size or placement of objects The Mouse Mode Details dialog box will appear when you first set a...

Страница 28: ... as F3 and modifier keys such as SHIFT ALT or CTRL for Windows or SHIFT OPTION COMMAND and CONTROL for Macintosh You can also select special keystrokes or keystroke combinations from the ADD SPECIAL drop down menu After defining a keystroke sequence click OK Important Because the ENTER Windows and RETURN Macintosh keys can be selected as a defined keystroke they cannot be used to select OK You mus...

Страница 29: ...ables you to adjust and optimize a variety of display settings at the touch of a button The OSD controls are located on the upper left edge of the unit The basic process for working with the OSD is as follows Press the MENU button to open the OSD main menu Use the or buttons to select an option When the option you want to adjust is highlighted press the ENTER button The current settings and adjust...

Страница 30: ...ly adjust use the RESET option RESET Provides two options Use AUTO ADJUST to reset only the image parameters Use RECALL to reset all screen options to the factory default Selecting the EXIT icon exits the RESET window without resetting anything VERTICAL CENTER Select to move the screen image up or down To automatically adjust use the RESET option HORIZONTAL CENTER Select to move the screen image l...

Страница 31: ...ONTRAST settings are also set to DIRECT and cannot be adjusted manually The USER option enables you to adjust Red Blue and Green independently Choose a setting and press ENTER to activate your selection Change the USER setting by selecting the ENTER icon In the user adjustment COLOR window change Red Green or Blue to calibrate color Select the EXIT icon to exit LANGUAGE Select to choose a language...

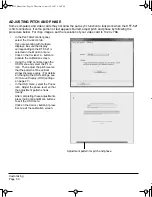
Страница 32: ...in the MONITOR menu Click on the CALIBRATE button to activate the calibration screen Using the OSD controls open the OSD menu and select the PITCH icon Then adjust the pitch level so that the pattern of fine vertical stripes displays evenly For details on changing the OSD settings see On Screen Display OSD settings on page 27 In the OSD menu select the PHASE icon Adjust the phase level so that the...

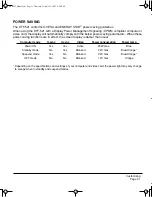
Страница 33: ...functions are in effect the screen display is darker than usual Depending on the specifications and settings of your computer and video card the power light may only change to orange when in standby and suspend modes Computer mode H sync V sync Video Power consumption Power lamp Power ON Yes Yes Active 23W max Blue Standby mode No Yes Blanked 2 W max Blue Orange Suspend mode Yes No Blanked 2 W max...

Страница 34: ...estions in this guide and still cannot resolve the problem then contact Wacom for Technical Support See the Read Me file for information on where to obtain support for your region TESTING THE DTF 521 1 If the DTF 521 power LED does not light check the following First verify that the green light on the power adapter is on If the light is not on check that the power cable is properly connected to th...

Страница 35: ...s LED will light blue when the DTF 521 is registered as a USB device and the pen tip is pressed against the display 4 Check the pen If you cannot make a selection on the display screen with the pen Test the pen by pressing the pen tip against the surface of the pen display tablet The tablet status LED should light blue Now without applying pressure to the pen tip but keeping the pen within 5 mm 0 ...

Страница 36: ...age appears briefly on your display screen Check that your computer is turned on Verify that you are using the video cable that came with the DTF 521 Check that the DTF 521 video cable is fully connected Turn off both your computer and the DTF 521 pen display and check the video cable and any video adapters for bent or broken connector pins Then properly connect the video cable and any necessary a...

Страница 37: ...en if necessary manually adjust pitch and phase Verify that the display adapter or video card matches the specifications for the DTF 521 Adjust the refresh rate in the Display Properties control panel The display is not clear Text or other portions of the screen appear blurred Set the display resolution of your video card to 1024 x 768 Turn off the DTF 521 then turn it back on Open the OSD menu go...

Страница 38: ...facturer for that particular device The pen display power LED is off Make sure the pen display power switch is turned on Check that the AC power adapter is plugged into both the pen display and an active power outlet Use only the power adapter that came with the pen display other adapters may cause damage to your product The pen works only in mouse mode and does not draw or write with pressure sen...

Страница 39: ...lay Make sure the status LED lights blue when the tip is pressed If the LED does not light verify that the USB cable is plugged into an active port on your computer or on a USB hub If the LED still does not light you may have defective hardware see Troubleshooting on page 32 The side switch does not work Be sure you are using the pen that originally came with your pen display Other pens may not fu...

Страница 40: ... operation If you have customized the side switch on your pen to toggle between pen mode and mouse mode make sure that your pen display is operating in pen mode See Customizing the side switch button functions beginning on page 24 When using the pen display tablet on a multiple monitor system you cannot use the pen to control the other monitor s You can use your pen to control the other monitors i...

Страница 41: ...lder and run the REMOVE WACOM TABLET utility When the utility starts click on the REMOVE ALL PREFERENCE FILES button The tablet driver will be restarted creating new preferences files with the factory defaults Recalibrate the tablet Note Do not manually remove the WACOM TABLET PREFPANE file from the main LIBRARY PREFERENCEPANES folder This file is only to be removed when uninstalling the tablet so...

Страница 42: ...g the pen display into a different USB port If this does not help contact Wacom for Technical Support See Technical support options on page 41 Inkwell does not work correctly with the pen display There may be a problem with the Inkwell preferences Remove the damaged preference files as follows They will be recreated when you enable handwriting recognition 1 From the Apple menu choose SYSTEM PREFER...

Страница 43: ...k your Wacom product is not working properly contact the Wacom support staff for the area where your product was purchased See the Wacom tablet Read Me file located on the Wacom Pen Tablet Driver CD for contact information When you call you should be at your computer with the following information available This manual Pen display serial number Look at the label on the back of the unit Driver vers...

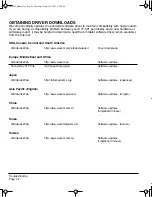
Страница 44: ...and Africa Japan Asia Pacific English China Korea Taiwan Worldwide Web http www wacom com productsupport Driver downloads Worldwide Web http www wacom eu Software updates Anonymous FTP Site ftp ftp wacom eu pub Software updates Worldwide Web http tablet wacom co jp Software updates Japanese Worldwide Web http www wacom asia com Software updates English Worldwide Web http www wacom com cn Software ...

Страница 45: ... of getting the display or pen buttons and tip wet they contain sensitive electronic parts that will fail if liquids enter them CLEANING To clean the DTF 521 casing or the pen use a soft damp cloth you can also dampen the cloth using a very mild soap diluted with water Do not use paint thinner benzine alcohol or other solvents to clean the unit casing or pen To clean the display screen use an anti...

Страница 46: ...or lay it flat on your desk To maintain the sensitivity of your pen do not store the tool in a container where it will rest on its tip To remove the old nib Clasp it with a Wacom nib removal tool pair of tweezers needle nosed plier or similar instrument and pull the old nib straight out of the pen To insert a new nib Slide it straight into the barrel of the pen Firmly push the nib until it stops T...

Страница 47: ...r off the DTF 521 Then disconnect all cables from between the unit and your computer 2 Protect the display screen surface by spreading a soft cloth onto a flat table and placing the DTF 521 face down on the cloth 3 Remove the four screws and lift the adjustable stand assembly away from the body of the unit 4 Using the appropriate screws for your mounting platform firmly attach the DTF 521 to the a...

Страница 48: ...o typed text at any time Gestures Use your Wacom pen to make simple gestural movements on the pen display to trigger customizable actions for navigation editing and other functions To customize your gestures select the FLICKS tab in the PEN AND INPUT DEVICES control panel Digital Ink in Microsoft Office 2007 Use your Wacom pen to full advantage with the enhanced digital mark up and inking tools av...

Страница 49: ...e taskbar select TOOLBARS and TABLET PC INPUT PANEL To customize the Input Panel 1 First open the Input Panel and then click on TOOLS in the menu bar 2 Select OPTIONS to open the Input Panel Options dialog box 3 Customize the Input Panel settings for the way you like to work To learn more about using your Wacom pen in Microsoft Windows Vista and Office 2007 study the documentation that came with y...

Страница 50: ... choose the PEN TABLET option and click on the ADD REMOVE button 3 Follow the prompts to remove the tablet driver If prompted enter your administrator login name and password 4 When the driver has been removed shut down your system power off your computer and turn off the DTF 521 When your computer and the DTF 521 are off disconnect the DTF 521 from your computer Macintosh 1 From the GO menu choos...

Страница 51: ... matrix LCD Screen size 15 0 in diagonal Signal inputs VGA Analog RGB Signal outputs VGA Analog RGB Resolution 1024 x 768 pixels XGA 800 x 600 pixels SVGA 640 x 480 pixels VGA Refresh rate 45 to 70 Hz vertical in XGA mode 45 to 75 Hz vertical in other modes All scan modes are non interlaced Pixel pitch 0 297 x 0 297 mm 0 012 x 0 012 in Color depth 16 2 million 6 bits for RGB FRC Brightness 250 cd ...

Страница 52: ...purchase parts and accessories in other countries please contact your local dealer or distributor Please note that not all parts and accessories may be available in all regions Reading technology Electromagnetic resonance method Active area 304 1 x 228 1 mm 11 98 x 8 99 in Resolution 20 lpmm 0 05 mm 508 lpi 0 002 in Accuracy 1 pixel Reading height 5 mm 0 2 in Maximum report rate 100 points sec Pre...

Страница 53: ...d can radiate radio frequency energy and if not installed and used in accordance with the instructions may cause harmful interference to radio communications However there is no guarantee that interference will not occur in a particular installation You can determine whether the equipment is causing interference by powering it off If the interference stops it was probably caused by the equipment I...

Страница 54: ...nd found to comply to the following harmonized European Norms EN 55024 1998 A1 2001 electromagnetic immunity EN 55022 1998 A1 2000 Class B electromagnetic emissions EN 61000 3 2 2000 Class D electromagnetic emissions EN 61000 3 3 1995 A1 2001 electromagnetic emissions EN 60950 2000 safety Based on the results of these tests Wacom declares that the above mentioned device conforms to the European Co...

Страница 55: ... than in accordance with Wacom s storage instructions Any descriptions drawings specifications samples models bulletins or similar material used in connection with the sale of the product shall not be construed as an express warranty that the product will conform or comply with your requirements EXCEPT FOR THE LIMITED WARRANTY DESCRIBED ABOVE THERE ARE NO OTHER WARRANTIES MADE BY WACOM ON THIS PRO...

Страница 56: ...oduct except in the Software within the Warranty Period you should contact your local dealer or distributor If an authorized Wacom repair center is not available in your local country you will be responsible for all transportation costs including duties and taxes to and from the Wacom repair center In all other respects the terms of the warranty as set forth above apply to such sales Should you ha...

Страница 57: ...not decompile the software if the software contains interfaces to software which is not supplied by Wacom Wacom shall make the necessary information available to the customer upon request provided that the customer can prove his her entitlement to use the software and that he she agrees to pay the copying and postage costs LIMITED WARRANTY Wacom warrants to you as the original end user that the pr...

Страница 58: ...provision of this agreement be declared invalid that provision shall be treated as separate from the agreement and the agreement shall remain in force without limitation in all other respects If this product is found to be defective the purchaser may be entitled to institute legal proceedings against the seller on grounds of liability for deficiency The statutory rights indicated with regard to th...

Страница 59: ...9 1513 Fax 81 3 5309 1514 Wacom China Corporation Wacom Digital Solutions Co Ltd 1108 Block One Kuntai International Bldg Gangnam Telepia B D 9th Fl 662 18 12 Chao Wai Street Chao Yang District Yeoksam dong Gangnam gu Seoul 135 080 Beijing China 100020 Korea Telephone Telephone General 86 10 5879 0880 General 82 2 557 3894 Fax 86 10 5879 0102 Fax 82 2 557 3895 Wacom Australia Pty Ltd Wacom Singapo...

Страница 60: ...interactive pen display Installation Guide User s Manual Wacom Co Ltd UM 0344 A DTF 521 DTF521_Manual fm Page 58 Thursday October 25 2007 3 46 PM ...

Отзывы: