12
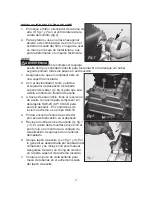
4. Run the compressor in this no-load condition for 15 to 20 minutes to lubricate
the bearings and pistons.
5. Close (turn the knurled knob out, clockwise) the air tank Moisture release
petcock.
6. Pressure will build in the tank and the Pressure switch will stop the pump when
it reaches the pressure set on the regulator. Your compressor is now ready for
use.
NOTE
During the break-in period, there may be a slight smell as the
electrical motor brushes seat themselves. This may last for about 5 minutes
and is normal.
CAUTION
!
If the compressor does not run properly after 15 minutes of the
break-in or if you notice any abnormalities, please contact the service center.
NOTE
If the Pressure switch fails to shut off the compressor for any
reason, the compressor has a safety valve (
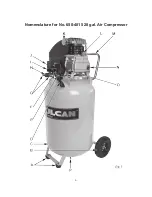
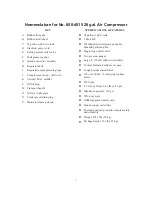
pictured at E, fig.1 & 5
) which will
open automaically when pressure in that tank becomes too great.
OPERATION
1. Be sure the On/Off switch (
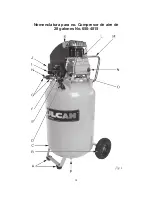
J, fig.1
) is swung down & in the Off position.
2. Close (turn the knurled knob out, clockwise) the air tank Moisture release
petcock (
P, fig.1 & 6
).
3. Plug in the power cord.
4. Pull up on the On/Off switch to turn the unit on.
5. Adjust the Regulator (
H, fig.1 & 5
) so that the needle on the Regulated output
pressure gauge (
I, fig.1
) is set to the working pressure of the air tool you plan
to use.
6. Connect the air tool to an air hose.
7. Connect the air hose to the compressor by inserting its quick-connector plug
into one of the two quick-connect air couplers (
G, fig.1 & 5
). Be sure the
connectors are properly connected.
8. Follow all instructions for the use of the air tool.
9. As air is used by the tool, the compressor will start up automatically to replenish
the pressure in the tank and stop when full. It will continue to cycle as you work.
WARNING
!
The compressor motor and pump can get quite hot in operation. Do
not touch or allow others near the unit during or after operation.
10. When finished, disconnect the air hose by pushing the quick-connect plug in
slightly while sliding the sleeve on the coupler back to release the plug.
11. Swing down the On/Off switch to stop the compressor.
12. Open the moisture release petcock (
P, fig.1 & 6
) on the bottom of the air tank
and allow all the air to escape from the tank.
WARNING
!
Wear safety goggles when opening the petcock. The escaping air
Содержание 650-4815
Страница 6: ...6 Nomenclature for No 650 4815 28 gal Air Compressor...
Страница 24: ...24 Nomenclatura para no Compresor de aire de 28 galones No 650 4815...
Страница 44: ...44 Nomenclature pour no 650 4815 Compresseur d air 28 gallons...
Страница 58: ...58 SCHEMATIC DRAWING ESQUEMA SCH MA 650 4815 v 090928...


