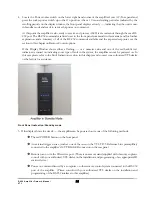
AC Power Source
This component is a high-performance, extremely high-powered component, capable of extremely high resolution and
sonic performance. To assure best conditions for optimal results, the unit should be plugged directly into a wall AC
outlet. Do not plug this amplifier into an extension cord or into the back of another component, as this will starve the
amplifier of current and significantly impact the performance of your system. To achieve the best performance, we
recommend that a dedicated 30A line be installed for each power amplifier, with a minimum of 20A required for each
amplifier.
We recommend that you consult your authorized VTL dealer or a licensed electrician on the installation of a dedicated
line and grounding requirements, as different local codes may apply to your location. See the
Specifications
in
chapter 5 for the power consumption requirements of this amplifier.
Connection to the AC
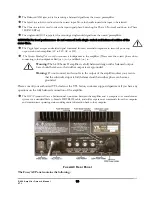
Using the supplied 20A power cord, connect the amplifier directly to the AC outlet closest to the chosen location.
For electrical safety, ensure that the AC connector fits securely, both to the AC line and to the amplifier’s AC inlet,
as a loose connection could cause intermittent operation and could damage the amplifier.
Power line conditioners are not recommended for powering this amplifier, as it can draw very high instantaneous
peak currents.
WARNING: Under no circumstances should any attempt be made to circumvent the AC
ground system for any reason. Using a ground lifted system can potentially be extremely
dangerous, both to persons that might come in contact with the unit, and to the unit itself,
and proper RF and static shielding cannot be attained without a secure ground connection.
This amplifier contains static sensitive components, and damage to the unit as a result of either improper AC
connection or improper grounding will not be covered under the warranty. The sensitive microprocessors in this
component can be affected by external noise, and proper operation cannot be guaranteed without a noise-free AC
ground connection setup for the amplifier.
Powering On the Amplifier
Please refer to the
Quick Start
section in Chapter 2 on how to properly connect the source, preamplifier and
loudspeaker components to this amplifier before powering on.
1. If you haven’t already done so, ensure that all the tubes inside the amplifier are properly seated all the way
into their sockets before powering on the amplifier. Look through the top cover of the amplifier. There are
three shorter tubes in the front that are the input/driver tubes, followed by three rows of four output tubes.
If any of the tubes are not fully seated into their sockets, they should be reseated firmly before powering on.
If any of the tubes are white on top they should be replaced before powering on. In either of these cases
notify the dealer that installed the amplifier, and give the technician the instructions in the Tube Replacement
section in Chapter 4 to remove the top cover and reseat or replace the tubes.
2. If the tubes are verified to be fully seated then power on the source component(s) to be used for your
listening session
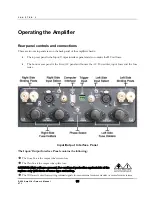
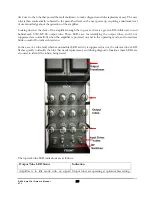
3. Check to ensure that the
Input Select
switch in the back of the amplifier is correctly selected for the
interconnect cable being used between the source/preamplifier and this amplifier, i.e. Single ended RCA or
Balanced XLR. For equal channel output all amplifiers in the system should be set to the same input type.
S-400 Amplifier Owner’s Manual
VTL
20

