VOLTCRAFT 1182021 Скачать руководство пользователя страница 79


OPERATING INSTRUCTIONS

VERSION 09/12

MS-430 CONTACT-FREE VOLTAGE DETECTOR

ITEM NO.: 12 34 41

INTENDED USE

This product is designed for contact-free detection of alternating current (AC) voltages. It 

measures stationary electrostatic fields that are generated by AC voltage via the insulation. 

If AC voltage is present, this is displayed visually by a red LED and acoustically by an audio 

signal. Additionally, the product has an integrated LED torch for illuminating dark corners. The 

product is operated with two AAA batteries. Do not use any other power sources. Protect the 

product from high levels of dampness and moisture.
This product complies with the statutory national and European requirements. All company 

names and product names are trademarks of their respective owners. All rights reserved.
For safety and approval purposes (CE), you must not rebuild and/or modify this product. If you 

use the product for purposes other than those described above, the product may be damaged. 

In addition, improper use can cause hazards such as short circuiting, fire, electric shock etc. 

Read the instructions carefully and keep them. Make this product available to third parties only 

together with its operating instructions.

DELIVERY CONTENT

•  Voltage detector
•  2 x AAA battery
•  Operating instructions

SYMBOLS EXPLANATION

CAT III

CAT IV

An exclamation mark within an equilateral triangle indicates important information 

in the operating instructions. Carefully read the whole operating instructions before 

operating the device, otherwise there is risk of danger.
The lightning symbol with arrowhead within an equilateral triangle is intended to alert 

the user to the presence of uninsulated voltage within the device’s enclosure that 

may be of sufficient magnitude to constitute a risk of electrical shock to persons.

This device provides basic insulation with supplementary insulation.

The device is designed to protect against transients voltage from fixed installations 

and building wiring. Examples include building wiring, industrial equipment with 

permanent connection to fixed installation.
The device is designed to protect against transients voltage at or near the feed into 

the electrical installation of buildings and that from the main distribution into the 

direction of the system. Examples include electricity meters and overcurrent circuit 

breakers.

SAFETY INSTRUCTIONS

Read the operating instructions carefully and especially observe the safety 

information. If you do not follow the safety instructions and information 

on proper handling in this manual, we assume no liability for any resulting 

personal injury or damage to property. Such cases will invalidate the warranty/

guarantee.
a) Persons / Product
•  The voltage between the measuring device and earth must not exceed 1000 V in 

overvoltage category III and 600 V in overvoltage category IV.

•  Apart from opening the lid of the battery compartment, the housing of the product 

must not be taken apart.

•  This device can be used in environment where only non-conductive pollution 

occurred or temporary conductivity caused by condensation occurred occasionally.

•  When operating the device, please equip proper protective equipment as required 

by local or national authorises.

•  The device is not a toy. Keep it out of the reach of children and pets.
•  Do not leave packaging material lying around carelessly. These may become 

dangerous playing material for children.

•  Protect the product from extreme temperatures, direct sunlight, strong jolts, high 

humidity, moisture, flammable gases, vapours and solvents.

•  Do not place the product under any mechanical stress.

•  If it is no longer possible to operate the product safely, take it out of operation and 

protect it from any accidental use. Safe operation can no longer be guaranteed if 

the product:

 - is visibly damaged, 
 - is no longer working properly, 
 - has been stored for extended periods in poor ambient conditions or 
 - has been subjected to any serious transport-related stresses.

•  Please handle the product carefully. Jolts, impacts or a fall even from a low height 

can damage the product.

b) (Rechargeable) batteries
•  Correct polarity must be observed while inserting the (rechargeable) batteries.
•  (Rechargeable) batteries should be removed from the device if it is not used 

for a long period of time to avoid damage through leaking. Leaking or damaged 

(rechargeable) batteries might cause acid burns when in contact with skin, therefore 

use suitable protective gloves to handle corrupted (rechargeable) batteries.

•  (Rechargeable) batteries must be kept out of reach of children. Do not leave 

(rechargeable) batteries lying around, as there is risk, that children or pets swallow 

them.

•  All (rechargeable) batteries should be replaced at the same time. Mixing old and 

new (rechargeable) batteries in the device can lead to (rechargeable) battery 

leakage and device damage. 

•  (Rechargeable) batteries must not be dismantled, short-circuited or thrown into fire. 

Never recharge non-rechargeable batteries. There is a risk of explosion.

c) Miscellaneous
•  Consult an expert when in doubt about operation, safety or connection of the 

device.

•  Maintenance,  modifications  and  repairs  are  to  be  performed  exclusively  by  an 

expert or at a qualified shop.

If you are not sure about the correct connection or use, or if questions arise which are not 

covered by these operating instructions, please do not hesitate to contact our technical support 

or another qualified specialist.
Voltcraft®, Lindenweg 15, D-92242 Hirschau, Tel. +49 180/586 582 7.
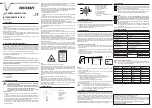
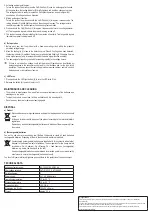
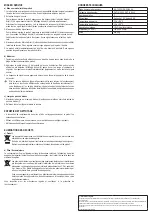
OPERATING ELEMENTS

1

3

2

5

4

6

7

1. Testing tip
2. Testing indicator (green / red)
3. On/Off button
4. Attachment clip

5. Battery compartment cover
6. LED light button
7. LED torch

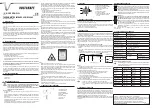
INSERTING/REPLACING THE BATTERIES

1. Carefully press the bar between the attachment clip (4) and LED light button (6) 

downwards and pull the battery compartment cover (5) backwards, away from the voltage 

detector. 

2. Insert two batteries (AAA) into the battery compartment. Observe the polarity markings in 

the battery compartment. 

3. Slide the battery compartment cover (5) back on until it audibly clicks into place.

When the batteries are discharged, the red testing indicator (2) will start blinking 

and a series of audio signals will sound after turning the product on. The product will 

subsequently turn itself off. Replace the two AAA batteries with new batteries of the same 

type.
Replace the batteries when the testing indicator (2) appears weakened or the acoustic 

signal becomes markedly lower in volume during operation.
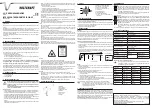
OPERATION

a) Switching the product on/off
1. When switching the product on, you have the option to either activate or mute the audio 

signal function for test operation. To do this, proceed as follows.

Содержание 1182021

Страница 1: ...ENUNGSANLEITUNG Seite 2 18 Probe Sensor VC 505 G OPERATING INSTRUCTIONS page 19 35 Pince amp rem trique VC 505 F NOTICE D EMPLOI page 36 52 Stroomtang VC 505 O GEBRUIKSAANWIJZING pagINA 53 71 Best Nr...

Страница 2: ...u 10 9 Symbol Beschreibungen 10 10 Inbetriebnahme 11 11 Bedienung 11 a HOLD Funktion 11 b LC Display Beleuchtung 11 c NCV Funktion Kontaktlose Spannungserkennung 12 d Max Min Werte aufzeichnen 12 e Sp...

Страница 3: ...diese Bedienungsanleitung beachten Lesen Sie sich vor Inbetriebnahme des Produkts die komplette Bedienungsanlei tung durch beachten Sie alle Bedienungs und Sicherheitshinweise Alle enthaltenen Firmen...

Страница 4: ...unter widrigen Umgebungsbedienungen wie z B N sse oder hohe Luftfeuchtigkeit Staub brennbare Gase D mpfe L sungsmittel Gewitter oder starke elektrostatische Felder sind nicht zul ssig Verwenden Sie zu...

Страница 5: ...n Ger ten welche ber einen Netzstecker direkt mit Netzspannung versorgt werden Diese Kategorie umfasst auch alle kleineren Kategorien z B CAT I zur Messung von Signal und Steuerspannungen CAT III Mess...

Страница 6: ...herzustellen muss der Anwender die Sicherheitshinweise und Warnvermerke beachten die in dieser Gebrauchsanweisung enthalten sind Aus Sicherheits und Zulassungsgr nden CE ist das eigenm chtige Umbauen...

Страница 7: ...Sie bei jeder Messung die Beschreibung der Abbildungen in jedem Kapitel Eine falsche Messung k nnte das Produkt zerst ren Entfernen Sie vor dem Anschluss der Messleitungen die Staubschutzkappen an den...

Страница 8: ...Anzeige f r kontaktlose Spannungserkennung 5 ffnungshebel f r Stromzangen Sensor 6 Einstellrad f r Messungsart 7 HOLD und Beleuchtungstaste 8 PEAK MAX MIN AC DC DCA ZERO Taste 9 LC Display 10 Messlei...

Страница 9: ...e Kapazit t B ZERO Anzeige C Anzeige f r Wechselstrom Wechselspannung D Anzeige f r Gleichstrom Gleichspannung E Digitalanzeige f r Messwert F Balkenskala G PEAK Anzeige H MAX MIN Anzeige I HOLD Anzei...

Страница 10: ...efach mittels einem kleinen Kreuz Schraubendreher 4 Entfernen Sie falls vorhanden die entleerten Batterien Akkus aus dem Batteriefach 5 Setzen Sie zwei neue Batterien Akkus vom selben Typ siehe Techni...

Страница 11: ...te Messgr e aus Beachten Sie bei den unterschiedlichen Messarten unbedingt die Beschreibung der einzelnen Abbildungen in jedem Kapitel 11 Bedienung a HOLD Funktion Mit der HOLD Funktion wird der aktue...

Страница 12: ...Gefahr eines elektrischen Schlages Diese Pr fmethode darf nicht zur Feststellung der Spannungsfreiheit eingesetzt werden d Max Min Werte aufzeichnen Die Aufzeichnung der Max und Min Werte ist f r die...

Страница 13: ...annungsmessung AC dr cken Sie f r ca 2 s die Taste AC DC 8 Die entsprechende Funktion wird im Display durch das Symbol AC oder DC angezeigt Jedes weitere Dr cken f r ca 2 s schaltet die Funktion um Ve...

Страница 14: ...ens 2 Sekunden die Taste 8 dr cken Im LC Display erscheint der Wert ZERO nur bei DC Messungm glich und notwendig Entfernen Sie falls vorhanden vor der Strommessung die Messleitungen vom Messger t W hl...

Страница 15: ...unbedingt spannungslos und entladen sind Schlie en Sie die Messleitungen wie unter Kapitel 10 beschrieben an das Messger t an W hlen Sie mit dem Stellrad 6 das Symbol zur Widerstandsmessung bzw Durchg...

Страница 16: ...keine aggressiven Reinigungsmittel wie Petroleum Alkohol oder hnliches Dies k nnte die Oberfl che des Messger tes besch digen Desweiteren verwenden Sie keine scharfkantigen Gegenst nde wie z B Schraub...

Страница 17: ...n Akkus verpflichtet eine Entsorgung ber den Hausm ll ist untersagt Schadstoffhaltige Batterien sind mit nebenstehendem Symbol gekennzeichnet das auf das Verbot der Entsorgung ber den Hausm ll hinweis...

Страница 18: ...digits Anzeigeart LC Display mit Hintergrundbeleuchtung PEAK Hold Aufzeichnung 10 ms Bereich 10 282 8 A Max Min Hold Aufzeichnung 50 ms Arbeitstemperaturbereich 10 50 C Lagertemperaturbereich 30 60 C...

Страница 19: ...9 Symbol Descriptions 27 10 Commissioning 28 11 Operation 28 a HOLD Function 28 b LC Display Lighting 28 c NCV Function Contact Free Voltage Recognition 29 d Recording Max Min Values 29 e Voltage Meas...

Страница 20: ...the user must observe these operating instructions Before taking the product into operation read the complete operating instructions and observe all operating and safety notes All company names and pr...

Страница 21: ...battery cover is missing Measurements in moist rooms or under detriment ambience conditions such as wetness or high humidity dust flammable gases vapours solvents thunderstorm or strong electrostatic...

Страница 22: ...hich is supplied with mains voltage directly by a power plug Included in this category are the lower categories e g CAT I for measuring signal and control voltages CAT III Measurement Category III is...

Страница 23: ...ser must observe the safety information and warning notes in these operating instructions The unauthorized conversion and or modification of the product is inadmissible for safety and approval reasons...

Страница 24: ...t Incorrect measurements may destroy the product Remove the dust protection caps at the connection sockets before connecting the measuring lines Always install them after each measurement to avoid con...

Страница 25: ...r contact free voltage recognition 5 Opening lever for current injection probe sensor 6 Setting wheel for measuring type 7 HOLD and lighting button 8 PEAK MAX MIN AC DC DCA ZERO button 9 LC display 10...

Страница 26: ...splay C Display for alternating current alternating voltage D Display for direct current direct voltage E Digital display for measured value F Bar scale G PEAK display H MAX MIN display I HOLD display...

Страница 27: ...he probe sensor with a small Phillips head screwdriver 4 Remove the flat batteries rechargeable batteries from the battery compartment if present 5 Insert two new batteries rechargeable batteries of t...

Страница 28: ...nt set the adjustment wheel 6 to the OFF position and then select the desired measuring value again Observe the description of the individual figures in each chapter for the different measu rement typ...

Страница 29: ...a danger of electric shock at incorrect detection Do not utilize this test method to test the absence of voltage d Recording Max Min Values Recording of the max and min values is possible for the meas...

Страница 30: ...ment to alternate current AC measurement The matching function is symbolized as AC or DC on the display The function will switch when the button is pressed again for about 2 s Connect the two measurin...

Страница 31: ...ayed value to zero by pushing the button 8 for at least 2 seconds The LC display shows the value ZERO only possible and required for DC measurement If present remove the measuring lines from the meter...

Страница 32: ...from the voltage and discharged Connect the measuring lines to the meter as described in chapter 10 Choose the symbol for resistance measurement or continuity with the adjustment wheel 6 Check the mea...

Страница 33: ...ch off the current injection probe first Do not use any aggressive cleaning agents such as petroleum alcohol or similar for cleaning This may damage the meter s surface Also do not use any sharp edged...

Страница 34: ...ries rechar geable batteries Disposing of them in the household waste is prohibited Batteries containing hazardous substances are marked with the adjacent symbol to indicate that disposal in the house...

Страница 35: ...Display 2000 to 9999 digits Display type LC display with backlighting PEAK hold recording 10 ms range 10 282 8 A Max Min hold recording 50 ms Operating temperature range 10 50 C Storage temperature ra...

Страница 36: ...e la batterie 44 9 L gende des symboles 44 10 Mise en service 45 11 Utilisation 45 a Fonction HOLD 45 b clairage de l cran cristaux liquides 46 c Fonction NCV d tection de tension sans contact 46 d En...

Страница 37: ...especter le pr sent mode d emploi Avant l utilisation de ce produit lisez attentivement l int gralit du pr sent mode d emploi et respectez toutes les instructions d utilisation et consignes de s curit...

Страница 38: ...Il est interdit de r aliser des mesures dans les locaux humides et en pr sence de conditions ambiantes d favorables comme par ex en pr sence d humidit ou d humidit de l air lev e de poussi re de gaz i...

Страница 39: ...iche d alimentation Cette cat gorie comprend galement toutes les cat gories inf rieures p ex CAT I pour mesurer les tensions de signal et de commande CAT III Cat gorie de mesure III pour les mesures r...

Страница 40: ...ir un fonctionnement sans risques l utilisateur doit tenir compte des consignes de s curit et avertisse ments stipul s dans le pr sent mode d emploi Pour des raisons de s curit et d homologation CE il...

Страница 41: ...re observez la description des illustrations dans les diff rents chapitres Une mesure incorrecte pourrait d truire le produit Avant le raccordement des lignes de mesure retirez les capuchons de protec...

Страница 42: ...tection de tension sans contact 5 Levier d ouverture du capteur de la pince amp rem trique 6 Molette de r glage pour le type de mesure 7 Touche HOLD et d clairage 8 Touche PEAK MAX MIN AC DC DCA ZERO...

Страница 43: ...Affichage Z RO C Affichage pour courant alternatif tension alternative D Affichage pour courant continu tension continue E cran num rique pour la valeur mesur e F chelle gradu e G Indicateur PEAK H In...

Страница 44: ...amp rem trique l aide d un petit tournevis cruciforme 4 Le cas ch ant retirez les piles ou batteries vides du logement des piles 5 I ns rez deux piles ou batteries neuves du m me type voir Caract ris...

Страница 45: ...le chapitre 10 Utilisation Pour conomiser de l nergie la pince amp rem trique s teint automatiquement au bout de 10 minutes d inactivit Afin de pouvoir poursuivre une mesure d placez la molette de r...

Страница 46: ...n Contact Voltage Detection permet de d tecter sans contact la pr sence de tension sur les conducteurs Le capteur NCV 13 se place sur la pointe du capteur de courant Faites passer le capteur NCV le lo...

Страница 47: ...s deux valeurs en parall le L indication MAX MIN s affiche sur l cran cristaux liquides Pour d sactiver le mode Max Min appuyez encore une fois pendant au moins 2 secondes sur la touche 8 e Mesure de...

Страница 48: ...pendant au moins 2 secondes La valeur Z RO s affiche sur l cran cristaux liquides Uniquement possible et n cessaire pour la mesure CC Le cas ch ant d branchez les lignes de mesure de l instrument de m...

Страница 49: ...t d charg s Raccordez les lignes de mesure l instrument de mesure en proc dant de la mani re d crite dans le chapitre 10 S lectionnez le symbole pour la mesure de la r sistance ou le test de continuit...

Страница 50: ...toyage n employez pas de d tergents agressifs comme du p trole de l alcool ou similaire Ceux ci pourraient endommager la surface de l instrument de mesure Pour le nettoyage n employez pas non plus d o...

Страница 51: ...es usag es il est interdit de les jeter avec les ordures m nag res Les piles qui contiennent des substances toxiques sont identifi es l aide des symboles ci contre qui indiquent l interdiction de les...

Страница 52: ...Affichage 2 000 9 999 digits Type d affichage cran r tro clair cristaux liquides Enregistrement PEAK Hold 10 ms Plage 10 282 8 A Enregistrement Max Min Hold 50 ms Plage de temp rature de service 10 50...

Страница 53: ...n de batterij accu 61 9 Symboolbeschrijvingen 61 10 Ingebruikname 62 11 Bediening 62 a HOLD functie 62 b LCD schermverlichting 62 c NCV functie contactloze spanningsherkenning 63 d Max min waarden ops...

Страница 54: ...haven en een onge vaarlijke werking te garanderen Lees voor de ingebruikneming van dit product de volledige gebruiksaanwijzing door en neem alle bedienings en veiligheidsvoorschriften in acht Alle ver...

Страница 55: ...tes resp onder slechte omgevingsom standigheden zoals vb vocht of hoge luchtvochtigheid stof brandbare gassen dampen oplossingsmiddelen onweer of sterke elektronische velden zijn niet toegelaten Gebru...

Страница 56: ...ische en elektronische apparaten die via een stekker direct van wisselspanning worden voorzien Deze categorie omvat ook alle kleinere categorie n bijvoorbeeld CAT I voor het meten van signaal en regel...

Страница 57: ...e status van het toestel te handhaven en een veilige werking te garanderen Om veiligheids en toelatingsredenen CE is het eigenhandig ombouwen en of wijzigen van het product niet toegestaan Het product...

Страница 58: ...van de afbeeldingen in elk hoofdstuk Een verkeerde meting kan het product vernietigen Verwijder voor de aansluiting van de meetsnoeren de stofbeschermkappen aan de aansluitbussen Monteer deze altijd n...

Страница 59: ...ED indicator voor contactloze spanningsherkenning 5 Openingshendel voor stroomtang sensor 6 Instelwiel voor metingstype 7 HOLD en verlichtingsknop 8 PEAK MAX MIN AC DC DCA ZERO knop 9 LCD scherm 10 Me...

Страница 60: ...it B ZERO aanduiding C Aanduiding voor wisselstroom wisselspanning D Aanduiding voor gelijkstroom gelijkspanning E Digitale weergave voor meetwaarde F Balkenschaal G PEAK aanduiding H MAX MIN weergave...

Страница 61: ...kleine kruiskopschroevendraaier 4 Verwijder indien aanwezig de lege batterijen accu s uit het batterijvak 5 Plaats twee nieuwe batterijen accu s van hetzelfde type zie Technische gegevens met de pole...

Страница 62: ...wenste meetgrootte Let bij de verschillende meettypes op de beschrijving van de afzonderlijke afbeeldingen in elk hoofdstuk 11 Bediening a HOLD functie Met de HOLD functie wordt de huidige meetwaarde...

Страница 63: ...van een elektrische schok Deze testmethode mag niet gebruikt worden om de spanning te bepalen d Max min waarden opslaan Het opslaan van max en min waarden is mogelijk voor meetgroottes DCA DCV en ACV...

Страница 64: ...isselspanningsmeting AC drukt u ongeveer 2 seconden op de AC DC 8 De overeenkomstige functie wordt op het display weergegeven door het symbool AC of DC Elke verdere druk gedurende 2 seconden schakelt...

Страница 65: ...ende minstens 2 seconden op knop 8 te drukken Op het LCD scherm verschijnt de waarde ZERO alleen voor DC metingen mogelijk en noodzakelijk Indien aanwezig verwijdert u de meetsnoeren van het meetappar...

Страница 66: ...ere meetobjecten absoluut spanningsloos en ontladen zijn Sluit de meetsnoeren aan het meetapparaat aan zoals beschreven onder hoofdstuk 10 Selecteer met het instelwiel 6 het symbool voor de weerstands...

Страница 67: ...igen geen agressieve reinigingsmiddelen zoals petroleum alcohol of dergelijke Deze kunnen het oppervlak van het meetapparaat beschadigen Verder gebruikt u voor het reinigen geen scherpe voorwerpen zoa...

Страница 68: ...jen accu s in te leveren verwijdering via het huisvuil is niet toegestaan Batterijen die schadelijke stoffen bevatten zijn gemarkeerd met nevenstaand sym bool Deze mogen niet via het huisvuil worden a...

Страница 69: ...ot 9999 digits Weergavetype LCD scherm met achtergrondverlichting PEAK hold opslag 10 ms Bereik 10 282 8 A Max Min Hold opslag 50 ms Arbeidstemperatuurbereik 10 50 C Opslagtemperatuur 30 60 C Afmeting...

Страница 70: ...70...

Страница 71: ...71...

Страница 72: ...t the time of printing Copyright 2014 by Conrad Electronic SE F Information l gales Ceci est une publication de Conrad Electronic SE Klaus Conrad Str 1 D 92240 Hirschau www conrad com Tous droits r se...

Страница 73: ...darf nur durch eine Fachkraft bzw einer Fachwerkstatt erfolgen Sollten Sie noch Fragen zum Umgang mit dem Ger t haben die in dieser Bedienungsanleitung nicht beantwortet werden steht Ihnen unser Tech...

Страница 74: ...workshop If you have queries about handling the device that are not answered in this operating instruction our technical support is available under the following address and telephone number Voltcraft...

Страница 75: ...appareil de mesure pour lesquelles vous ne trouvez pas de r ponses dans le pr sent mode d emploi nos support technique se tient volontiers votre disposition l adresse et au num ro de t l phone suivant...

Страница 76: ...s onze afdeling technische ondersteuning bereikbaar op het volgende adres en telefoonnummer Voltcraft 92242 Hirschau Lindenweg 15 Duitsland telefoon 0180 586 582 7 bedieningselementen 5 1 2 3 4 5 6 7...

Страница 77: ...ensation kommt Bei Benutzung des Ger tes bitte den Sicherheitsvorkehrungen von lokaler bzw nationaler Beh rde sachgem folgen Das Produkt ist kein Spielzeug Halten Sie es von Kindern und Haustieren fer...

Страница 78: ...s Licht auszuschalten WARTUNG UND REININGUNG Bis auf den Batteriewechsel und eine gelegentliche Reinigung ist das Produkt wartungsfrei Verwenden Sie zur Reinigung des Produktes ein sauberes fusselfrei...

Страница 79: ...evice is not a toy Keep it out of the reach of children and pets Do not leave packaging material lying around carelessly These may become dangerous playing material for children Protect the product fr...

Страница 80: ...apart from occasional replacement of the batteries and cleaning once in a while To clean the product use a clean lint free anti static and dry cleaning cloth Do not use any chemical or abrasive cleani...

Страница 81: ...e fourni selon les exigences des autorit s locales ou nationales Ce produit n est pas un jouet Gardez le hors de port e des enfants et des animaux domestiques Ne laissez pas tra ner le mat riel d emba...

Страница 82: ...bouton 6 pour teindre la lumi re ENTRETIEN ET NETTOYAGE A l exception du remplacement des piles et d un nettoyage occasionnel le produit ne n cessite aucun entretien Utilisez un chiffon propre non pe...

Страница 83: ...de juiste beschermingsuitrusting zoals vereist door de plaatselijke of landelijke overheid Het product is geen speelgoed Houd het buiten bereik van kinderen en huisdieren Laat verpakkingsmateriaal nie...

Страница 84: ...rvangen van de batterij na en het periodiek reinigen is het product onderhoudsvrij Gebruik voor het reinigen van het product een schone pluisvrije antistatische en droge reinigingsdoek Gebruik geen sc...

Отзывы: